As an Amazon Associate BakingBakewareSets.com earns from qualifying purchases.
Easy Ciabatta Rolls Recipe: 7 Steps to a Crisp Crust
Master this easy ciabatta rolls recipe with our simple no-knead method. Learn 7 proven steps to achieve an airy open crumb and crisp crackly crust at home.
Have you ever pulled a dense, heavy brick of bread from your oven instead of an airy artisan loaf? Working with wet, sticky dough often frustrates beginners trying to master a Ciabatta Rolls Recipe.
A traditional ciabatta rolls recipe requires a high hydration dough of about 80% water to flour ratio. By utilizing a slow, no-knead stretch and fold technique alongside steam injection, you can easily develop the signature large air pockets characteristic of authentic Italian slipper bread.
Drawing from comprehensive analysis of proven baker’s percentages, this guide provides a reproducible small batch methodology. You will discover exactly how to handle wet dough with confidence. Get ready to bake incredibly light and airy interior rolls with a crisp crackly crust.
☰ Table of Contents ▼
show
Why Your Homemade Ciabatta Rolls Recipe Needs This No-Knead Method
Traditional Italian ciabatta relies on a high hydration dough and precise baker’s percentages to develop an open crumb structure and a crisp crackly crust. Many home bakers struggle with dense, heavy homemade bread because they rush the fermentation process or add too much extra flour. This easy ciabatta bread rolls recipe utilizes a simple overnight slow proof to build a rustic Italian crumb without the need for commercial stand mixers or exhausting kneading sessions.
As of September 2026, the most successful artisan home bakers rely heavily on the enzymatic science of cold fermentation. By focusing on metric measurements and explicit visual cues, you can easily achieve an authentic ciabatta texture. Unlike generic recipes that ignore dough temperatures, this comprehensive guide explains exactly how to handle wet dough gently to maintain those beautiful trapped air bubbles. The secret to your success lies in understanding the dough’s behavior at every single stage of development.
7 Steps to a Crisp Crust: Your Easy Ciabatta Rolls Recipe Guide
Step by step artisan ciabatta rolls by hand rely on mastering the stretch and fold technique during the bulk fermentation time. The baking process naturally connects active dry yeast and warm water to your bread flour high protein base. Instead of intimidating kneading methods, these seven actionable steps break down the exact physical stages of making perfect dough.
We will guide you from the initial shaggy mix through the vital cold retard, finishing with a steam tray oven bake to trigger massive oven spring. By monitoring controlled temperature fermentation testing and reading the dough’s visual cues, you will understand exactly why each step works. Let’s dive into the core methodology to guarantee your long-lasting baking success.
1. Mix Ingredients Thoroughly and Autolyse Dough Mixture

Pin this authentic hydration method to your ‘Artisan Bread’ board!
Mixing your ingredients thoroughly and allowing an autolyse dough mixture phase jumpstarts glutenin and gliadin cross linking without any kneading. Using a digital kitchen scale to measure your bread flour vs all purpose flour in grams prevents the common mistake of adding too much dry matter.
When you measure in grams with a digital kitchen scale, you establish a reproducible small batch methodology. This exact precision ensures your flour absorbs the water perfectly, setting the foundation for a flawless crumb.
Ingredients
- 500g bread flour high protein (Never substitute all-purpose if you want a true chewy texture)
- 400g warm water (Ideally at 85°F to properly activate the yeast)
- 10g fine sea salt
- 4g active dry yeast or instant yeast
- 1 Reliable digital kitchen scale with tare function
Directions
- Mix ingredients thoroughly in a large mixing bowl using a wooden spoon or the handle of a dough whisk until a shaggy, very sticky dough forms.
- Scrape down the sides of the bowl to ensure no dry flour pockets remain hidden at the bottom.
- Cover the bowl with a damp towel and let the mixture rest (autolyse) for 45 minutes at room temperature to allow the flour to fully hydrate before manipulation.
Pro-Tip: Allowing the dough to rest through an autolyse phase naturally initiates glutenin and gliadin cross linking, meaning the flour builds structural integrity on its own without needing a stand mixer.


2. Develop the Open Crumb Structure with the Stretch and Fold Technique

Save this crucial gluten-building technique to your ‘Baking Tips’ board!
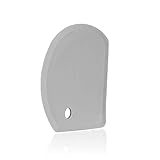
The stretch and fold method replaces traditional kneading, using a coil fold technique to handle dough too sticky to handle. Wetting your hands and using a flexible dough scraper transforms a sticky mess into a cohesive ball capable of trapping carbon dioxide.
Meeting the strict gluten mesh development criteria requires you to pay attention to how the dough feels. When the dough starts resisting the stretch, you know you are successfully building the necessary internal strength.
Ingredients
- 1 Bowl of clean water (for dipping your hands)
- 1 Flexible silicone bowl scraper (Crucial for handling high hydration dough)
- The rested ciabatta dough mixture
Directions
- Dip your hands in the bowl of water to prevent the wet dough from sticking to your skin.
- Reach under one side of the dough, pull it firmly upward until you feel resistance, and fold it completely over the center of the dough mass.
- Rotate the bowl 90 degrees and repeat this stretch and fold motion three more times until you have completed a full circle.
- Cover and rest for 30 minutes, then repeat this exact folding sequence two more times (for a total of three folding sessions).
Pro-Tip: Utilizing the coil fold technique with wet hands ensures you build tension without tearing the delicate dough rheology and extensibility, keeping the air trapped inside for big holes.
3. Execute Bulk Fermentation at Room Temperature

Pin this perfect fermentation visual cue to your ‘Bread Making’ board!
You must bulk ferment at room temperature until the dough shows irregular alveoli and a bubbly surface to prevent an underfermented dough fix later. Active yeast fermentation fills the gluten network with gas bubbles, gradually building that coveted honeycomb crumb.
Professional bakers rely on distinct sensory proofing indicators rather than just staring at a clock. You want to see translucent surface bubbles and gently domed edges before moving to the next stage of the recipe.
Ingredients
- 1 Large food-grade proofing container or glass bowl
- 1 Reusable bowl cover or tightly fitting lid
- A warm spot in your kitchen (ideally 75°F to 78°F)
Directions
- Transfer your folded dough into the clear proofing container, noting its original volume.
- Cover tightly to prevent a dry skin from forming on the surface.
- Bulk ferment at room temperature for 2 to 3 hours, watching the dough rather than the clock.
- Conclude the bulk fermentation only when the dough has increased by 50% in volume, features large bubbles on the surface, and jiggles like a water balloon when gently shaken.
Pro-Tip: If your kitchen is cold, your bulk fermentation time will extend significantly. Never rush this step; maximizing crumb alveolation optimization requires patience as the yeast converts starches into gas.

4. Implement an Overnight Cold Retard for Flavor

Don’t skip the flavor step—pin this overnight method for later!
Implementing a cold retard overnight shifts the balance toward lactic acid vs acetic acid fermentation for a sweeter, more complex flavor. This easy overnight no knead ciabatta rolls strategy slows yeast activity while accelerating proteolytic enzyme activity regulation.
This resting phase is not just for your schedule’s convenience; it actively promotes cold retard enzymatic sugar development. These released sugars are entirely responsible for creating the distinct dark browning and blistered texture on the final crust.
Ingredients
- Your fully bulk-fermented dough
- 1 Airtight lid or a heavy-duty reusable bowl cover
- Refrigerator space cleared to accommodate the container
Directions
- Ensure your proofing container is completely sealed so the cold refrigerator air doesn’t dry out the top of your high hydration dough.
- Cold retard overnight by placing the container directly into the refrigerator for 12 to 18 hours.
- Leave the dough completely undisturbed during this cold proofing phase; you will notice it stiffens slightly, which will make shaping the rolls tomorrow much easier.
Pro-Tip: The prolonged cold environment shifts the balance toward lactic acid vs acetic acid fermentation, replacing harsh sourness with a deep, complex, slightly sweet wheat flavor and encouraging surface blister formation via cold fermentation during the bake.

5. Turn Out and Divide Dough with a Bench Knife

Pin this pro shaping technique to your ‘Kitchen Hacks’ board!
When you turn out onto floured surface, you must divide with bench knife cleanly to prevent dough deflating while cutting. Using a sharp bench knife smoothly separates the panini sandwich bread portions, ensuring you avoid tearing delicate gluten structure.
Professional bakers know that handling the dough as little as possible preserves the alveolar structure you just spent hours building. Pressing straight down rather than dragging the knife keeps those large, beautiful air pockets totally intact.
Ingredients
- Generous handfuls of extra all-purpose flour (for dusting)
- 1 Sharp stainless steel bench knife / dough scraper
- The cold, fermented ciabatta dough
Directions
- Turn out onto floured surface by generously dusting your countertop with flour and gently inverting the proofing container. Let gravity pull the dough out slowly—do not rip or pull it.
- Dust the top of the wet dough with another layer of flour and gently pat it into a rough rectangle.
- Divide with bench knife by pressing the sharp metal blade firmly straight down into the dough to cut it into 8 equal rectangular ciabatta bread rolls.
- Never drag the knife through the dough; a firm stamping motion ensures you slice cleanly through the air pockets without sealing them shut.
Pro-Tip: If you struggle with handling high hydration wet dough, keeping it cold straight from the fridge during this step prevents it from spreading out too quickly, preserving the large air pockets you worked so hard to build.

6. Transfer to Baking Parchment for the Final Proof

Save this essential proofing setup to your ‘Bread Tools’ board!
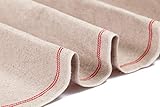
You must transfer to baking parchment and dimple gently with fingertips to maintain the structural integrity of your high hydration rolls. Using a couche linen cloth to support the parchment paper + baking steel combination creates walls that force the fluffy and airy texture to expand upward instead of flattening out.
Following food safety and bread storage guidelines means selecting unbleached parchment paper designed to withstand extreme oven heat. Proper support during this final resting phase ensures the rolls keep their iconic slipper shape.
Ingredients
- Unbleached heavy-duty parchment paper
- 1 Thick baker’s couche linen cloth (or heavily floured rolled-up kitchen towels)
- Your divided ciabatta rolls
Directions
- Gently slide your bench knife underneath each divided roll to lift it, and transfer to baking parchment sheets.
- Arrange the rolls about 2 inches apart, then pull the parchment paper up between each roll to create little walls—or prop them up using a thick baker’s couche—so they expand upward instead of outward.
- Dimple gently with fingertips across the surface of each roll, just like you would with focaccia, to even out the dough and redistribute large gas bubbles.
- Cover with a light cloth and allow them a final proof at room temperature for 45 minutes while your oven preheats.
Pro-Tip: Proper prevent sticking to proofing cloth protocol dictates rubbing raw flour directly into your couche linen before use; this ensures the rustic artisan sandwich buns hold their rigid shape without gluing themselves to the fabric.
7. Create Steam in a Hot Oven and Bake to Perfection

Pin the secret to a crackly crust to your ‘Baking Science’ board!
To bake until deep golden, you must create steam in hot oven using a baking stone and a heavy cast iron skillet. Baking with steam causes steam condensation latent heat transfer, which keeps the exterior flexible long enough for massive oven spring thermal expansion dynamics.
Following calibrated oven temperature guidelines guarantees you hit an internal temperature reached 205 F 210 F metric. This intense heat sets the interior crumb fully so it remains light and airy rather than gummy when sliced.
Ingredients
- 1 Heavy-duty baking stone or baking steel
- 1 Cast iron skillet or heavy roasting pan (for the steam tray)
- 1 Cup of boiling water
- 1 Wire cooling rack
Directions
- Place your baking steel on the middle oven rack and an empty cast iron skillet on the bottom rack. Preheat the oven to 475°F (245°C) for a full hour.
- Slide the parchment paper carrying the rolls directly onto the hot baking steel.
- Create steam in hot oven by carefully pouring the cup of boiling water into the hot cast iron skillet on the bottom rack, immediately shutting the door to trap the steam.
- Bake until deep golden brown (about 18-22 minutes), removing the steam pan halfway through. Cool completely on wire rack before slicing.
Pro-Tip: Utilizing steam condensation latent heat transfer delays the maillard browning reaction on flour crust, keeping the dough surface pliable so the bread can expand maximally before the crust hardens into that perfect crunch.

Key Takeaways: Your Quick Guide to the Ciabatta Rolls Recipe
Reviewing these core insights ensures your homemade ciabatta rolls recipe yields a crisp golden crust every single time. By mastering this reproducible small batch methodology, you can confidently handle high hydration dough. Here is your quick reference guide for consistent artisan baking success.
- Always Measure by Weight – Utilizing a digital scale to weigh your bread flour high protein and water ensures your high hydration dough remains perfectly balanced at ~80% hydration, avoiding dense, heavy loaves.
- Embrace the Stretch and Fold – Replace traditional kneading with the gentle stretch and fold technique to build dough strength while maintaining the carbon dioxide retention in wet matrix required for big air holes.
- Cold Retard for Flavor – Opting for an overnight proof + cold retarding transforms bland flour into a deeply complex, slightly sweet easy ciabatta bread rolls recipe with superior crust blistering.
- Handle with Extreme Care – When it’s time to divide with bench knife, use a sharp stamping motion on a generously floured surface to prevent dough deflating while cutting.
- Steam is Mandatory – You must create steam in hot oven using a cast iron skillet and boiling water; this keeps the crust pliable, allowing for massive oven spring thermal expansion dynamics.
- Bake Hot and Dark – Bake at 475°F on a preheated baking stone or steel until the crust is a deep, rich amber; a pale crust will quickly become soft and leathery once cooled.
- Let It Cool Completely – Never slice into hot bread; the interior starches need time to set on a wire rack, otherwise your fluffy and airy texture will turn gummy and ruin your panini sandwich bread.
People Also Ask About Ciabatta Rolls Recipe
Understanding the science behind your dough helps resolve common issues and explains exactly what is a ciabatta roll. Whether you are wondering why is my ciabatta dough so wet and sticky or how to get big holes in ciabatta rolls, these answers rely on professional baker technique. Let’s troubleshoot the most common questions bakers face.
What makes ciabatta bread so airy?
Ciabatta bread achieves its airy, open honeycomb crumb due to an exceptionally high hydration dough (typically 75-85% water) and a gentle, no-knead fermentation process.
Because there is so much water in the matrix, the yeast can easily produce large pockets of carbon dioxide. By utilizing gentle stretch and fold techniques rather than heavy mixing, bakers trap these large gas bubbles inside the strong gluten network, which then rapidly expand in a hot oven to create the signature irregular alveoli.
Why is my ciabatta dough so wet and sticky?
An authentic ciabatta rolls recipe is supposed to yield a wet, shaggy, and sticky dough; this high moisture content is mandatory for a crisp crust and porous interior.
Many beginners make the mistake of adding extra flour when they encounter this stickiness, which results in a heavy, dense brick of bread. To make handling easier without altering the hydration, always dip your hands and dough scraper in cold water before touching the dough.
How to get big holes in ciabatta rolls?
To guarantee big holes, you must prioritize long, slow fermentation and handle the dough as little as possible during the final shaping.
Avoid pressing, rolling, or aggressively kneading the dough. When you divide the rolls with a bench knife, use a decisive downward stamping motion. Finally, baking on a preheated baking steel with plenty of oven steam will trigger explosive oven spring, blowing up those trapped air pockets into beautiful, large holes.
Can you make ciabatta rolls with all purpose flour?
While you can physically bake ciabatta with all-purpose flour, it is highly discouraged as it lacks the protein necessary to support a high-hydration dough.
Bread flour (containing 12-14% protein) is essential to develop a gluten mesh strong enough to trap the massive gas bubbles without collapsing. If you substitute all-purpose flour, your rolls will likely flatten out in the oven and lack the chewy, authentic artisan texture.
Ciabatta rolls vs focaccia: what is the difference?
While both are high-hydration Italian flatbreads, ciabatta is baked without a pan to create a crusty sandwich roll, whereas focaccia is baked in a heavily oiled pan yielding a softer, richer crumb.
Focaccia dough is typically enriched with large quantities of olive oil directly in the dough and in the pan, creating a fried bottom texture. Ciabatta is baked directly on a baking stone with minimal or no oil, prioritizing a flour-dusted, crisp, crackly crust designed for structural integrity in sandwiches.
Why did my ciabatta rolls not rise?
Flat ciabatta rolls are usually the result of under-developed gluten, inactive yeast, or deflating the dough during the dividing and shaping process.
If you did not perform enough stretch and folds, the dough lacks the structural tension to rise upward and will simply spread outward into a puddle. Ensure your yeast is fresh, your bulk fermentation time was sufficient (the dough should be jiggly and domed), and that you shape the rolls incredibly gently.
How to reheat ciabatta rolls to keep them crispy?
To restore the crisp crackly crust of leftover ciabatta, mist the rolls lightly with water and bake them at 350°F (175°C) directly on the oven rack for 5 to 7 minutes.
Never microwave artisan bread, as this severely alters the starch structure and turns a chewy artisan texture into tough, rubbery leather. The quick blast in a hot oven revitalizes the crust and warms the soft interior perfectly.
What is the difference between biga and poolish for ciabatta?
A biga is a stiff Italian preferment that imparts a complex, slightly nutty flavor, while a poolish is a wet, highly hydrated preferment that contributes to an incredibly extensible, airy dough.
Traditional Italian recipes often lean on biga for ciabatta because it strengthens the dough matrix. However, the overnight cold retard method outlined in our easy recipe replicates the flavor depth of a biga without requiring the extra day of pre-planning.
Can you bake ciabatta rolls in a dutch oven?
Yes, baking ciabatta in a preheated Dutch oven is an excellent way to trap steam and achieve phenomenal oven spring, though it limits how many rolls you can bake at once.
If you don’t have a baking stone and a steam tray, a Dutch oven perfectly mimics a professional bakery’s steam injection oven. Simply place 1-2 divided rolls inside on parchment paper, bake covered for 15 minutes, then remove the lid to allow the crust to turn a deep golden brown.
How to freeze ciabatta bread rolls?
To freeze ciabatta rolls, allow them to cool completely, wrap each roll tightly in plastic wrap, place them in a heavy-duty freezer bag, and freeze for up to 3 months.
Proper wrapping prevents freezer burn and protects the delicate crumb. When ready to eat, let them thaw at room temperature for an hour, then refresh the crust by baking at 350°F for 5 minutes. Do not refrigerate baked bread, as the cold temperature rapidly accelerates staling.
Final Thoughts on the Ciabatta Rolls Recipe
Mastering this easy ciabatta bread rolls recipe is a rite of passage for any home baker. While the high hydration dough might seem incredibly intimidating at first glance, breaking the process down into these 7 manageable steps demystifies the science of artisan bread. By trusting the slow autolyse, relying on gentle stretch and folds, and utilizing the magic of an overnight cold retard, you can effortlessly coax four simple ingredients into a masterpiece of texture and flavor.
Remember, professional baker technique isn’t about rushing the dough or forcing it into submission; it’s about observing the sensory proofing indicators and letting the yeast and gluten do the heavy lifting. The reward for your patience is undeniable: pulling a tray of beautifully blistered, golden-brown rolls from a steaming oven, knowing that the crisp, crackly exterior hides a light, airy, honeycomb crumb inside.
Once you hear that crust shatter under your knife, you’ll never settle for store-bought sandwich buns again. The only question remaining is: how are you going to serve your fresh artisan ciabatta rolls recipe? Are you building the ultimate pressed Italian panini, or keeping it brilliantly simple with a heavy drizzle of extra virgin olive oil and balsamic vinegar? Let us know your favorite sandwich combination in the comments below!
Last update on 2026-09-29 / Affiliate links / Images from Amazon Product Advertising API
