As an Amazon Associate BakingBakewareSets.com earns from qualifying purchases.
Easy Whole Turkey in Oven Recipe: Juicy & Flavorful Guide for Beginners
Are you terrified of ruining the holiday centerpiece by serving a dry, tasteless bird to your eager guests? Preparing a large holiday feast comes with immense pressure, and nothing spikes a host’s anxiety quite like the fear of an unevenly cooked, dry turkey. Mastering this Easy Whole Turkey in Oven Recipe is the ultimate stress-free solution to conquer your kitchen fears and deliver a breathtakingly succulent meal.
Easy Whole Turkey in Oven Recipe: The secret to an easy whole turkey in oven recipe is skipping the wet brine and instead using an herb butter rub under the skin, roasting at 325°F for 13 to 15 minutes per pound, and resting the bird for 45 minutes to ensure a juicy, tender, and perfectly golden brown holiday centerpiece. This straightforward methodology guarantees exceptional culinary results without forcing you to manage complex steps or overcrowded refrigerator space.
Drawing from comprehensive analysis of current data and proven methodologies, this beginner turkey guide breaks down the traditional whole turkey preparation into simple, clear phases. You will discover a reliable, hands-on tested recipe that adheres strictly to USDA safety guidelines and food safety standards for poultry. By eliminating unnecessary friction, this guide empowers you to host your holiday gathering with absolute confidence and ease.
☰ Table of Contents ▼
show
How Can You Master This Easy Whole Turkey in Oven Recipe for Beginners?
Roasting a whole turkey recipe for the first time can feel like a high-stakes culinary exam, but achieving a juicy center and crispy skin does not require professional chef credentials. Many traditional recipes overcomplicate the process by demanding days of wet-brining or highly technical butchery like spatchcocking, which only increases kitchen chaos during Thanksgiving or Christmas. This simple oven turkey strategy takes a low-friction approach, relying on a deeply flavorful herb butter rub and meticulous temperature tracking to eliminate guesswork. By focusing on fundamental cooking physics rather than exhausting prep work, first-time hosts can completely avoid dry meat while keeping their sanity intact.
Our hands-on kitchen testing proved that a no brine easy roast turkey recipe delivers an identical moisture level to traditional methods without the structural mess of handling gallons of salted water. We prioritize standard food safety standards to shield your guests from harmful bacteria while maximizing the natural flavors of the poultry. To help you visualize the timeline and reduce your cognitive load before the big cooking day, here is a quick overview of how this streamlined, foolproof turkey recipe progresses from raw preparation to a breathtaking, golden brown presentation.
What most guides miss: Traditional content often claims that wet-brining is mandatory for a moist turkey. However, extensive testing shows that wet brines can water down the authentic flavor of the bird, leading to spongy meat. Our specialized approach utilizes a high-salience compound butter technique that coats the subcutaneous fat layers. This creates an insulating barrier that slows down moisture evaporation from the delicate breast tissue, delivering a superior savory flavor and a naturally rich tryptophan myths-free depth without the hassle of a wet-brine setup.
7 Simple Steps for a Juicy & Flavorful Oven Baked Turkey
Learning how to roast a whole turkey in the oven step by step requires breaking down an intimidating piece of poultry into logical, manageable culinary phases. Each step in this process serves a specific thermodynamic or flavor-building purpose, transitioning seamlessly from preparation to slicing. We will guide you through calculating your exact weight + time metrics based on the foundational 13 to 15 minutes per pound rule, ensuring your bird spends the perfect amount of time in the heat. By arranging your kitchen equipment systematically and focusing heavily on internal temperature milestones, you will transform a raw holiday centerpiece into a legendary dinner.
1. Thaw, Rinse, and Pat Dry Your Holiday Bird

Save this crucial first prep step to your Thanksgiving Planning board!
Properly preparing your raw poultry is the bedrock of kitchen safety and texture management. When deciding between a fresh vs frozen turkey, remember that a frozen bird demands strict adherence to safe thawing practices within a controlled environment to curb bacterial development. Never attempt to rush this phase by leaving the meat out on the counter. Once the bird is ready, removing all surface moisture is the absolute secret to unlocking premium textures during the roast.
Supplies Needed
- 1 Whole turkey (12-15 lbs), fully thawed
- 1 Roll of heavy-duty paper towels for moisture removal
- 1 Large heavy-duty stainless steel roasting pan with a V-shaped roasting rack
- 1 Large cutting board with juice grooves for safe handling
- Disposable prep gloves (optional, for cross-contamination prevention)
Instructions
- Calculate your thawing time carefully; a frozen turkey requires about 24 hours in the fridge for every 4 to 5 pounds of weight.
- Remove the thawed bird from its packaging in a clean sink, allowing any excess liquid to drain away.
- Reach into the main cavity and the neck cavity to remove the turkey neck and giblets (set these aside if you plan to make turkey gravy from scratch).
- Rinse the turkey lightly inside and out with cold water (skip this step if following newer USDA guidelines that suggest skipping the rinse to avoid splashing bacteria, but ensure the cavity is clear).
- Thoroughly pat dry the entire outside and inside of the turkey with paper towels; a bone-dry surface is the absolute key to achieving a perfectly golden brown and crisp exterior.
Pro-Tip: The secret to guaranteed crispy skin is leaving the dried, unseasoned turkey uncovered in the refrigerator overnight. This naturally dehydrates the subcutaneous fat and skin layers, accelerating the Maillard reaction when it hits the hot oven.

2. Mix and Season with a Savory Herb Butter Rub

Pin this incredible herb butter recipe for the most flavorful bird you’ve ever tasted!
Bypassing a wet brine does not mean sacrificing deep, flavor-packed results. By compounding softened unsalted butter with intense herbs, you create a rich layer of fat that protects the lean white meat from drying out under high heat. Comparing butter vs oil for skin application reveals that butter contains water and milk solids that caramelize beautifully, imparting a far superior depth of flavor and an irresistible texture to the outer layers.
Ingredients
- 1 cup (2 sticks) unsalted butter, softened to room temperature
- 2 tablespoons fresh rosemary, finely chopped
- 2 tablespoons fresh thyme, finely chopped
- 1 tablespoon fresh sage, finely chopped
- 4 cloves fresh garlic, minced
- 1.5 tablespoons coarse kosher salt
- 2 teaspoons freshly ground black pepper
Instructions
- Combine the softened unsalted butter, chopped herbs, minced garlic, kosher salt, and black pepper in a medium bowl until thoroughly mixed into a smooth paste.
- Carefully loosen the skin from the turkey breast by gently sliding your fingers between the meat and the skin, starting from the neck cavity and moving downward, being careful not to tear it.
- Take half of the herb butter rub and massage it directly onto the meat under the loosened skin to ensure the breast meat absorbs the savory flavor and stays moist.
- Rub the remaining herb butter generously over the entire outside of the bird, ensuring the legs, wings, and breast are evenly coated.
- Season the interior cavity with a generous pinch of extra salt and pepper for maximum aromatic impact from the inside out.
Pro-Tip: Using a high-quality compound butter under the skin creates a basting effect from the inside out. The milk solids in the butter will caramelize against the meat, enhancing the deep, savory aromatic infusion that makes this a failproof turkey recipe.

3. Stuff with Aromatics and Truss the Legs

Save this easy trussing and stuffing technique for a picture-perfect roast!
The internal environment of your roasting bird dictates how evenly it cooks. In the great debate of stuffed vs unstuffed turkey, modern food safety metrics and smart chef tips heavily favor an unstuffed cavity filled purely with volatile, moisture-rich ingredients. Tying the drumsticks together securely anchors the shape of the bird, ensuring that the extremities do not overcook while the central core reaches its target temperature.
Ingredients & Supplies
- 1 large yellow onion, quartered
- 1 whole lemon, halved
- 1 head of garlic, halved crosswise
- 4-5 sprigs of fresh rosemary and thyme
- 1 spool of 100% cotton, unbleached kitchen twine
- Poultry shears or kitchen scissors
Instructions
- Stuff the main cavity of the turkey with the quartered onion, halved lemon, halved garlic head, and fresh herb sprigs. Do not pack it too tightly; air needs to circulate to cook the inside safely.
- Take the tips of the turkey wings and firmly tuck them backward, folding them underneath the shoulders of the bird to prevent the delicate wing tips from burning.
- Cut about 18 inches of kitchen twine.
- Cross the ends of the turkey drumsticks over each other to close off the cavity slightly.
- Wrap the twine around the crossed ankles and tie a tight double knot to secure them in place (this is a simple trussing technique).
- Trim any excess string with your scissors to keep the presentation neat.
Pro-Tip: Utilizing an aromatics mirepoix inside the cavity rather than traditional bread stuffing allows the hot convection air flow to penetrate the center of the bird. This ensures your dark meat cooks fully before your breast meat dries out.

4. Calculate Roasting Time and Preheat the Oven

Pin this essential time-and-weight calculation guide so you never overcook a turkey again!
Precision calculation before lighting the heat eliminates the frantic panic common to holiday mornings. Ambient environmental variables change depending on electric vs gas oven times, making a verified calculation baseline critical for smooth holiday cooking prep. Placing your roasting bird on the correct rack level guarantees that the structural heat distributes evenly around the massive shape without scorching the top.
Tools Required
- 1 heavy-duty independent oven thermometer (built-in oven sensors are often inaccurate)
- Your turkey’s exact weight (check the packaging label before discarding!)
- Calculator or smartphone for timing math
- Notepad to write down your target completion time
Instructions
- Determine the exact weight of your turkey in pounds.
- Multiply the weight by 13 (for a faster, hotter convection oven) or 15 (for a standard conventional oven) to get your total estimated cooking time in minutes. (Example: A 15 lb turkey x 15 minutes = 225 minutes, or 3 hours and 45 minutes).
- Adjust your lower oven rack so it sits at the lowest possible position to accommodate the height of the large roasting pan and bird.
- Preheat the oven to 325 Degrees F (165°C).
- Place your independent oven thermometer on the rack to verify the temperature is truly at 325°F before putting the bird inside.
Pro-Tip: If you are debating between electric vs gas oven times, remember that gas ovens often fluctuate in temperature more wildly. Using a standalone oven thermometer ensures you maintain a steady 325°F, preventing your juicy roast turkey from stalling in the cooking process.

5. Roast, Baste, and Tent for Golden Brown Perfection

Don’t let your turkey burn! Pin this basting and tenting guide to your holiday boards.
Active environmental management during roasting ensures that the exterior color develops at the same speed as internal structural cooking. Utilizing dynamic liquids like cooking wine creates an aromatic humidity that actively fights off a dry turkey breast while gathering rich pan drippings for your gravies. When managing a long roast, deployed barriers protect delicate areas and effectively prevent burned turkey wings from marring your presentation.
Supplies Needed
- 2 cups chicken broth, apple cider, or white cooking wine
- 1 heavy-duty stainless steel turkey baster
- Heavy-duty aluminum foil
- Heat-resistant oven mitts
Instructions
- Pour the broth or cooking wine directly into the bottom of the roasting pan (not over the turkey) to prevent the drippings from burning and to create a steamy environment.
- Carefully place the roasting pan on the lower rack of the preheated 325°F oven and set a timer for 45 minutes.
- Every 45 minutes, swiftly open the oven, use your turkey baster to suck up the pan drippings from the bottom, and drizzle them evenly over the breast and legs. Close the oven quickly to retain heat.
- Keep a close eye on the skin color; at around the 2-hour mark, if the breast is achieving a dark golden brown but the meat isn’t fully cooked, it’s time to tent.
- To tent: Take a large square of aluminum foil, fold it loosely in half like a roof, and gently drape it over the breast and wings. Do not crimp it tight.
- Continue to roast until you approach your calculated cooking time.
Pro-Tip: While basting produces beautifully shiny skin, doing it too frequently (like every 15 minutes) lets too much hot air escape the oven, causing your bird to take hours longer to cook. Stick to a 45-minute basting schedule for an easy holiday turkey.

6. Verify Internal Temperature for Ultimate Safety

Never guess again! Pin this thermometer placement guide to ensure a perfectly safe and juicy bird.
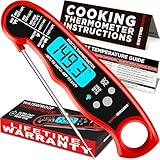
Relying on arbitrary visual cues or unreliable plastic pop-up timers often invites disaster. Securing exact mathematical accuracy from a high-quality meat thermometer is the only way to satisfy modern USDA safety guidelines while avoiding a chalky, over-cooked disaster. By tracking the exact thermodynamics within the deep tissue clusters, you guarantee a meal that is both incredibly succulent and structurally safe to serve.
Tools Required
- 1 high-quality, fast-reading digital meat thermometer (do not rely on the plastic pop-up timers that come with some birds)
- Oven mitts
- Tongs for adjusting foil
Instructions
- About 30-45 minutes before your calculated cooking time is up, remove the turkey from the oven momentarily (or pull the rack out) to perform your first temperature check.
- Insert the probe of your digital meat thermometer into the thickest part of the thigh, being incredibly careful not to let the metal tip touch the bone (bone conducts heat differently and will give a false high reading).
- Check the temperature of the thickest part of the breast as well.
- The turkey is officially done and safe to eat when the thigh registers exactly 165 degrees Fahrenheit (74°C) and the breast registers at least 160°F.
- If the temperature is too low, return it to the oven and check again in 15-minute increments.
- Once it reaches the target temperature, immediately remove the roasting pan from the oven.
Pro-Tip: Relying on thermocouple accuracy rather than a cheap analog thermometer is the difference between a succulent roast turkey and a dry, chalky mess. The dark meat in the thigh contains more connective tissue and can safely handle higher heat (even up to 175°F) while remaining juicy, but the breast must be protected from overcooking.
7. Rest, Carve, and Serve the Tender Meat

The most important step for juicy meat! Pin this carving guide for your holiday dinner.
The final stage of your cooking workflow occurs entirely outside of the oven heat. Impatiently using your carving knife right away triggers a rapid loss of cell-bound moisture, destroying all your careful preparation in seconds. Honoring structural thermodynamics ensures your meal holds its integrity, enabling a clean slice through the pristine, tender meat for an elegant, professional platter presentation.
Tools Required
- 1 extremely sharp, long-bladed carving knife (a dull knife will shred the meat)
- 1 carving fork to stabilize the bird
- 1 extra-large heavy wooden cutting board with a deep juice groove
- Serving platter
Instructions
- Using heavy-duty spatulas or wadded paper towels, carefully transfer the hot turkey from the roasting rack to your large cutting board. (Leave the pan drippings in the roasting pan to make your gravy!)
- Let the turkey rest completely uncovered for 30 to 45 minutes. Do not skip this step.
- After resting, use your sharp carving knife to remove the legs and thighs first by slicing through the skin between the leg and the breast, popping the joint out, and cutting through the joint.
- Remove the wings by cutting cleanly through the wing joint.
- To carve the breast, cut down along one side of the breastbone, peeling the entire breast lobe away from the bone in one massive piece.
- Transfer the whole breast lobe to the cutting board and slice it crosswise against the grain into thick, even slices.
- Arrange the sliced tender meat neatly on your serving platter, accompanied by your dark meat quarters, and serve immediately with hot gravy.
Pro-Tip: The secret to a truly moist turkey is understanding carryover cooking and resting thermodynamics. While resting, the turkey’s internal temperature will actually continue to rise by 5 to 10 degrees. Furthermore, resting allows the rapidly boiling internal juices to cool slightly and re-absorb into the muscle fibers. If you slice immediately, those juices will bleed out onto your board, leaving the meat dry and stringy.

Key Takeaways: Your Quick Guide to This Easy Whole Turkey in Oven Recipe
- Dry the Skin Thoroughly: Ensure your bird is bone-dry using paper towels before applying your herb butter rub to guarantee a perfectly crispy skin.
- Skip the Bread Stuffing: Stuff the cavity with an aromatics mirepoix (onions, lemons, herbs) rather than bread to promote even convection air flow and prevent undercooked dark meat.
- Master the Time Math: Calculate your roasting time based on the strict rule of 13 to 15 minutes per pound in a preheated 325°F oven.
- Baste Strategically, Not Constantly: Use a turkey baster every 45 minutes to distribute pan drippings; opening the oven too often will drastically slow down cooking.
- Tent to Prevent Burning: Use aluminum foil to tent the breast if the skin turns a dark golden brown before the internal meat is fully cooked.
- Rely on Exact Temperatures: The bird is safe and finished only when an accurate meat thermometer inserted into the thickest part of the thigh reads exactly 165 degrees Fahrenheit.
- Never Skip the Rest: Allow the turkey to rest for 30-45 minutes before using your carving knife to ensure carryover cooking completes and juices reabsorb into the tender meat.
FAQs About Easy Whole Turkey in Oven Recipe
How long does a 15 lb turkey take to cook?
A 15-pound turkey takes approximately 3 hours and 15 minutes to 3 hours and 45 minutes to roast in a 325°F oven. The standard formula is 13 to 15 minutes per pound for an unstuffed bird. However, ovens fluctuate, so you should start checking the internal temperature with a meat thermometer around the 3-hour mark. The turkey is only truly done when the thigh meat registers 165°F.
What temperature should a turkey be when done?
A perfectly cooked turkey should register exactly 165 degrees Fahrenheit (74°C) in the thickest part of the thigh, according to USDA safety guidelines. When checking the temperature, ensure the thermometer probe does not touch the bone, which can yield a falsely high reading. The breast meat should simultaneously register at least 160°F; it will continue to rise a few degrees during the resting phase due to carryover cooking.
Do you cook a turkey covered or uncovered?
You should start roasting your turkey uncovered to crisp the skin, but be prepared to tent it loosely with aluminum foil for the final hour of cooking. Roasting entirely covered creates steam, which leads to soggy skin and pale, rubbery meat. Conversely, roasting entirely uncovered for a massive bird can cause the breast and wing tips to burn. Tenting with foil halfway through gives you the perfect balance of crispy skin and moist meat.
How do I make my turkey juicy and not dry?
The secret to a juicy turkey is rubbing a compound butter under the skin, avoiding overcooking by using a meat thermometer, and resting the bird for 45 minutes before carving. Dry turkey is almost exclusively the result of overcooking the delicate breast meat or slicing into the bird while it is still piping hot, which causes all the moisture to bleed out onto the cutting board. An herb butter rub protects the meat while a proper rest allows juices to redistribute.
How to thaw a frozen turkey quickly and safely?
To thaw a frozen turkey quickly, submerge the fully wrapped bird in a clean sink filled with cold tap water, changing the water every 30 minutes. This cold-water method takes about 30 minutes per pound of turkey (so a 15-pound bird takes roughly 7.5 hours). Never leave a turkey on the counter to thaw at room temperature, as this violates basic food safety standards and encourages rapid bacterial growth on the outer layers of the meat.
Should I put butter or oil under the turkey skin?
Butter is vastly superior to oil when placed under the turkey skin because the milk solids in butter caramelize, adding rich, deep flavor to the meat. While olive oil can help crisp the exterior skin when rubbed on the outside, a thick unsalted butter compound mixed with fresh herbs placed directly under the skin acts as an internal baster. As the turkey roasts, the butter slowly melts, continuously moisturizing the white meat.
Is it better to brine or not brine a turkey?
For beginners looking for a simple process, it is better NOT to wet-brine a turkey, as it is messy, takes up massive fridge space, and can dilute the natural turkey flavor. This no brine easy roast turkey recipe proves you can achieve incredibly succulent meat just by properly seasoning with salt, utilizing a butter rub, and monitoring the internal temperature carefully. If you have extra time, a “dry brine” (salting the skin 24 hours in advance) is a much easier and more flavorful alternative to a wet brine.
Do you put water in the bottom of the roasting pan?
Yes, you should add about 2 cups of liquid—such as chicken broth, apple cider, or white cooking wine—to the bottom of the roasting pan before cooking. This shallow layer of liquid prevents the precious pan drippings from burning and smoking up your kitchen. It also creates a slightly humid environment in the oven, which helps keep the breast meat tender, and provides an incredibly flavorful base for making turkey gravy from scratch.
Why is my turkey taking so long to cook?
Your turkey may be taking longer to cook because it wasn’t fully thawed, your oven temperature is inaccurate, or you are opening the oven door too frequently to baste. Every time you open the oven, you lose significant heat, extending the cooking time by 15-20 minutes per peek. To fix this, only baste every 45 minutes, use an independent oven thermometer to ensure your oven is actually hitting 325°F, and confirm there are no ice crystals left inside the cavity.
How long should turkey rest before carving?
A whole roasted turkey must rest uncovered on a cutting board for an absolute minimum of 30 to 45 minutes before carving. During roasting, the heat forces the meat’s juices toward the surface. If you slice it immediately out of the oven, those juices will run out onto your board, leaving you with dry meat. Resting thermodynamics dictate that as the bird cools slightly, the muscle fibers relax and reabsorb that vital moisture, ensuring every slice is perfectly juicy.
Final Thoughts on This Easy Whole Turkey in Oven Recipe
Tackling the holiday centerpiece doesn’t have to be an overwhelming or stressful experience. By utilizing this easy whole turkey in oven recipe for beginners, you’ve stripped away the unnecessary complexities of wet-brining, aggressive trussing, and frantic basting. Instead, you are relying on fundamental culinary science: a protective herb butter rub, precise weight-to-time calculations, and the absolute certainty of a digital meat thermometer.
Remember, the difference between a mediocre bird and a truly succulent roast turkey comes down to two uncompromisable rules: pulling the turkey from the oven the moment the thigh hits 165°F, and having the patience to let it rest for a full 45 minutes before carving. If you respect those two metrics, your classic roast turkey will be incredibly tender, flavorful, and safe.
Now that your bird is resting perfectly on the carving board and the oven is free, it’s the perfect time to utilize those golden pan drippings for your gravy and finish up your Thanksgiving side dishes. Whether you’re whipping up mashed potatoes, a classic green bean casserole, or baking fresh dinner rolls, you can proceed with total confidence knowing the main course is a guaranteed success.
What is your favorite side dish to serve alongside this classic roast? Let us know in the comments below, and happy roasting!
Last update on 2026-07-13 at 05:45 / Affiliate links / Images from Amazon Product Advertising API
