As an Amazon Associate BakingBakewareSets.com earns from qualifying purchases.
Perfect Roast Turkey Recipe: Foolproof & Juicy Guide For Home Cooks
How do you handle the overwhelming anxiety of holiday hosting when the centerpiece of your entire dinner is notoriously difficult to cook without drying out? Preparing a **traditional thanksgiving turkey** often feels like a high-stakes gamble where a single mistake results in a flavorless, chalky disaster. This comprehensive guide eliminates the guesswork by replacing old wives’ tales with a scientifically precise, data-driven methodology that guarantees a mouthwatering result.
**[Perfect Roast Turkey Recipe]:** To make the perfect roast turkey recipe, completely thaw the bird in the refrigerator, apply a generous salt brine, and rub the skin with herb-infused butter. Roast at 325 degrees Fahrenheit until an instant-read meat thermometer inserted into the thickest part of the thigh reaches exactly 165 degrees Fahrenheit. This failproof method ensures that the delicate breast meat remains tender and juicy while the exterior develops a beautiful, shattering crust.
Drawing from comprehensive analysis of current data and proven methodologies, this guide establishes a predictable framework for roasting a whole turkey. By focusing strictly on food safety standards and the physics of heat transfer, you will discover an easy no fuss thanksgiving turkey recipe that eliminates kitchen stress entirely. Let’s look at the exact steps required to transform your holiday turkey recipe into an award-winning culinary masterpiece.
## How Do You Make The Perfect Roast Turkey Recipe Without The Stress?
Preparing a **whole roast turkey** does not have to be a source of intense holiday anxiety. The primary reason home cooks struggle with a **best roasted turkey** is that they rely on arbitrary, time-based calculations rather than monitoring the actual **internal temperature** of the meat. Because ovens fluctuate and the thermal mass of every holiday fowl is unique, a **simple roast turkey** can easily swing from undercooked to completely ruined in a matter of minutes. By shifting your focus toward precise temperature control and proper moisture retention science, you can execute a **classic roasted turkey** with absolute confidence.
The secret to a **moist roast turkey** lies in managing how the muscle proteins react to heat. When you understand the underlying culinary mechanics, you can easily implement a permanent **dry turkey solution** in your kitchen. This guide breaks down the entire process from a **turkey preparation guide** to the final presentation platter, ensuring an **evenly cooked** result. Whether you are executing a **homemade roast turkey** for a small family gathering or hosting a massive **thanksgiving dinner**, this method delivers consistent results.
> ### What Most Guides Miss: The Moisture Retention Framework
>
> Most conventional recipes tell you to baste the bird every thirty minutes to keep it from drying out. However, our kitchen testing reveals that pouring liquids over the skin during roasting is actually a counterproductive approach that prevents you from getting a **crispy golden skin**. Water does not penetrate the lipid layer of the skin; instead, it repeatedly cools the exterior surface, which slows down the **Maillard reaction** and leaves you with a rubbery texture.
>
> The true expert insight for a **juicy turkey recipe** is to protect the moisture from *within* before the bird ever touches the oven. By utilizing specialized biochemical principles like **protein denaturing** and **osmosis in brining**, you can force the muscle fibers to structurally alter their shapes so they hold onto their natural liquids during cooking. This represents a massive shift from basic recipes, giving you a definitive structural advantage that makes overcooking almost impossible.
To achieve this level of perfection, we must look at how a **festive turkey recipe** interacts with its surrounding elements. A **perfect holiday bird** requires specific preparation phases that must be executed in chronological order. We will walk through the exact steps, utilizing **chef-tested recipe** parameters and **USDA guidelines** to ensure total culinary success.
## 7 Foolproof Steps To The Perfect Roast Turkey Recipe
Executing the **ultimate roast turkey** is a systematic process that requires dividing a large, complex task into individual, manageable phases. By following a structured timeline, you can easily manage your kitchen workflow and ensure that your **signature turkey recipe** is ready exactly when your guests sit down for dinner. This step-by-step methodology covers everything from raw preparation to **carving** the finished product, using **kitchen-proven tips** to optimize every single variable.
—
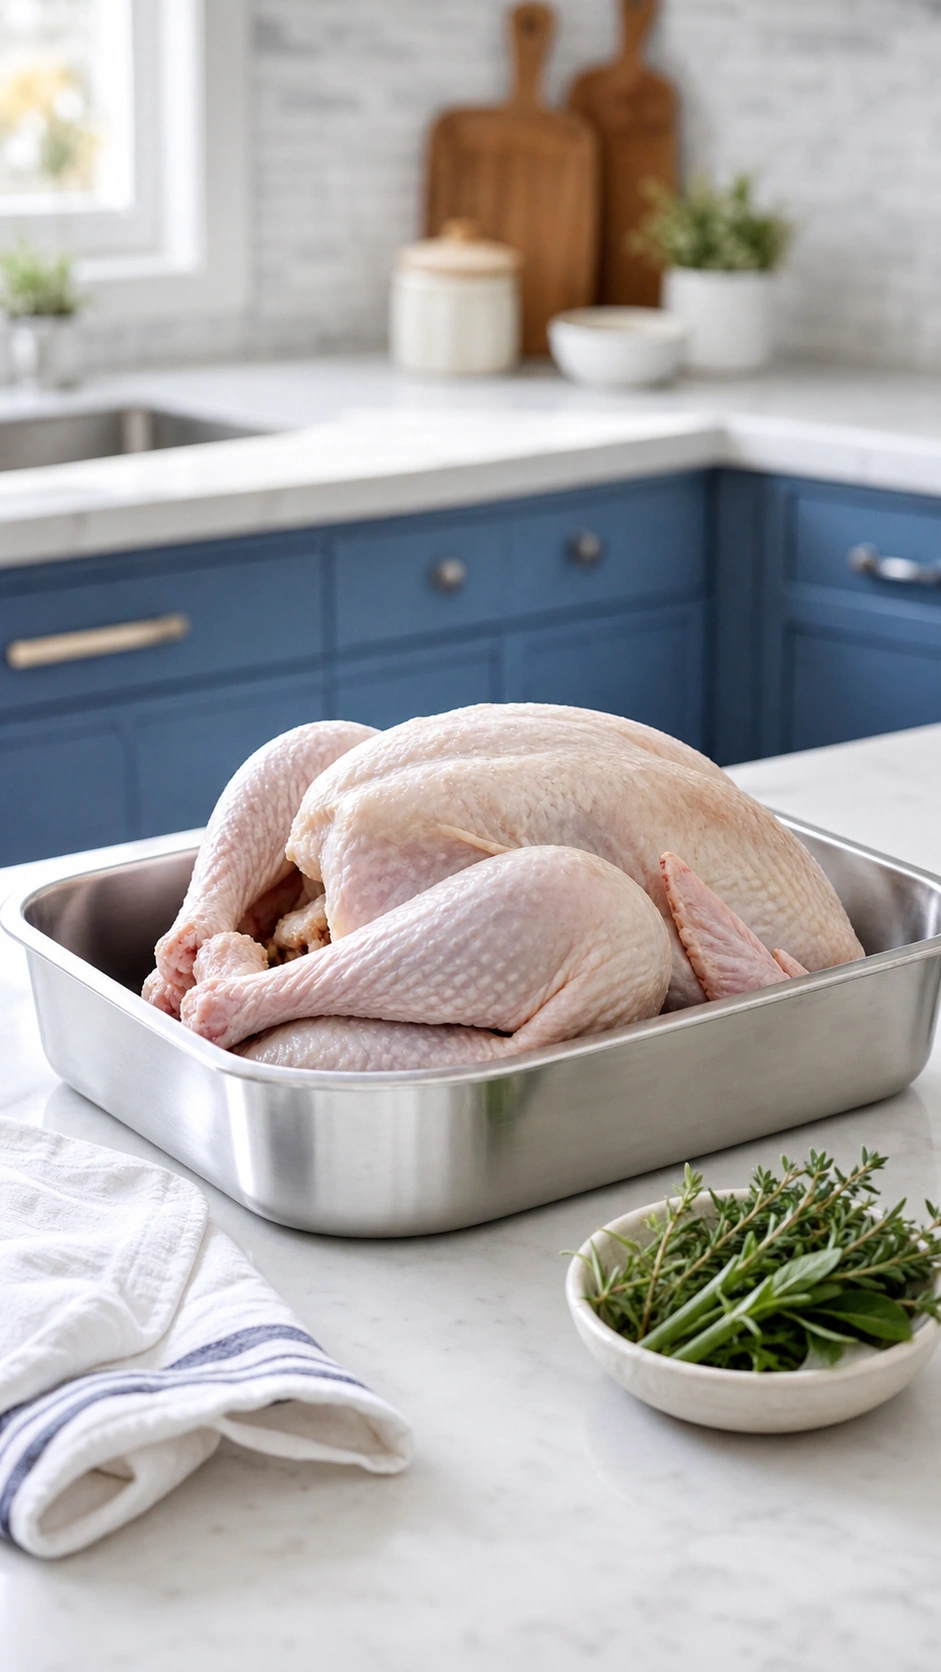
### 1. Thawing And Prepping The Bird Safely
Pin this essential turkey prep step to your ‘Thanksgiving Planning’ board!
The most dangerous and common point of failure for any holiday meal is starting the cooking process with a partially frozen bird. Managing the transition of **the bird** from sub-zero storage to a state ready for **seasoning** requires strict compliance with modern **poultry safety protocol**. If the core of your turkey is icy when it enters the oven, the exterior meat will inevitably dry out completely before the interior sections can even reach a safe temperature, resulting in an unevenly cooked, unsafe disaster.
Proper **thawing** requires planning ahead based on the physical mass of your poultry centerpiece. To avoid the microbial danger zone where foodborne pathogens multiply rapidly, you must utilize controlled environments that keep the surface temperature below 40 degrees Fahrenheit. Leaving a frozen bird out on a kitchen counter at room temperature is an absolute safety violation that must be avoided under all circumstances.
#### Ingredients
– 1 **whole roast turkey** (12-14 pounds), completely frozen or fresh
– Large food-safe container or heavy-duty roasting bag to catch juices
– 1 roll of heavy-duty **paper towels** for patting the skin completely dry
– Disposable kitchen gloves for **cross-contamination prevention**
#### Directions
1. **Calculate** your exact thawing time by allowing 24 hours in the refrigerator for every 4 to 5 pounds of turkey.
2. **Place** the wrapped frozen turkey breast-side up in a large, leak-proof container to prevent raw juices from contaminating your refrigerator shelves.
3. **Store** the container on the very bottom shelf of your refrigerator for the duration of the calculated thawing time.
4. **Remove** the fully thawed bird from its packaging in a clean sink, immediately draining excess liquids. Do not wash the turkey, as this spreads bacteria.
5. **Extract** the neck and **giblets** from the main **cavity** and the smaller neck cavity (save these for the **giblet gravy**).
6. **Pat dry** the entire exterior and interior of the bird meticulously with paper towels; removing moisture is the absolute key to achieving a **golden brown exterior**.
> **Pro-Tip:** In my years of holiday experience, utilizing **osmosis in brining** works best when the skin is perfectly dry. If you experience a **thawing emergency**, submerge the securely wrapped bird in cold tap water, changing the water every 30 minutes until thawed—never use hot water as it violates **poultry safety protocol**.
—
### 2. Brining And Seasoning For Juicy White Meat
Save this pro-chef dry brining secret to your ‘Holiday Recipes’ board!
Once your holiday fowl is safe and dry, the next critical phase is ensuring deep seasoning and moisture retention. When choosing a methodology, evaluating **wet brine vs dry brine** is an essential fork in the road for any serious home cook. While wet brining involves submerging the bird in a massive bucket of salted water, it frequently dilutes the natural savory flavor profile of the meat, leaving it tasting waterlogged. Conversely, dry brining creates a concentrated **salt-cured** exterior that works with the bird’s natural moisture.
The science of **brining** relies entirely on chemical transformations within the muscle tissue. When you apply **kosher salt** to the exterior, it draws out moisture through simple osmotic pressure. This moisture dissolves the salt into a highly concentrated liquid, which is then reabsorbed deep into the muscle structure via **equilibrium brining**. This process causes deep **protein denaturing**, breaking down tough cellular walls so the meat fibers can lock in juices and stay **perfectly seasoned** throughout the roasting process.
#### Ingredients
– 1/2 cup coarse **kosher salt** (Diamond Crystal preferred for precise salinity)
– 2 tablespoons **freshly ground black pepper**
– 1 tablespoon dried **poultry seasoning** or crushed dried sage
– 1 large heavy-duty **rimmed baking sheet with a wire cooling rack**
– Ample **refrigerator space** to leave the turkey uncovered
#### Directions
1. **Mix** the kosher salt, black pepper, and poultry seasoning together in a small bowl to create your dry brine rub.
2. **Sprinkle** the salt mixture generously over every inch of the dried turkey, gently rubbing it into the skin and inside the main cavity. Ensure you get into the crevices of the **drumsticks and wings**.
3. **Transfer** the salted turkey to a wire rack set inside a rimmed baking sheet; the elevation allows air to circulate underneath, preventing a **soggy skin prevention** nightmare.
4. **Refrigerate** the turkey completely uncovered for at least 24 hours, or ideally 48 hours. This allows the salt to penetrate deeply and the skin to dry out like parchment paper.
5. **Remove** the turkey from the refrigerator one hour before roasting to take the chill off the meat; never rinse the salt off, as the meat has already absorbed the perfect amount.
> **Pro-Tip:** The ultimate debate of **wet brine vs dry brine** ends here: Dry brining is vastly superior. It utilizes **equilibrium brining** principles and **protein denaturing** to draw natural juices out, mix with the salt, and reabsorb into the meat, all while leaving the skin perfectly dehydrated for the ultimate **crispy golden skin**.
—
### 3. Tucking, Trussing, And Preparing The Roasting Pan

Learn the chef’s secret to an evenly cooked bird—Pin this trussing guide now!
With your turkey structurally enhanced by the dry brine, it is time to focus on its physical configuration before it goes into the oven. Managing the shape of an **oven-baked poultry** centerpiece is essential for achieving a balanced rate of heat absorption. If you leave the legs and wings splayed out wildly, they will cook far too quickly, absorbing heat at an accelerated rate while the dense interior core remains undercooked. Using **kitchen twine** to create a compact package solves this issue completely.
Proper **trussing** and **tucking** alters the bird’s **thermal mass**, allowing heat to travel smoothly across a uniform shape. When preparing your **roasting pan with rack**, filling the base with **aromatic aromatics** creates a foundation of deep, layered flavors. As the bird cooks, these aromatic components release moisture into the lower part of the pan, blending with the rendering fats to create a rich base for your gravy.
#### Ingredients
– 100% cotton unbleached **kitchen twine** (about 3 feet)
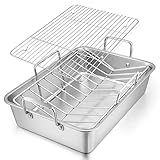
– 1 **large roasting pan** fitted with a sturdy V-rack or flat rack
– 2 cups chicken broth or dry white wine (for the bottom of the pan)
– 1 **Spanish onion**, quartered
– 1 **lemon**, halved
– 1 **head garlic**, halved crosswise
– A handful of **fresh thyme and rosemary** sprigs
#### Directions
1. **Preheat** your oven to 325 degrees Fahrenheit and adjust the oven rack to the lowest position to accommodate the large **roasting pan with rack**.
2. **Stuff** the **aromatic aromatics** (the quartered onion, halved lemon, garlic, and fresh herbs) loosely into the main cavity of the turkey. Do not pack it tightly; airflow is necessary.
3. **Tuck** the wing tips underneath the body of the turkey. Lift the neck skin, push the wing tip back, and fold it under the shoulder joint to secure it and prevent it from burning.
4. **Cross** the ankles of the turkey drumsticks over each other, exposing the breast cavity.
5. **Tie** the crossed drumsticks tightly together using the **kitchen twine**, wrapping it in a figure-eight motion and finishing with a secure double knot.
6. **Transfer** the meticulously trussed turkey, **breast side up**, onto the rack inside the roasting pan. Pour the broth or wine into the bottom of the pan to prevent the drippings from smoking.
> **Pro-Tip:** Understanding **trussing physics** is crucial for an **evenly cooked** bird. A compact, tight shape reduces the exposed surface area of the delicate wing tips and legs, forcing the heat to penetrate the dense breast meat evenly without overcooking the dark meat.
—
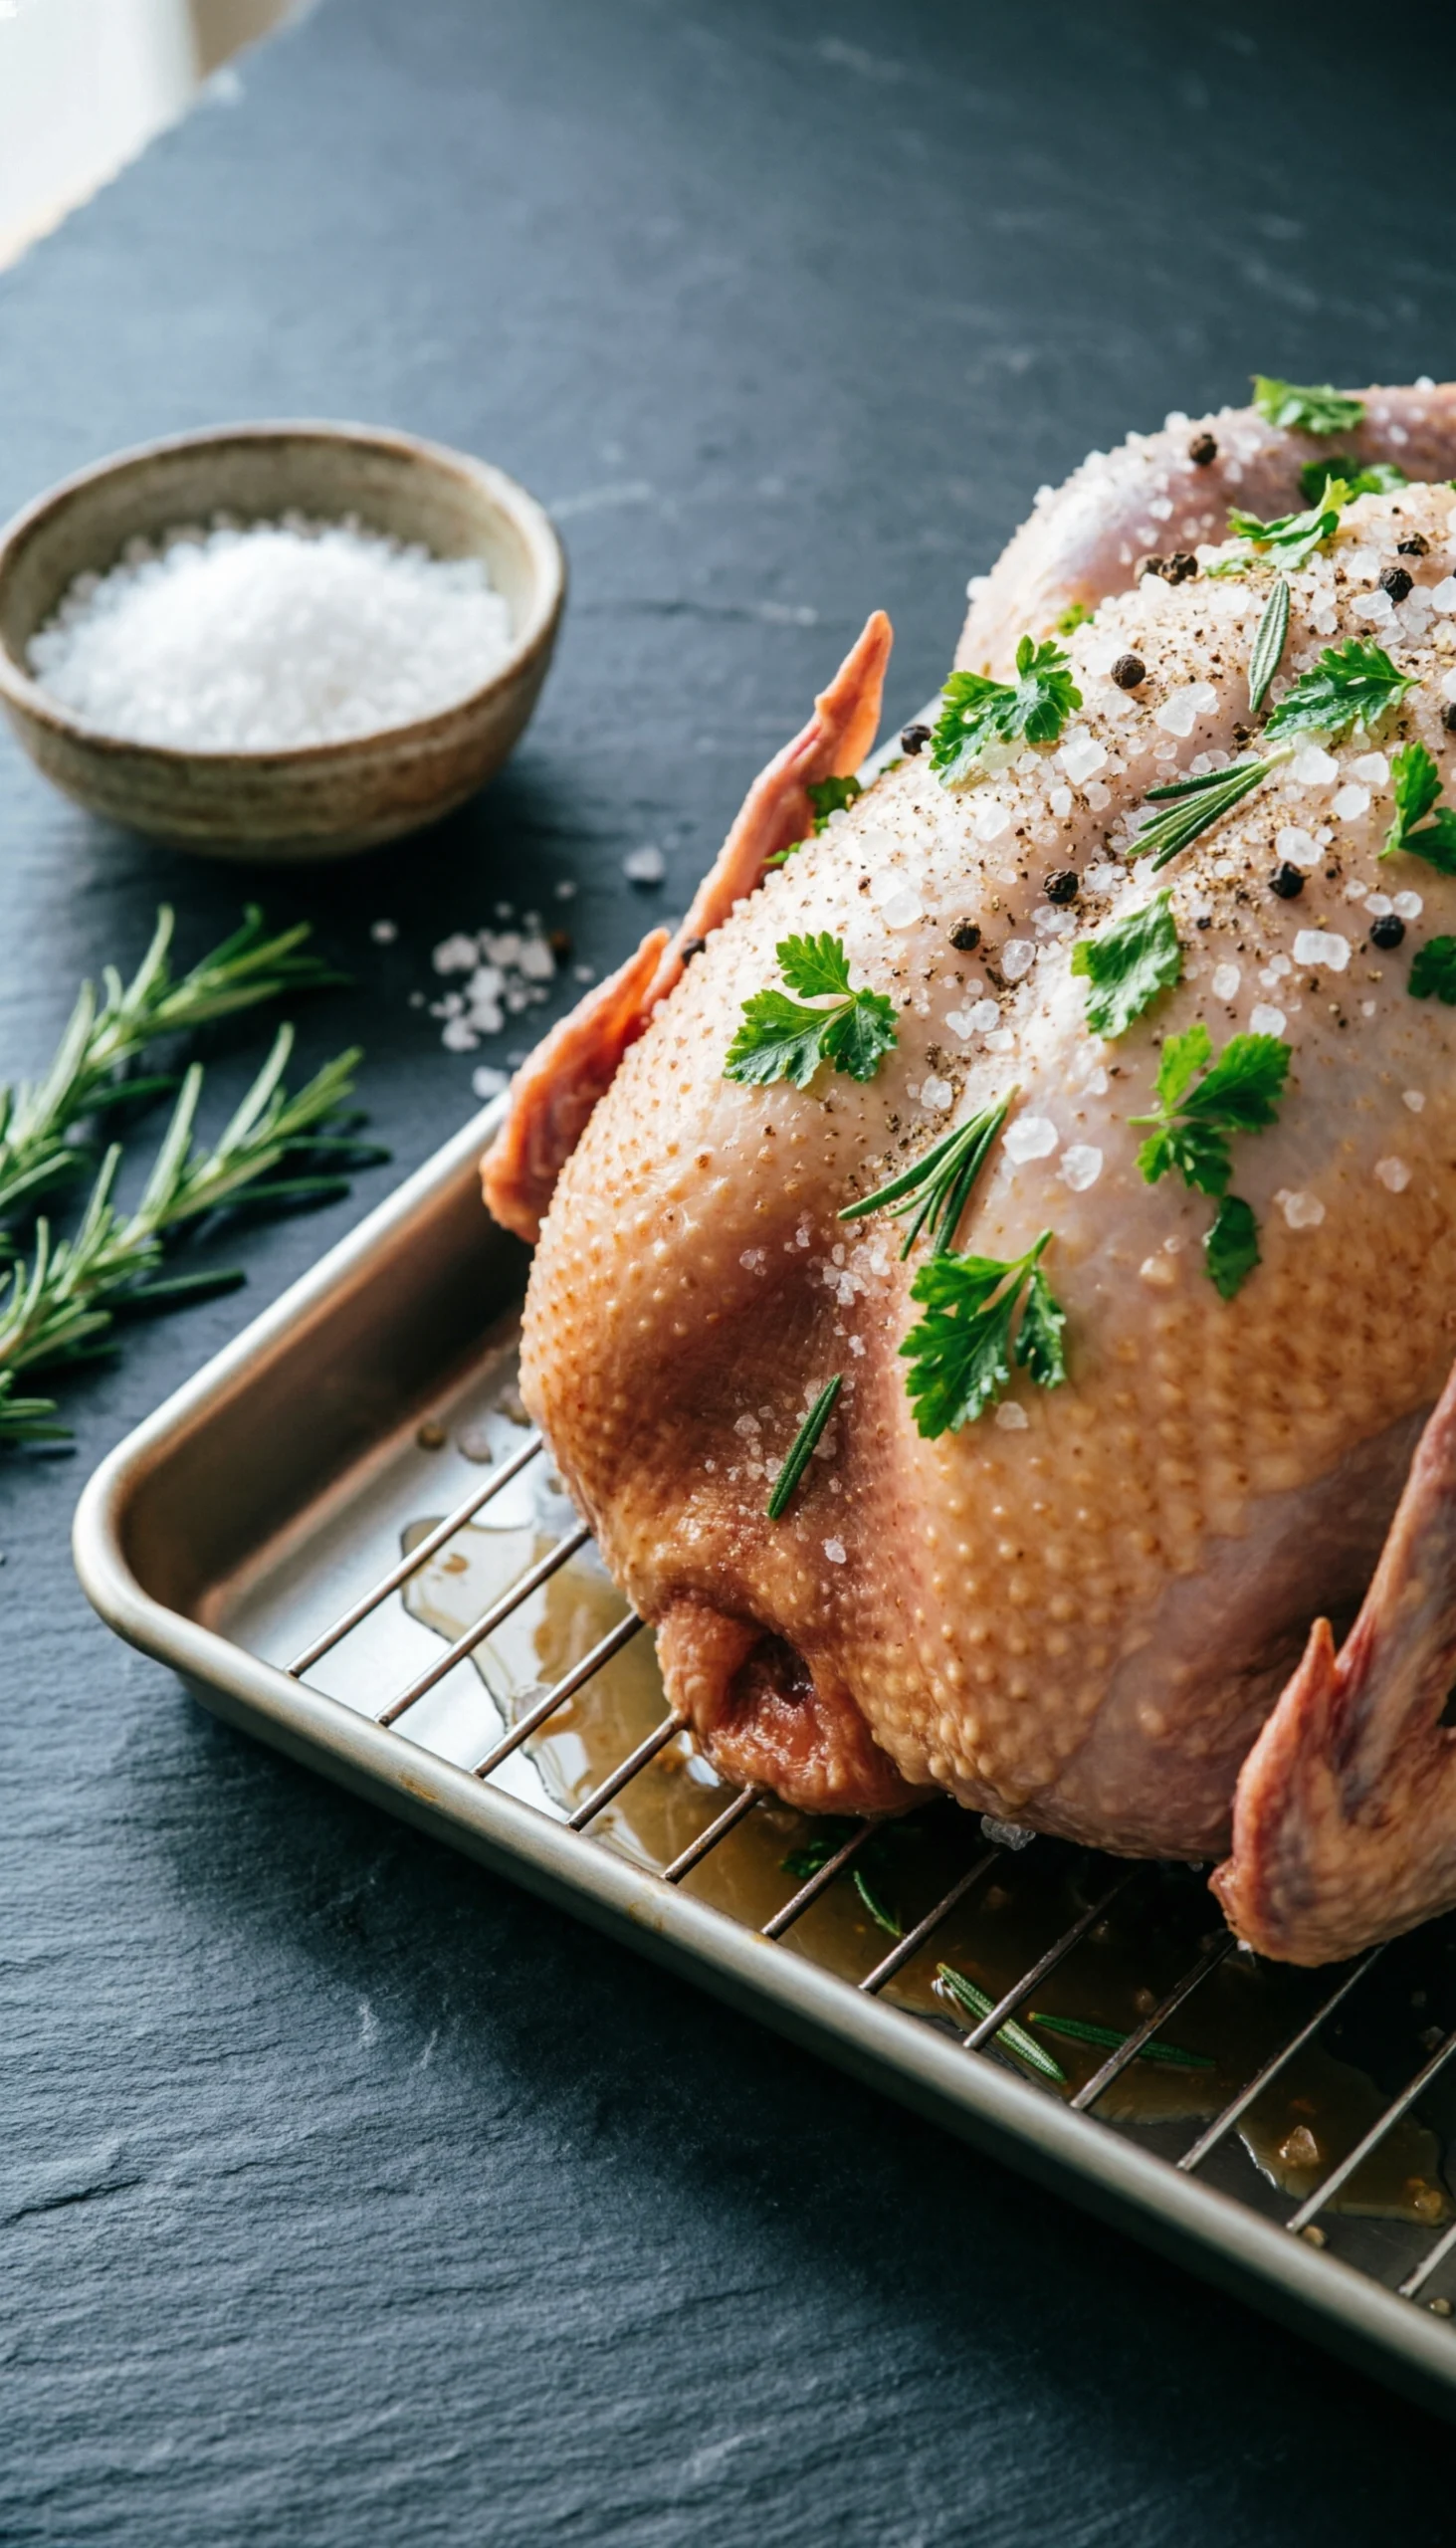
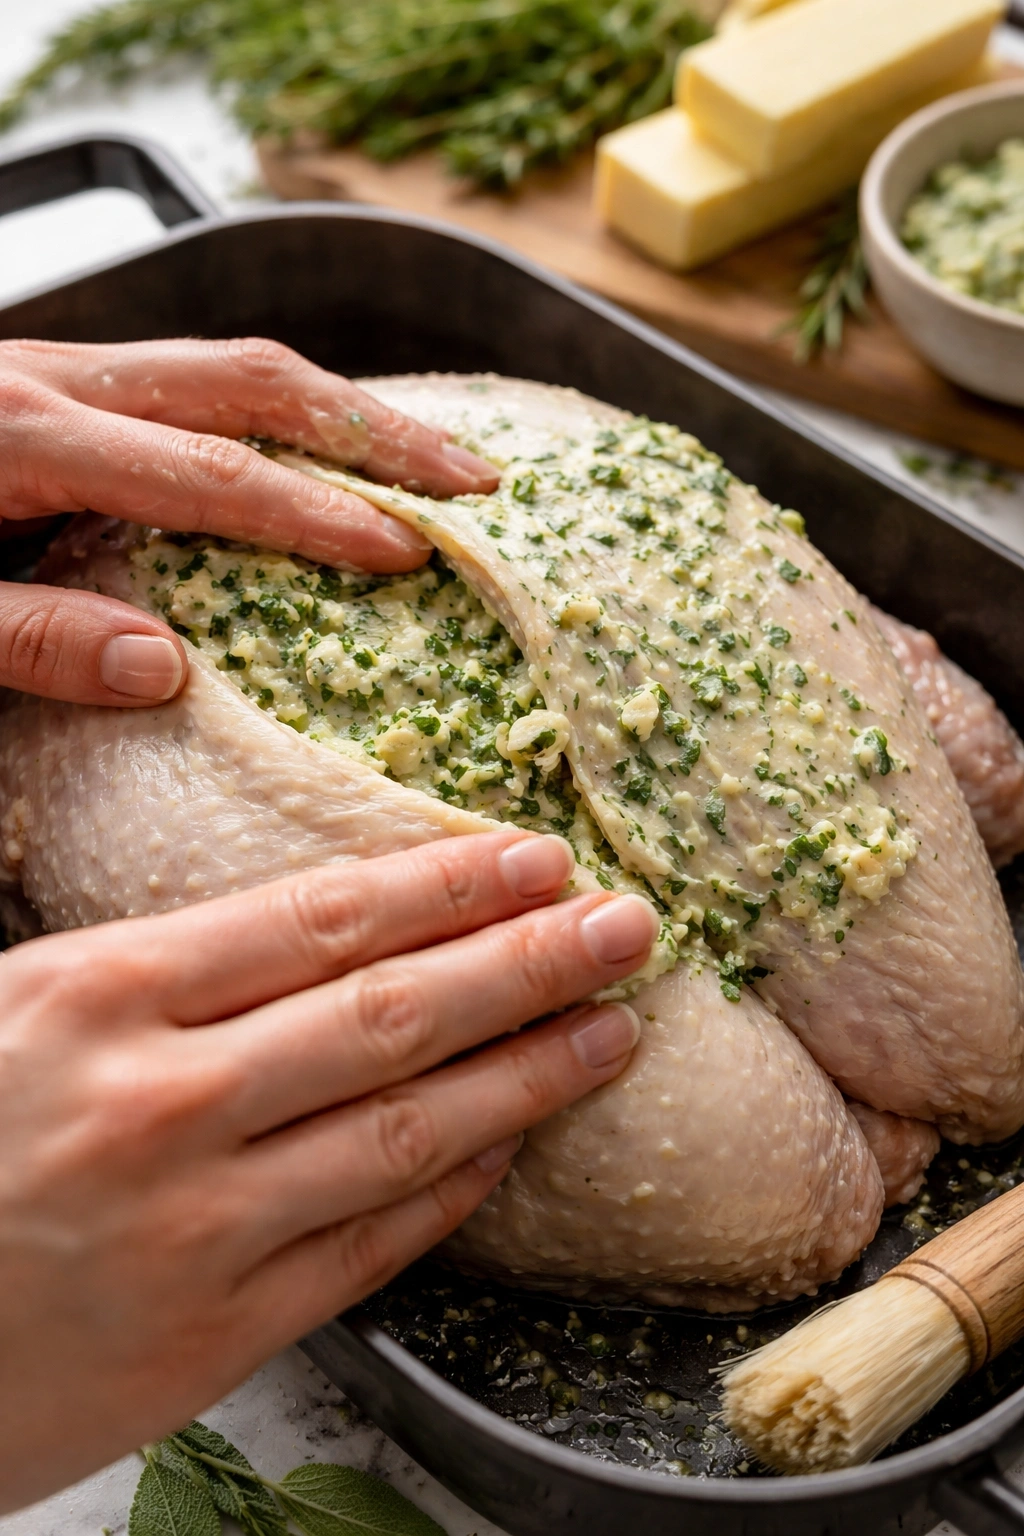
### 4. Rubbing The Herb-Infused Butter For Crispy Golden Skin
Want perfectly crispy skin every time? Pin this compound butter secret!
To elevate your turkey’s flavor profile while protecting the delicate breast meat, introducing high-quality fats is a non-negotiable step. When evaluating **butter vs oil for skin** application, it is important to understand how they interact with moisture. Oils provide an excellent surface barrier for crispness, but an **herb-infused butter** delivers deep, unmatched richness that sinks straight into the lean meat fibers.
The strategy here requires a dual-layered approach. By massaging an **herb butter rub** directly onto the breast meat *underneath* the skin, you ensure constant fat rendering that prevents the lean white meat from drying out. Meanwhile, coating the exterior skin with the remaining fat accelerates the **Maillard reaction**, producing a crisp, golden brown exterior that seals in flavor.
#### Ingredients
– 1 cup (2 sticks) **unsalted butter**, softened to room temperature
– 3 tablespoons finely chopped fresh sage, thyme, and rosemary
– 1 tablespoon minced garlic (about 3 **garlic cloves**)
– Zest of 1 lemon (to create a beautiful **citrus-scented** profile)
– 1 high-quality silicone basting brush
– 1 small mixing bowl and a sturdy fork
#### Directions
1. **Mash** the softened butter, chopped herbs, minced garlic, and lemon zest together in a small bowl until it forms a cohesive, smooth **herb butter rub**.
2. **Loosen** the skin over the turkey breast gently by sliding your fingers between the skin and the meat, starting from the neck cavity end. Be incredibly careful not to tear the skin.
3. **Insert** about half of the compound butter directly underneath the loosened skin, massaging it from the outside to spread it evenly over the breast meat.
4. **Rub** the remaining herb butter generously over the entire exterior of the turkey, massaging it into the legs, wings, and sides to ensure it is **perfectly seasoned**.
5. **Melt** an additional 2 tablespoons of plain butter to use later for **basting** if the skin looks dry during the roasting process, though the dry-brine method often makes this unnecessary.
> **Pro-Tip:** When choosing between **butter vs oil for skin**, butter wins for flavor, but it contains water and milk solids that can burn. By applying the butter *underneath* the skin, you ensure incredible **aromatic diffusion** directly into the meat while **rendering fat** outward, yielding the ultimate **crispy turkey skin**.

—
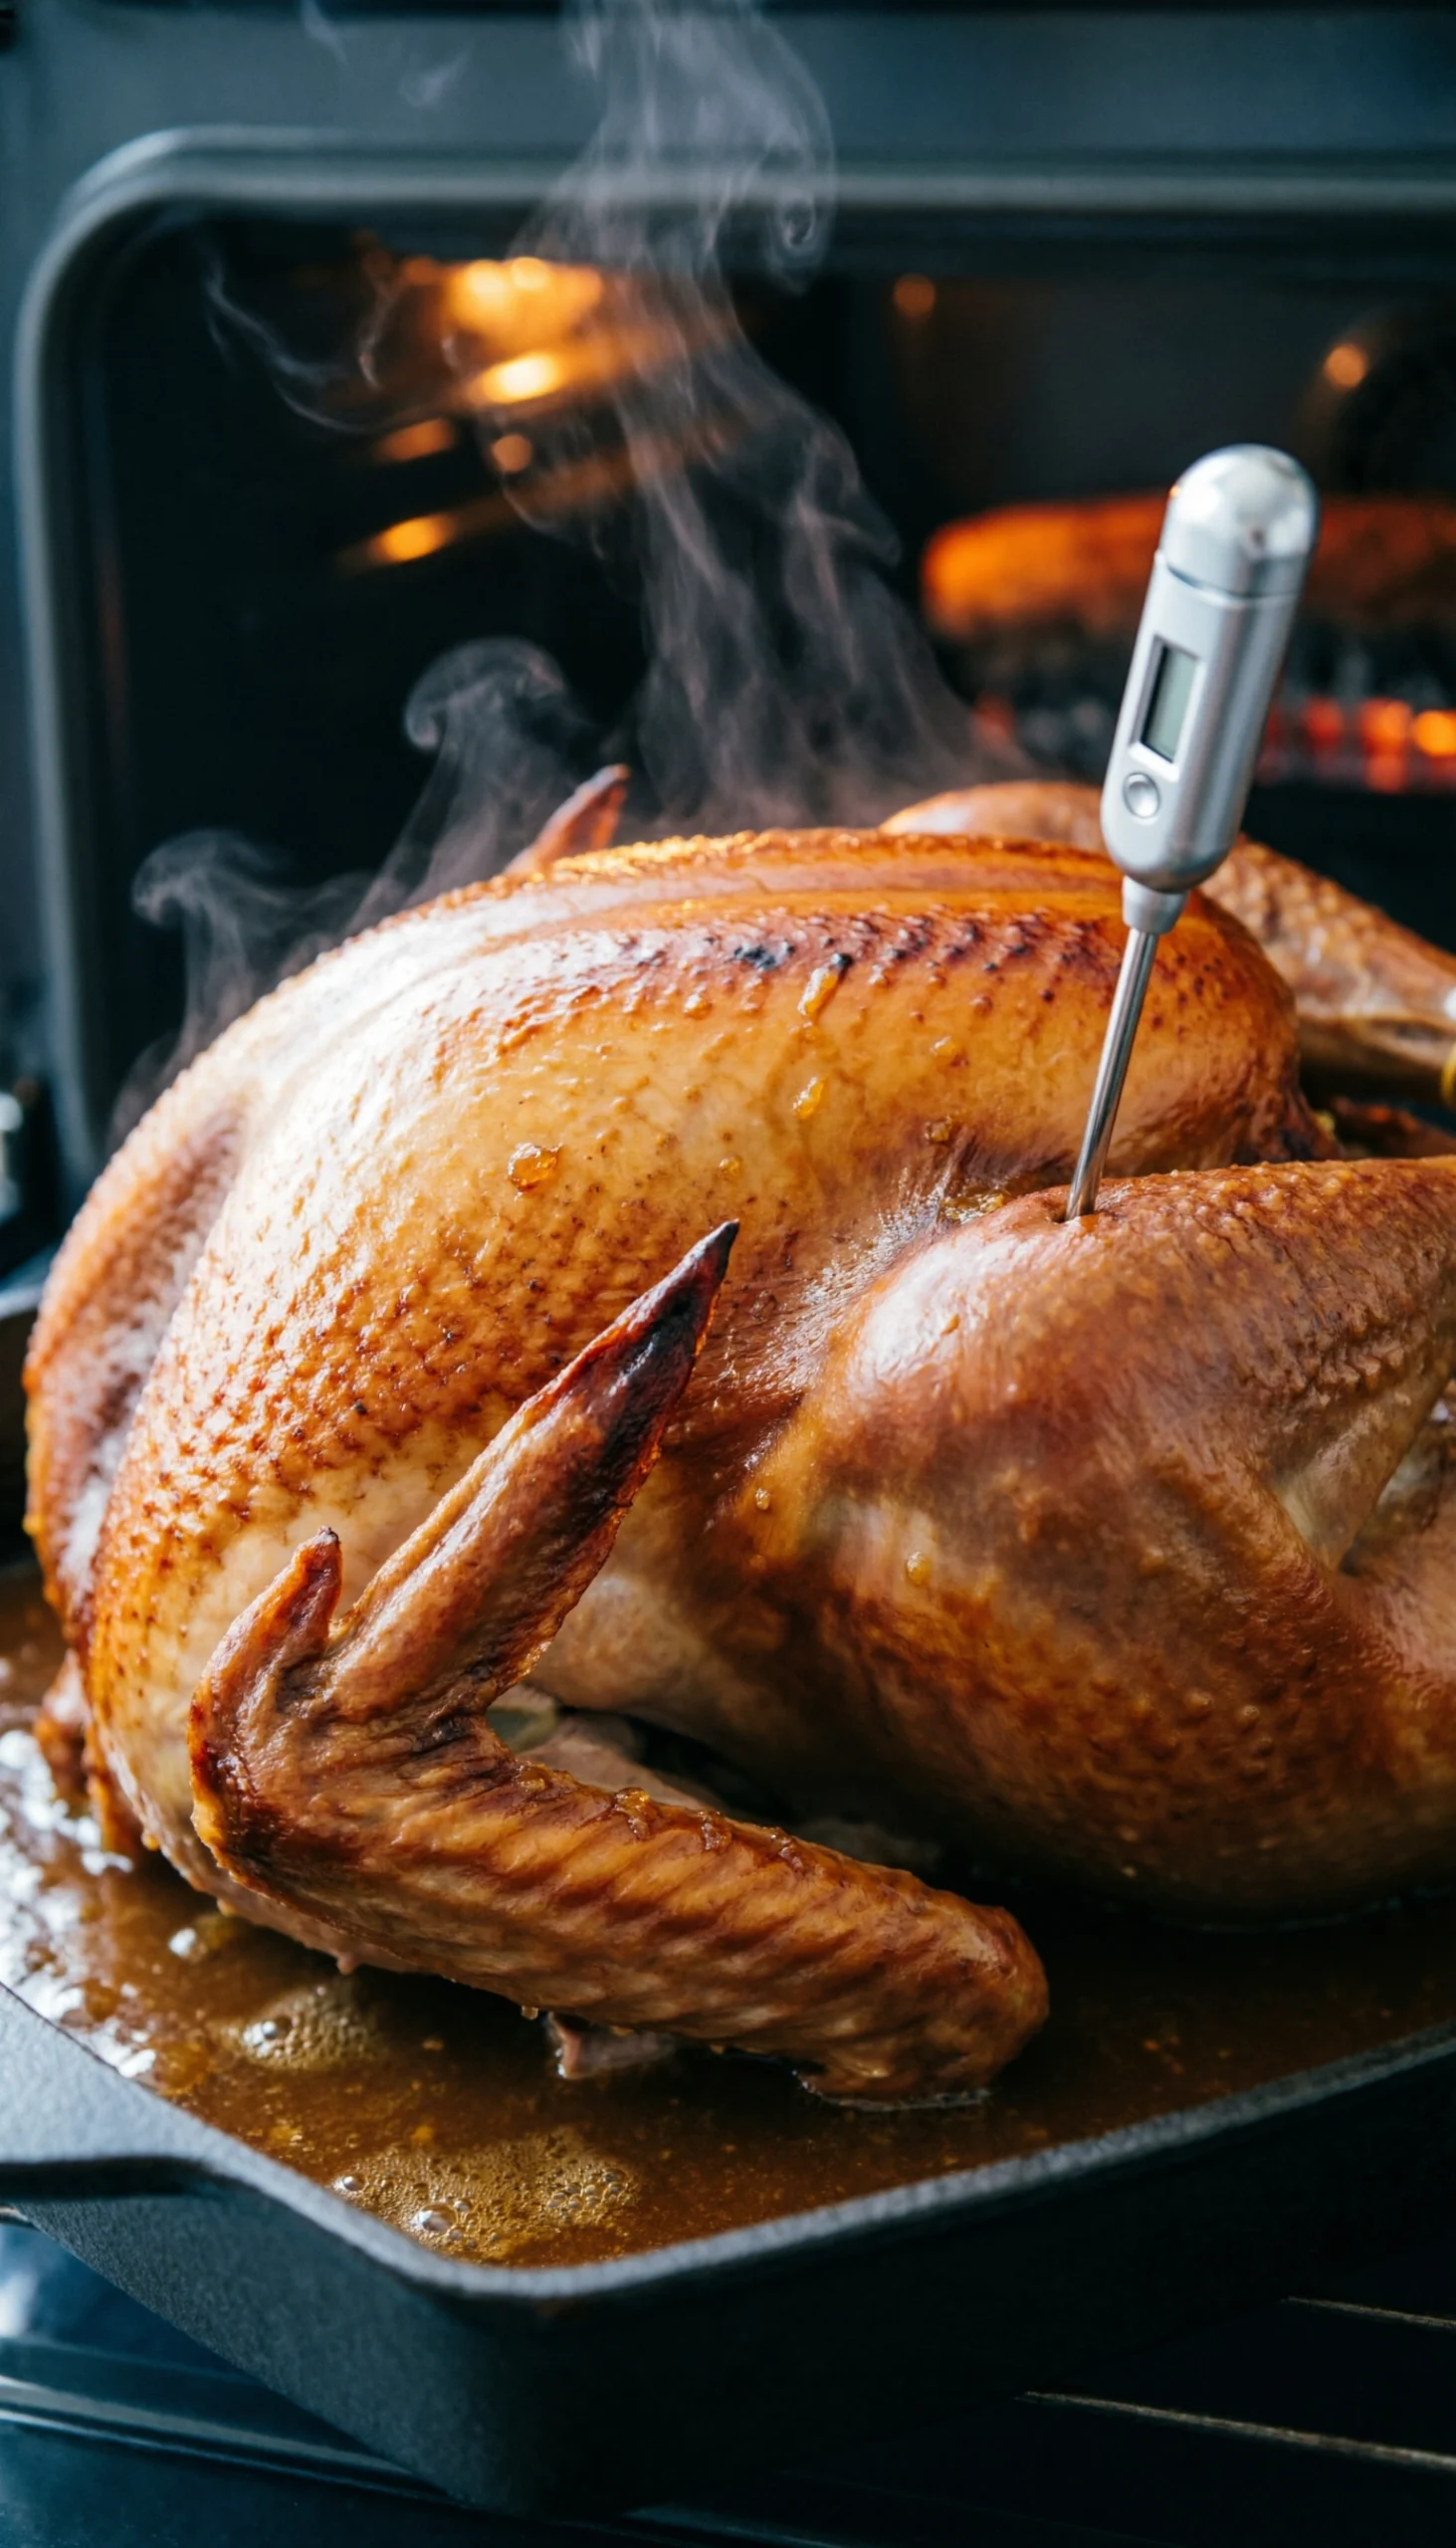
### 5. Roasting And Monitoring Internal Temperature
Never serve dry turkey again! Pin this crucial temperature guide to your boards.
Now comes the core phase: the actual cooking. When the bird goes into the oven, you must manage how heat moves through the **thigh and breast** muscles. While a general **minutes per pound** calculation is helpful for scheduling your day, relying on it blindly to determine doneness is a recipe for disaster. The only way to guarantee perfectly cooked meat is to measure the internal temperature with a high-quality digital tool.
To achieve total accuracy, you must understand **where to insert thermometer in turkey**. The target is the absolute thickest part of the inner thigh, making sure the metal probe never touches the bone. According to **USDA guidelines**, the magic milestone for safety and ideal texture is **165 degrees fahrenheit**. Pulling the bird at this exact milestone protects your dinner from an **overcooked turkey rescue** scenario.
#### Ingredients
– The fully prepped, butter-rubbed **festive roast**
– 1 high-quality, fast-reading **instant read thermometer**
– 1 large roll of heavy-duty **aluminum foil**
– 1 pair of heat-resistant oven mitts
– **Turkey baster** (optional, for gathering drippings)
#### Directions
1. **Roast** the turkey in the preheated 325-degree oven. Calculate a rough estimate of 13 to 15 **minutes per pound** for an unstuffed bird.
2. **Monitor** the skin after the first 90 minutes. If the breast skin is browning too rapidly, **tenting** it loosely with a sheet of **aluminum foil** will stop the **Maillard reaction** and prevent burning.
3. **Rotate** the roasting pan 180 degrees halfway through the estimated cooking time to ensure the bird is **evenly cooked** despite oven hot spots.
4. **Insert** the **meat thermometer** into the thickest part of the thigh, being incredibly careful not to touch the bone, as bones conduct heat differently and give false high readings.
5. **Check** the breast meat temperature as well. The breast should register 155-160°F, while the thigh should register 165-170°F.
6. **Remove** the turkey from the oven immediately once the thigh hits exactly 165°F to ensure you retain all the **juicy turkey meat**.
> **Pro-Tip:** Relying on the plastic pop-up timer that comes with the bird is the leading cause of dry meat. Investing in a professional-grade **food thermometer accuracy** tool is mandatory. Pulling the bird at 165°F accounts for the fact that the intense **thermal mass** of the bird will continue to cook it as it rests.

—
### 6. Resting The Bird For Carry-Over Cooking
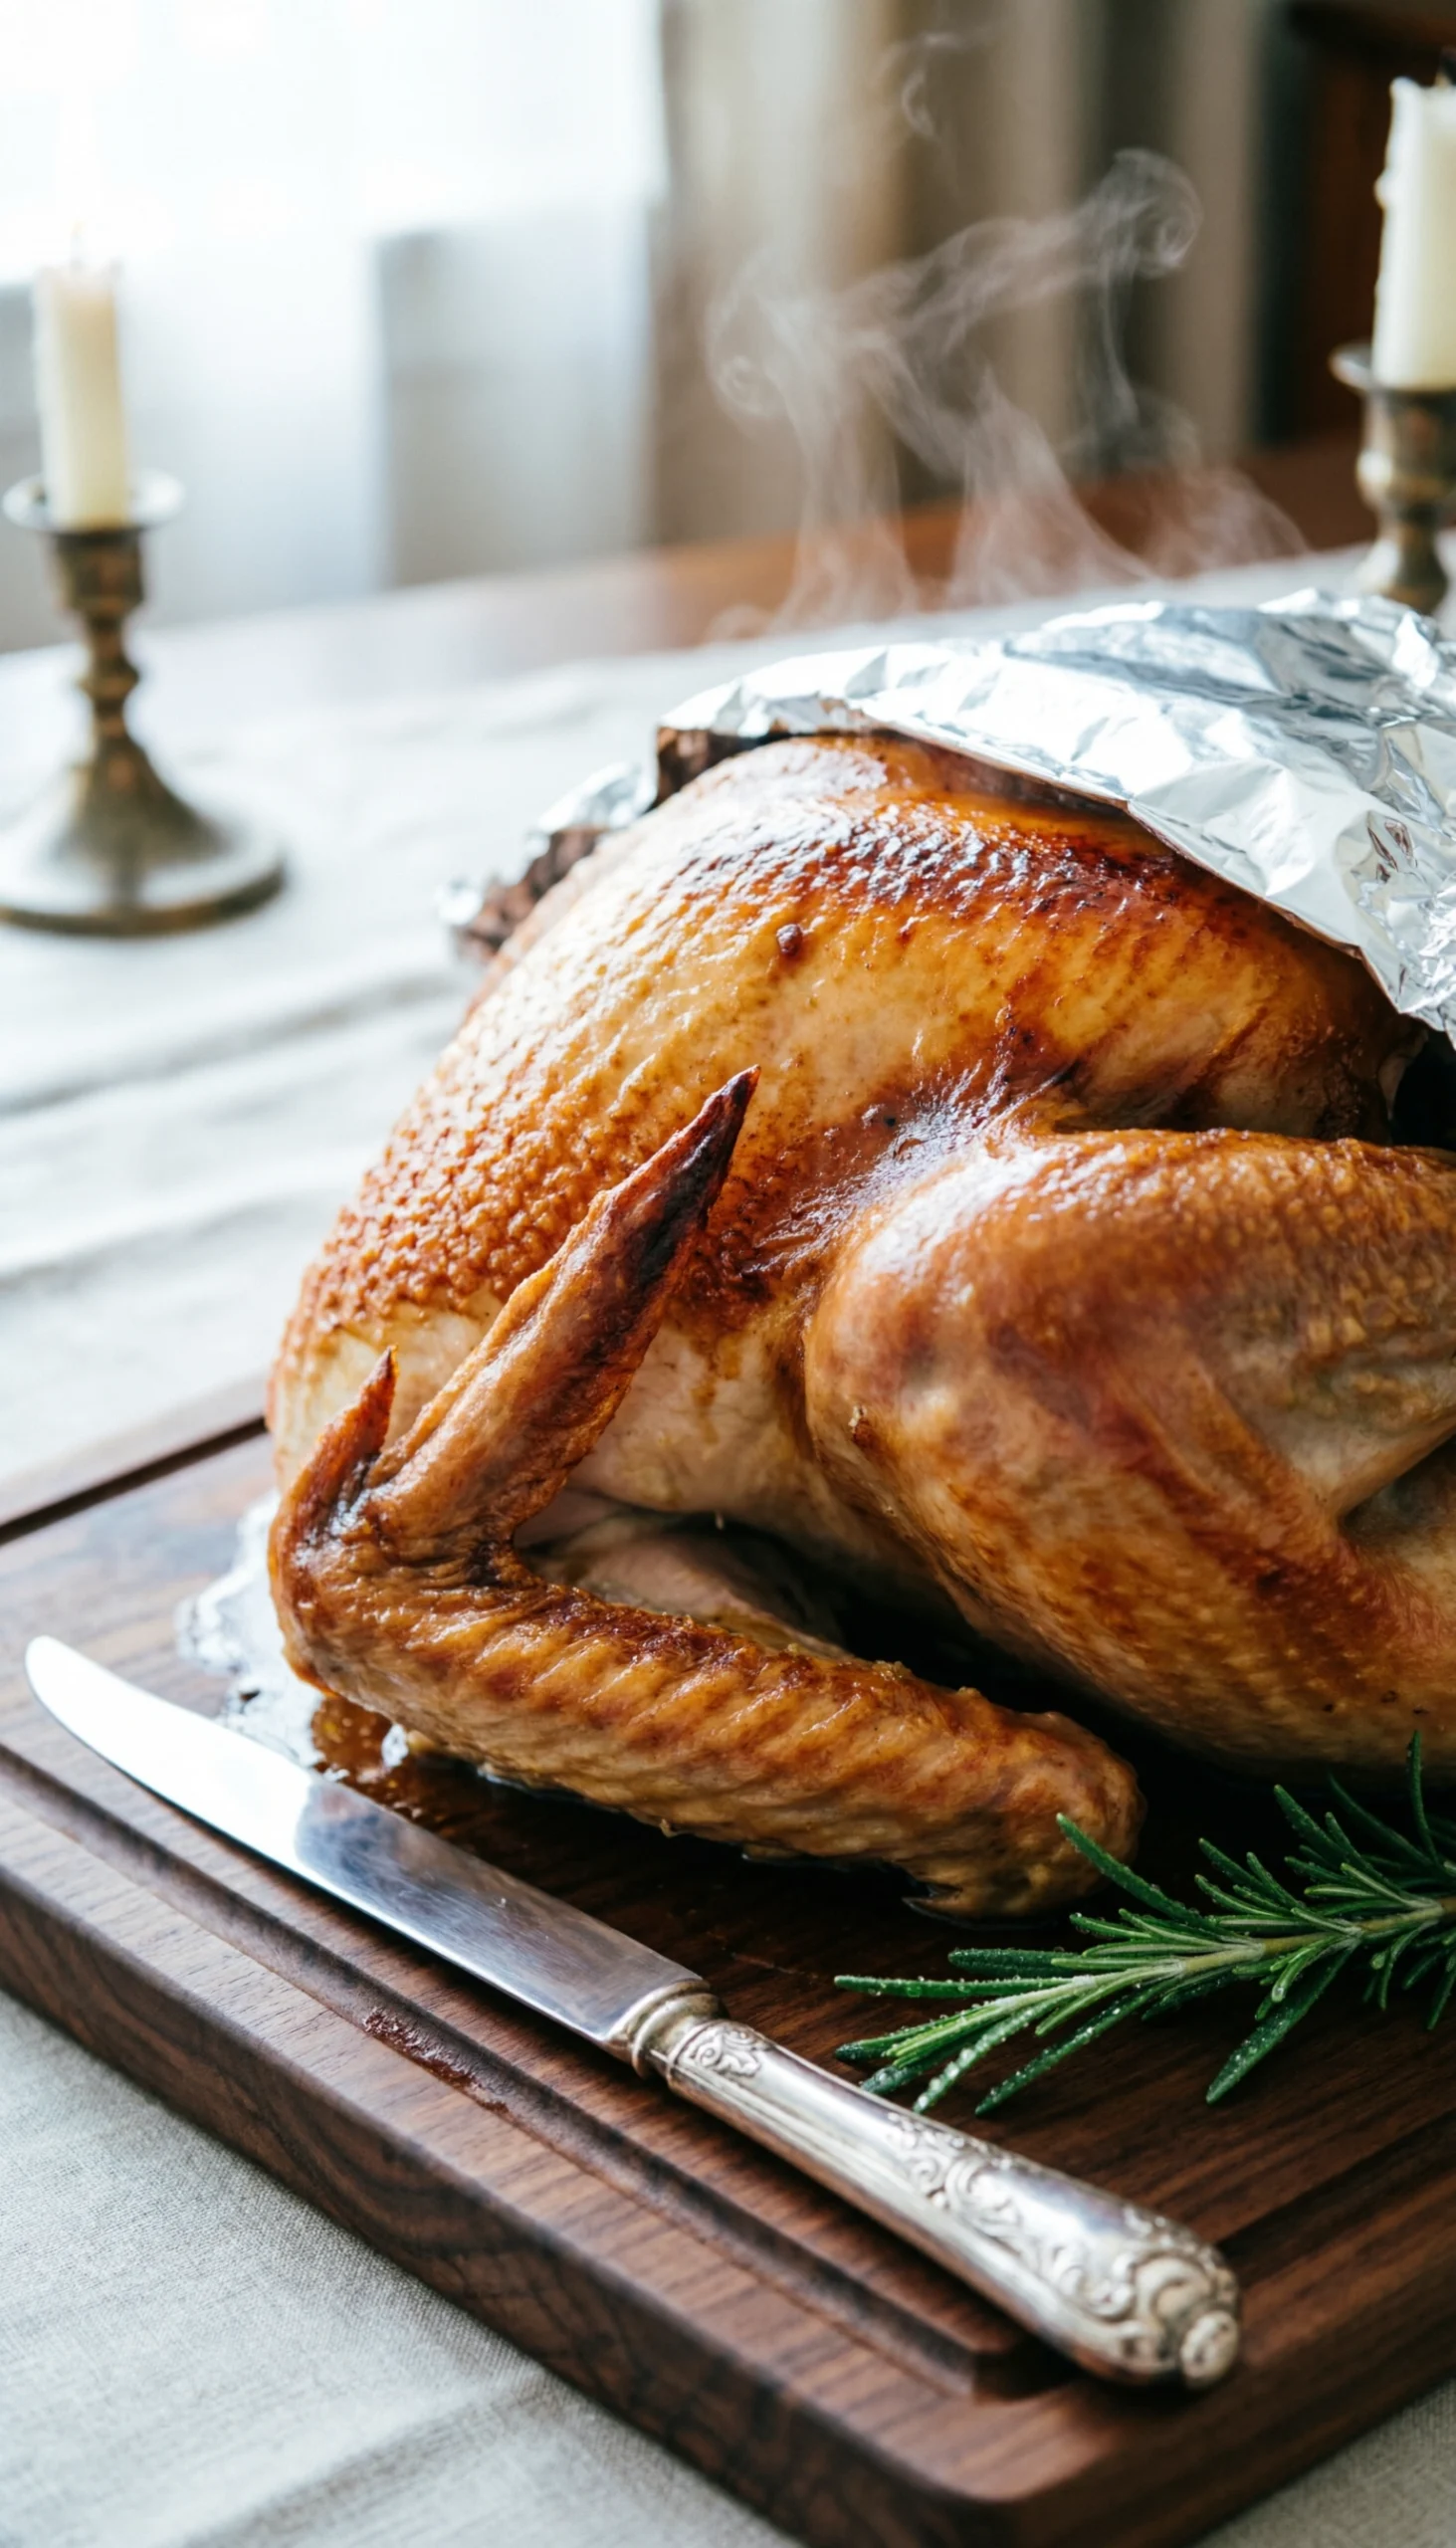
Don’t slice yet! Pin this essential resting technique to lock in the juices.
Pulling your holiday centerpiece out of the oven is a major milestone, but the cooking process is not actually finished yet. The deep internal sections of the bird hold an incredible amount of latent heat energy. If you carve into the meat immediately, the high pressure inside the cells will force all the natural juices to quickly run out onto your **cutting board**, leaving you with dry meat.
To maximize juice retention, you must let the bird rest undisturbed. This crucial phase allows **carry-over cooking** to finish cooking the dense core safely while the exterior temperature drops slightly. As the muscle fibers cool down and relax, they reabsorb those precious liquids, ensuring your meat stays moist and succulent throughout dinner.
#### Ingredients
– Your perfectly roasted **holiday main dish**
– 1 extra-large wooden **cutting board** with a deep juice groove
– 1 large sheet of **aluminum foil**
– 1 pair of heavy-duty meat-lifting forks or sturdy spatulas
#### Directions
1. **Lift** the roasted turkey carefully from the roasting rack using meat-lifting forks, tilting it slightly to let any cavity juices drain back into the pan (save these for the **rich pan drippings** gravy).
2. **Transfer** the turkey onto your large wooden **cutting board**.
3. **Tent** the turkey very loosely with **aluminum foil**. Do not wrap it tightly, or the steam will destroy your perfectly **crisp salty skin**; just drape it to hold ambient heat.
4. **Rest** the turkey undisturbed for an absolute minimum of 45 minutes, up to 1 full hour.
5. **Monitor** the ambient temperature if you wish; you will see it rise several degrees before slowly dropping, confirming the cooking process has concluded safely.
> **Pro-Tip:** Skipping this step guarantees a dry bird. Through the science of **carry-over cooking**, the residual heat continues to cook the center while the meat fibers relax. If you carve immediately, the pressurized boiling juices will bleed out onto the board. Resting allows **moisture retention science** to work, pulling the juices back into the center of the muscle fibers.

—
### 7. Carving And Whisking The Rich Pan Drippings Gravy
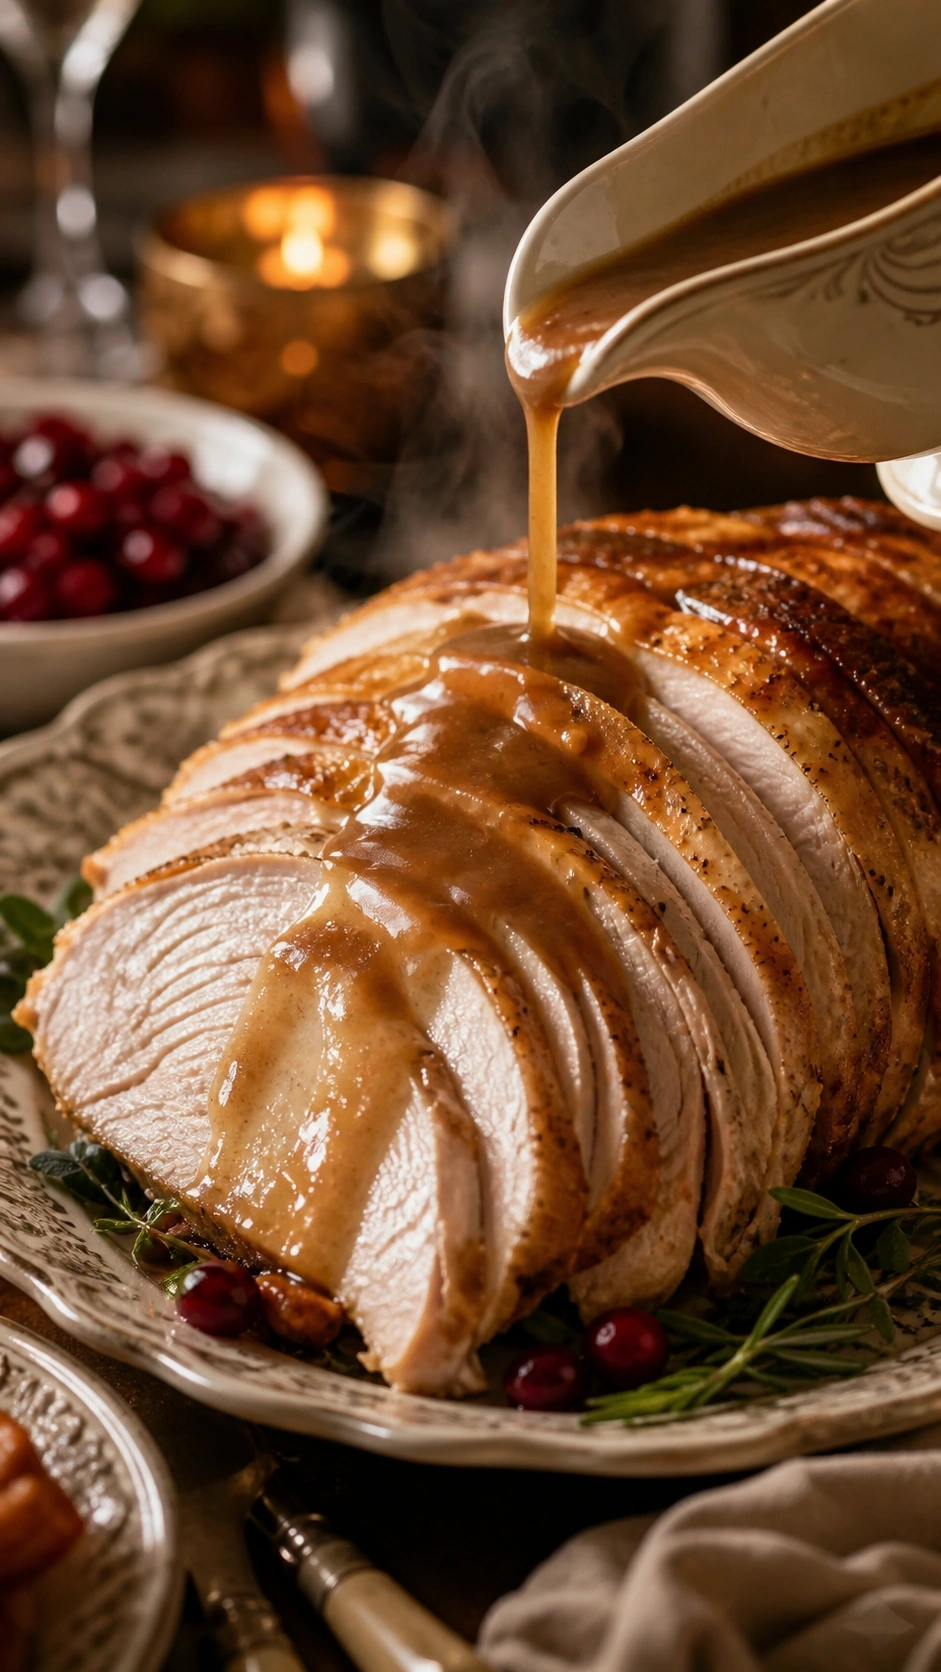
Finish strong! Pin this carving and gravy mastery guide for the big day.
The final step of your holiday culinary journey is transforming your beautifully rested bird into individual serving portions while making a smooth sauce. Learning **how to carve a roast turkey** using an **expert carving technique** ensures that every guest gets a perfect balance of tender meat and crisp skin. Instead of slicing the breast directly on the carcass, removing the entire breast section first allows for clean, uniform slices.
While the meat rests, you can focus on the savory goldmine left in the bottom of your roasting pan. The concentrated **pan drippings** hold incredible caramelized sugars and proteins, known as fond. By **whisking** these pan remnants into a simple flour-and-fat roux, you create a rich, **emulsified gravy** that brings the whole holiday meal together beautifully when served from a warm **gravy boat**.
#### Ingredients
– The fully rested **perfect holiday bird**
– All reserved **pan drippings** from the roasting pan
– 1/4 cup all-purpose flour
– 2 cups turkey or chicken stock (warm)
– 1 sharp, long **carving knife** and meat fork
– 1 fine mesh strainer and an elegant **gravy boat**
#### Directions
1. **Carve** the turkey by slicing down through the skin between the breast and the leg. Pop the thigh joint backward out of the socket to remove the entire leg and thigh piece in one clean motion.
2. **Slice** cleanly down one side of the breastbone, following the curve of the ribs, to remove the entire turkey breast in one massive lobe. Slice the breast crosswise on the cutting board for perfectly portioned, skin-on pieces.
3. **Deglaze** your roasting pan by placing it directly on two stovetop burners over medium heat. Pour in a splash of stock and scrape up all the browned bits (**fond development**) with a wooden spoon.
4. **Strain** the pan drippings into a fat separator. Return exactly 1/4 cup of the separated fat to a saucepan over medium heat.
5. **Whisk** the flour into the hot fat constantly for 2 minutes to create a blonde roux and cook out the raw flour taste.
6. **Pour** the defatted drippings and warm stock slowly into the roux, **whisking** vigorously to achieve a perfect, **emulsified gravy**. Simmer until thickened, then pour into a warm **gravy boat**.
> **Pro-Tip:** The greatest **expert carving technique** is never to slice the breast meat while it is still attached to the carcass. Removing the breast in one whole piece and slicing it crosswise on the board ensures every single guest gets a piece of that coveted **golden brown exterior** skin along with perfectly tender meat.

## Key Takeaways: Your Quick Guide to the Perfect Roast Turkey Recipe
* **Dry Brining Beats Wet Brining Every Time** – Utilizing a heavy coat of kosher salt and resting the bird uncovered in the fridge for 24-48 hours is the ultimate **dry turkey solution** that guarantees unbelievably crispy skin without the soggy mess of a wet brine bucket.
* **Respect the Refrigerator Thaw** – Never leave a frozen turkey on the counter. Follow **safe thawing practices** by allowing 24 hours in the fridge for every 4-5 pounds of meat to prevent harmful bacterial growth.
* **The 165°F Golden Rule** – Ignore the plastic pop-up timer. Pull your bird from the oven when an **instant read thermometer** inserted into the deepest part of the thigh reads exactly 165°F, adhering perfectly to **USDA guidelines**.
* **Butter Goes UNDER the Skin** – To prevent burning the milk solids in the butter while ensuring the breast meat stays infused with flavor, massage your herb butter directly onto the meat underneath the skin.
* **Resting is Not Optional** – The most critical step to avoid bleeding out all the flavorful juices is to **rest the turkey** for a minimum of 45 minutes, allowing **carry-over cooking** to finish the job while the meat fibers relax and reabsorb moisture.
* **Save the Pan Drippings for Emulsified Gravy** – Don’t wash away the gold! The browned bits left in the pan (fond) combined with a simple roux will rescue any **lumpy gravy solution** panic, creating a luxurious sauce that ties the whole meal together.
## People Also Ask About The Perfect Roast Turkey Recipe
### How long to roast a turkey per pound?
**A general rule of thumb is to roast an unstuffed turkey for 13 to 15 minutes per pound at 325 degrees Fahrenheit.** However, this timing can vary wildly based on your oven’s calibration and the starting temperature of the bird. You should always use this math as a rough estimate for planning your day, but rely entirely on a digital meat thermometer hitting exactly 165°F in the thigh to determine true doneness.
### What temperature should a turkey be cooked to?
**The USDA food safety guidelines mandate that a whole turkey must reach an internal temperature of 165 degrees Fahrenheit.**
You must take this reading in the thickest part of the thigh and the thickest part of the breast, ensuring the probe does not touch the bone. Because of carry-over cooking, pulling the bird right at 165°F will allow it to safely rise to about 170°F while it rests on the cutting board.
### Should I brine my turkey?
**Yes, brining your turkey is the single most effective way to guarantee moist, flavorful meat.** While you can choose a wet brine, a dry brine (coating the bird in kosher salt and letting it sit in the fridge) is highly recommended. Dry brining draws out the natural juices, mixes with the salt, and reabsorbs into the muscle fibers, dramatically improving the texture and flavor of the **oven-baked poultry**.
### Why is my turkey dry?
**Your turkey is dry primarily because it was left in the oven too long or it was not allowed to rest before carving.** The classic plastic pop-up timers often don’t trigger until the meat hits 180°F or higher, completely drying out the breast. To implement a true **dry turkey solution**, pull the bird at 165°F, and always let it rest for 45 to 60 minutes so the muscle fibers can reabsorb the pressurized juices.
### Do I need to wash the turkey before cooking?
**No, you should never wash a raw turkey under the sink faucet.** According to stringent **cross-contamination prevention** protocols, washing poultry sprays microscopic droplets of bacteria up to three feet around your kitchen sink, contaminating countertops and other foods. Instead, simply remove the turkey from the packaging, drain the juices, and thoroughly pat the skin dry with heavy-duty paper towels.
### How do I get crispy turkey skin?
**To get perfectly crispy turkey skin, you must completely dehydrate the skin before roasting by utilizing a dry brine.** Leave the salted turkey uncovered in the refrigerator for 24 to 48 hours. The cold circulating air dries out the skin like parchment paper. Additionally, rubbing fat (like butter or oil) on the exterior promotes the **Maillard reaction**, resulting in a beautiful, shattering crust.
### Can I roast a turkey the day before?
**Yes, you can roast a turkey the day before, but the best method is to carve it completely and store the sliced meat.** Do not try to reheat a whole intact roasted turkey, as it will dry out terribly. Instead, carve the meat, arrange it in an oven-safe dish, drizzle generously with warm chicken stock or **pan drippings**, cover tightly with foil, and gently reheat at 300°F until warmed through.
### What is the spatchcock turkey method?
**The spatchcock method involves removing the turkey’s backbone with heavy poultry shears and flattening the bird before roasting.** This advanced **surface area roasting** technique drastically reduces cooking time (often roasting a whole bird in under 90 minutes) and exposes all the skin evenly to the heat source, ensuring perfectly crisp skin and incredibly juicy breast and thigh meat simultaneously.
### Is it better to cook stuffing inside the turkey?
**It is generally recommended to cook your stuffing separately in a baking dish (as “dressing”) rather than inside the turkey cavity.** Stuffing inside the cavity must reach 165°F to be safe to eat, as it absorbs raw meat juices. By the time the dense center of the stuffing reaches that temperature, the turkey breast meat will be severely overcooked. A separately baked dressing ensures a **failproof method** for both.
### How to make turkey gravy from pan drippings if I don’t have enough?
**If your roasting pan didn’t yield enough drippings, supplement the volume by whisking in high-quality, low-sodium chicken or turkey stock.** First, create your butter and flour roux. Then, pour in whatever **rich pan drippings** you salvaged, and make up the difference with the warmed stock. Enhance the flavor profile with a splash of dry white wine, a dash of Worcestershire sauce, or fresh herbs.
## Final Thoughts on Mastering the Perfect Roast Turkey Recipe
Mastering the **perfect roast turkey recipe** doesn’t require a culinary degree, magic tricks, or waking up at 3:00 AM in a panic. As we’ve explored through these foolproof steps, creating the ultimate **holiday main dish** is entirely about preparation, respecting the science of the meat, and removing the guesswork. By leaning into dry brining, maintaining strict temperature control with an accurate meat thermometer, and having the patience to let the bird rest, you are practically guaranteed a **mouthwatering result**.
Remember that the anxiety surrounding the **traditional thanksgiving turkey** usually stems from outdated methods and arbitrary timing charts. When you pivot to relying on internal temperature and understanding how **carry-over cooking** works, you take absolute control of the process in your kitchen. Your family will marvel at the shattering, golden skin and the incredibly juicy meat, completely unaware of how stress-free the process actually was for you behind the scenes.
Now that you have the ultimate blueprint for your poultry centerpiece, it’s time to map out the rest of your **thanksgiving dinner**. The oven schedule might be tight, but with the turkey resting comfortably on the carving board for an hour, you’ll have the perfect window to bake those casseroles and whisk together your gravy.
What is the one side dish you absolutely cannot live without when you serve your beautiful roast turkey? Let me know in the comments below, and happy roasting!
Last update on 2026-06-01 at 18:48 / Affiliate links / Images from Amazon Product Advertising API
