
As an Amazon Associate BakingBakewareSets.com earns from qualifying purchases.
Authentic Ciabatta Bread Recipe: 7 Secrets to Airy Crumb
Are you tired of baking flat, dense bread with zero oven spring? Handling highly wet, sticky dough often leaves home bakers deeply frustrated. Mastering the Authentic Ciabatta Bread Recipe ends this struggle forever.
An authentic ciabatta bread recipe is a traditional Italian formula utilizing a high-hydration dough and an overnight biga preferment. Baked on a preheated baking steel with active steam, this technique develops a delicate gluten network, resulting in a slipper-shaped loaf with a crisp crust and airy, honeycomb crumb.
Drawing from comprehensive analysis of established artisan panificio methodologies, this guide reveals professional baking secrets. You will discover exactly how to handle wet dough without deflation. Follow these verified techniques to confidently bake bakery-quality artisan loaves in your home kitchen today.
☰ Table of Contents ▼
show
What Is an Authentic Ciabatta Bread Recipe?
Many home bakers struggle with a flat ciabatta loaf exhibiting no oven spring. Understanding the history and science of this bread solves these structural failures. Invented in 1982 by Arnaldo Cavallari in Adria, Veneto, this classic Italian loaf was developed specifically as a rustic alternative to the French baguette. The technical definition of an authentic ciabatta relies entirely on artisan methodology, explicitly rejecting the artificial dough conditioners found in commercial supermarkets. By managing precise amylase enzyme activity and prioritizing starch gelatinization through extreme heat, bakers create that signature airy texture. The traditional Italian panificio methodology transforms basic flour, water, yeast, and salt into a culinary masterpiece.
7 Secrets to an Airy Crumb: Your Authentic Ciabatta Bread Recipe
Achieving that highly coveted open crumb structure requires moving beyond generic baking instructions. This comprehensive procedure breaks the complex artisan methodology into seven actionable secrets for handling a high hydration dough. We emphasize measuring ingredients using precise baker’s percentages in grams to guarantee consistent results. By mastering careful dough manipulation without degassing and utilizing optimal thermal equipment setups, you ensure massive oven spring. These highly technical, master baker techniques replace vague kneading instructions, effectively transforming an impossibly wet mixture into a structured, beautifully aerated Italian slipper bread.
1. Mix an Overnight Biga Preferment

Save this essential overnight preferment step to your Artisan Baking board!
The foundation of an aromatic fermented flavor begins with an overnight biga preferment. While some recipes use a wet poolish starter, a stiff biga (mixing at roughly 60-70% hydration) is universally considered superior for ciabatta’s structural integrity. This preferment inoculation percentage is critical; employing a 12-16 hour cold retard utilizes the fermentation temperature coefficient Q10 to develop intense flavor without exhausting the yeast.
Ingredients
- 150g strong bread flour (12-14% protein content for optimal gluten structure)
- 100g room temperature water (68°F/20°C to control yeast activation)
- 0.5g instant dry yeast (weighed on a highly accurate precision digital kitchen scale in grams)
Directions
- Mix the flour, water, and instant dry yeast in a small bowl until a shaggy, stiff dough forms.
- Cover the bowl tightly with plastic wrap to prevent a dry skin from forming.
- Bulk ferment at room temperature (around 70°F) for 12 to 16 hours until the biga is domed, highly aromatic, and filled with a webbed network of bubbles.
Pro-Tip: Proper proteolysis during cold fermentation is critical here. If your kitchen is warmer than 72°F, let the biga sit at room temperature for just 2 hours, then move it to the refrigerator overnight to prevent overfermentation and preserve yeast vitality.

2. Use High-Protein Tipo 00 Flour

Pin this flour selection guide so you never buy the wrong bread flour again!
Flour selection fundamentally dictates your dough rheology and extensibility. A traditional ciabatta utilizes Tipo 00 flour or a very strong bread flour containing a flour protein percentage of 12 to 14 percent. Standard all-purpose flour lacks the glutenin and gliadin cross-linking capacity necessary to support an 80% hydration dough. High protein content retains delicate trapped gas bubbles, preventing the wet dough from collapsing during the final proof.
Ingredients
- 350g authentic Italian Tipo 00 flour (or substitute with a very strong bread flour)
- 10g fine sea salt (essential for gluten structure and flavor)
- The entire ripened biga preferment from step 1
- 1g active dry yeast (or instant dry yeast)
Directions
- Autolyse flour and water by whisking the Tipo 00 flour and most of your final water together in a large mixing bowl.
- Let the mixture rest for 30 minutes to allow the flour to fully hydrate and begin natural gluten development before adding salt or yeast.
- Tear the ripened biga into small, golf-ball-sized chunks and drop them into the hydrated flour mixture for easier incorporation.
Pro-Tip: The secret to an authentic ciabatta bread recipe’s chew is maintaining a dough viscoelastic balance. Tipo 00 flour is milled extremely fine but retains high protein, giving you maximum extensibility (stretch) without tearing when forming those large signature holes.

3. Hydrate Dough to Exactly 80 Percent

Save these baker’s math ratios to your Recipe Reference board!
The defining characteristic of this artisan hearth bread is a heavily 80 percent hydration level. Using baker’s percentages, we calculate this precisely: your total flour is 500g (150g from the biga plus 350g main), and your total water is 400g (100g biga plus 300g main). Dividing 400g by 500g gives exactly 80%. Mastering this high hydration dough is mandatory to produce large irregular alveoli (holes) in the final crumb.
Ingredients
- 300g warm water (divided into 280g for mixing and 20g held back for mixing in the salt later)
- The autolysed flour and biga mixture
- Heavy-duty stainless steel Danish dough whisk (for cutting through wet, sticky dough)
Directions
- Pour 280g of water over the biga and autolysed flour mixture.
- Mix aggressively using a pincer method with your fingers, or use a Danish dough whisk, until the biga is completely homogenized into the fresh dough.
- Dissolve your 10g of salt into the remaining 20g of water, pour it over the dough, and continue mixing until the dough is uniformly shiny, wet, and shaggy.
Pro-Tip: If this is your first time handling a wet sticky dough, hold back an extra 20g of water (dropping to about 76% hydration). Dough rheology changes based on your kitchen’s humidity; it’s always easier to add a splash of water later than it is to fix a dough that has turned to liquid.

4. Develop Gluten Through Stretch and Fold

Pin this essential dough-handling technique to master high-hydration breads!
Traditional kneading destroys highly aerated bread structure. Instead, we stretch and fold dough to build a delicate gluten network. Because the ciabatta dough is too sticky to handle normally on a floured counter, we utilize hygroscopic gluten development principles. Time and hydration do the hard work for you. Always employ the wet-hand method to avoid dough tearing during the stretch and fold, preserving those expanding gas pockets.
Ingredients
- The fully mixed, shaggy ciabatta dough
- A small bowl of cold water (crucial for dipping hands to prevent sticking)
- A flexible curved plastic dough scraper (to cleanly release dough from the bowl edges)
Directions
- Let the mixed dough rest for 30 minutes in the bowl to relax the gluten.
- Dip your hands in cold water to prevent sticking, reach under one side of the dough, stretch it up until you feel resistance, and fold it completely over itself to the opposite side.
- Rotate the bowl 90 degrees and repeat the stretch and fold dough process for all four sides. This completes one “set” of folds.
- Complete 3 total sets of stretch and folds, spaced 30 minutes apart, until the dough transforms from a shaggy mess into a smooth, elastic ball that holds its shape.
Pro-Tip: If the dough is tearing during the stretch and fold, you are pulling too hard or not waiting long enough between sets. The goal is to align the gluten strands, not break them. Treat the dough gently to preserve the delicate gas bubbles forming inside.

5. Bulk Ferment and Coil Fold in a Container

Save this visual cue for perfect bulk fermentation to your Bread Making tips board!
Once initial gluten strength is established, you must bulk ferment at room temperature while managing ambient proofing humidity control. We transition to a specialized coil fold in a container for the later stages. Using a square cambro container naturally coaxes the wet mass into a rectangular block, making it drastically easier to divide later. A master baker targets a 50-75% volume expansion to ensure maximum gas retention in alveoli.
Ingredients
- The developed dough from step 4
- 1 tablespoon Extra Virgin Olive Oil (for lightly greasing the container)
- A clear, square 4-quart commercial dough fermentation container
Directions
- Transfer the dough into the lightly oiled square container, which will naturally help the dough form a rectangular shape for dividing later.
- Bulk ferment at room temperature (72°F/22°C) for 2 to 3 hours, executing one gentle coil fold at the 1-hour mark (lifting the dough from the center and letting the ends tuck under themselves).
- Stop bulk fermentation when the dough has increased in volume by about 75%, is extremely jiggly when shaken, and shows large gas bubbles resting just beneath the surface.
Pro-Tip: Do not let the dough fully double in size during bulk fermentation. Overproofed ciabatta signs include the dough collapsing instantly when touched. You want to leave some “food” (sugars) for the yeast so you get explosive oven spring later.

6. Transfer Gently to a Baker’s Couche

Pin this authentic Italian shaping technique for perfectly uniform loaves!
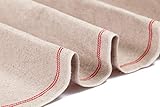
The shaping phase requires extreme delicacy to avoid degassing dough. You will transfer to a baker’s couche for the final proof. Utilizing coarse semolina flour for dusting prevents sticking, while the heavy linen proofing cloth physically supports the high-hydration dough sidewalls. Using a bench scraper to decisively split the puddle of dough forms the authentic slipper shaped loaf without crushing the airy interior.
Ingredients
- Generous amounts of bench flour and coarse semolina flour for dusting
- A heavy linen baker’s couche (proofing cloth) to support the dough’s shape
- A sharp metal dough bench scraper
Directions
- Heavily dust your countertop with a mixture of bread flour and semolina. Carefully turn the square container upside down and let gravity pull the dough out onto the flour—do not pull or rip it.
- Heavily dust the top of the dough. Using your metal bench scraper, decisively divide with a bench scraper straight down the middle to create two long, rectangular slipper shaped loaves.
- Carefully slide your hands under each loaf and transfer to a baker’s couche, pleating the heavy linen between the loaves to support their sidewalls.
- Dimple gently with fingertips to even out the shape, then cover and proof for 45 minutes while your oven preheats.
Pro-Tip: The linen baker’s couche is not just for aesthetics; the heavy fabric wicks away a microscopic layer of moisture from the dough’s surface. This slight drying effect prevents sticking and creates the foundation for a crispy crust. Never wash your couche with soap; just scrape it clean and air dry!
7. Bake on a Preheated Baking Steel with Steam

Pin the secret to a perfectly blistered crust to your Kitchen Hacks board!
Home ovens inherently lack the thermodynamics of commercial deck ovens. To fix a flat ciabatta loaf with no oven spring, you must utilize a preheated baking steel and inject steam with boiling water. A heavy baking steel provides superior thermal mass heat transfer over a thin pizza stone. Baking with steam delays the gelatinization of wheat starch on the crust, allowing the loaf to expand massively while causing crust blister micro-formation.
Ingredients
- A heavy-duty 3/8-inch baking steel (or a thick pizza stone) placed on the middle oven rack
- A heavy cast iron skillet filled with lava rocks (placed on the bottom oven rack for steam)
- 1 cup of boiling water
- A pizza peel or stiff piece of cardboard to transfer the loaves
Directions
- Preheat oven with baking steel and cast iron skillet at 475°F (245°C) for a full 60 minutes to ensure maximum thermal mass heat transfer.
- Gently roll the proofed loaves off the couche onto a piece of parchment paper resting on your pizza peel. Slide the loaves (on the parchment) directly onto the blazing hot baking steel.
- Immediately inject steam by carefully pouring the 1 cup of boiling water into the cast-iron skillet with the lava rocks. Shut the oven door quickly to trap the steam.
- Bake with steam for 15 minutes, then carefully remove the steam pan. Continue to bake until deeply golden brown for another 15-20 minutes, until the internal crumb temperature is 205-210°F.
- Cool completely on a wire rack for at least 2 hours before slicing to prevent a gummy interior.
Pro-Tip: The steam phase is non-negotiable for authentic ciabatta. Steam keeps the crust cool and pliable during the first 15 minutes, allowing the bread to expand massively (oven spring) before the crust sets. The moisture also causes crust blister micro-formation, resulting in that signature shatteringly crisp exterior.

Key Takeaways: Your Quick Guide to Authentic Ciabatta Bread Recipe
Executing a traditional ciabatta bread recipe in grams step by step requires remembering several critical variables simultaneously. To guarantee a high hydration dough yields a spectacularly open crumb structure, refer to this highly scannable summary. These foundational rules distill complex baking physics—like proteolysis and gelatinization—into field-tested, practical action items.
- Rely on an Overnight Biga: Traditional flavor and structural integrity rely on a 12-16 hour stiff biga preferment, rather than a wet poolish, to ensure the dough doesn’t collapse.
- Commit to High Hydration: True authentic ciabatta requires an 80 percent hydration dough; resist the urge to add excess flour during mixing, even when the dough feels excessively wet.
- Build Strength with Folds: Do not knead the dough; develop a delicate gluten network by utilizing the gentle stretch and fold and coil fold methods to trap fermentation gases.
- Watch the Volume, Not the Clock: Bulk ferment at room temperature until the dough increases by about 75% in volume and becomes extremely jiggly—do not let it fully double, or it will overproof.
- Shape Without Degassing: Transfer the dough to a linen baker’s couche and divide it with a bench scraper decisively; never punch down or roll the dough, which destroys the open crumb.
- Maximize Thermal Mass: Bake on a heavily preheated baking steel (475°F for one hour) to deliver the instant bottom heat required for explosive oven spring.
- Always Inject Steam: Utilize a cast iron steam pan with boiling water during the first 15 minutes of baking to ensure the crust remains pliable for expansion and develops micro-blisters.
People Also Ask About Authentic Ciabatta Bread Recipe
Even armed with a master baker technique, working with a highly aerated Italian loaf often raises specific troubleshooting questions. From flour selection to fixing a dense tight crumb, these answers resolve the most common uncertainties. Master these nuances to elevate your artisan hearth bread skills.
What flour is best for ciabatta bread?
The best flour for authentic ciabatta bread is high-protein Italian Tipo 00 flour or a very strong commercial bread flour (12-14% protein content).
Because ciabatta is an 80% high-hydration dough, you need a robust gluten network to trap expanding gases without collapsing. Standard all-purpose flour lacks the necessary protein strength, resulting in a flat, dense loaf that spreads out rather than springing upward in the oven.
Why is my ciabatta bread dense inside?
A dense, tight crumb in ciabatta is most commonly caused by over-handling the dough during shaping, adding too much bench flour, or under-fermentation.
To achieve a honeycombed interior, you must treat the aerated dough incredibly gently after bulk fermentation. Using a bench scraper to cut the dough—rather than tearing or kneading it—preserves the delicate gas pockets (alveoli). Additionally, ensure your biga starter is fully active and bubbly before mixing.
Is biga or poolish better for authentic ciabatta?
A traditional biga (a stiff preferment at 60-70% hydration) is universally considered better for authentic Italian ciabatta than a wet poolish.
While a poolish develops excellent flavor, a stiff biga adds crucial structural strength to the final, highly wet dough. The biga balances the extreme 80% hydration of the main dough mix, giving the final loaf the viscoelastic strength needed to hold its signature slipper shape without flattening.
How do you handle wet ciabatta dough without sticking?
To handle wet, sticky ciabatta dough without it adhering to your skin, always dip your hands and your bench scraper in cold water before touching the dough.
During the stretch and fold phase, water acts as a non-stick barrier. Never incorporate raw flour into the dough during the folding process, as this alters the baker’s percentage and results in tough, dry bread. Rely on speed, confident movements, and wet hands.
Do you need a baking stone to make ciabatta bread?
Yes, you need a preheated baking stone or a heavy-duty baking steel to achieve the rapid oven spring and crisp crust characteristic of authentic ciabatta.
Ciabatta dough requires intense, immediate thermal shock from the bottom to push the dough upward before the crust sets. A standard thin metal baking sheet cannot hold enough thermal mass, resulting in a pale crust and a much flatter, denser loaf.
How do you create steam in a home oven for bread?
To create effective steam in a home oven, place a heavy cast iron skillet filled with lava rocks on the bottom oven rack during the one-hour preheat phase.
Right after you load your ciabatta onto the baking steel, carefully pour one cup of boiling water over the hot lava rocks and immediately shut the door. The rocks create massive surface area for rapid evaporation, perfectly mimicking a commercial bakery’s steam injection system.
What is the difference between ciabatta and focaccia?
While both are high-hydration Italian breads, ciabatta is formed into individual free-standing slipper-shaped loaves and baked on a hot stone, whereas focaccia is baked flat inside a heavily oiled sheet pan.
Focaccia dough is generally enriched with large amounts of olive oil both inside the dough and pressed into the crust, yielding a softer, fried texture. Ciabatta is a leaner hearth bread characterized by a crispy, flour-dusted exterior.
Can you proof ciabatta bread in the refrigerator overnight?
Yes, you can utilize a cold retard by placing the shaped ciabatta loaves on their couche, wrapped in plastic, in the refrigerator overnight.
Cold fermentation dramatically enhances the complex, aromatic fermented flavor through slow proteolysis and enzyme activity. When ready to bake, you can transfer the loaves directly from the cold refrigerator to the blazing hot baking steel—the extreme temperature contrast actually improves oven spring.
Why did my ciabatta bread not rise in the oven?
A lack of oven spring is typically caused by over-proofing the dough during bulk fermentation, failing to preheat your baking stone adequately, or baking without steam.
If you let the dough fully double in size during the room-temperature bulk ferment, the yeast exhausts its food supply. By the time it hits the oven, it has no energy left to expand. Always stop bulk fermentation when the dough has expanded by roughly 75%.
How to reheat and restore crusty ciabatta bread?
To restore the crispy crust of day-old ciabatta, lightly mist the exterior of the loaf with water and bake it directly on the center rack of a 350°F (175°C) oven for 5 to 8 minutes.
The moisture turns to steam, re-gelatinizing the starches in the crust, while the oven heat crisps the exterior back to its original state. Never microwave artisan ciabatta, as it will render the chewy interior permanently rubbery and tough.
Final Thoughts on Authentic Ciabatta Bread Recipe
Mastering this authentic ciabatta bread recipe is a rite of passage for any artisan home baker. While wrangling an 80% high-hydration dough can feel intimidating at first glance, trusting the science of the process will transform the way you bake. By relying on a long-fermented biga, utilizing high-protein Tipo 00 flour, and allowing time—rather than aggressive kneading—to build a delicate gluten network, you eliminate the need for any commercial dough conditioners or shortcuts.
The true secret to that breathtaking, open honeycomb crumb and shatteringly crisp crust lies in your respect for the dough’s structure. Whether you are executing a gentle coil fold or sliding your slipper-shaped loaves onto a preheated baking steel surrounded by steam, every step in this panificio methodology is designed to preserve those precious gas bubbles. Practice the wet-hand handling techniques, monitor your dough’s volume rather than strictly watching the clock, and you will consistently pull bakery-quality artisan hearth bread from your home oven.
Are you ready to test your skills with high-hydration dough, or do you have questions about setting up your oven’s steam pan for the perfect crust? Let us know your biggest bread-baking challenges in the comments below!
Last update on 2026-09-07 at 21:30 / Affiliate links / Images from Amazon Product Advertising API
