
As an Amazon Associate BakingBakewareSets.com earns from qualifying purchases.
Italian Ciabatta Recipe: 7 Steps to a Crisp Open Crumb
Have you ever baked a loaf that ended up flat, dense, and disappointingly heavy? Tackling wet, sticky dough can frustrate even seasoned home bakers striving for bakery-quality results. Mastering an Italian Ciabatta Recipe solves these common textural issues completely.
An authentic Italian ciabatta recipe utilizes a traditional biga preferment, 80 percent hydration dough, and high-protein flour to create large air pockets and a crisp crust. Created in 1982, this authentic Venetian slipper bread requires gentle folding rather than heavy kneading.
Based on established best practices and verified artisan methods, this guide reveals professional panetteria techniques. We will explore precise baker percentages and hydration control protocols. Discover how to confidently handle wet dough and finally achieve that highly sought-after rustic golden crust.
☰ Table of Contents ▼
show
How to Master the Authentic Italian Ciabatta Recipe: Your Guide to a Crisp, Open Crumb
Created in 1982 by baker Arnaldo Cavallari in Adria, Veneto, the authentic ciabatta—literally translating to “slipper”—revolutionized Italian baking. Many modern blogs promote one-bowl “no-knead” shortcuts that yield flat, flavorless results. True mastery requires understanding the traditional biga preferment and managing a high hydration dough (typically 75-85%). While handling this wet dough intimidates many beginners, relying on measured in grams baker percentages ensures a foolproof process.
This authentic Italian ciabatta recipe bridges the gap between commercial panetteria standards and home kitchen capabilities. We rely on an artisan baker certified method to develop the open crumb structure and crisp crust you expect. During baking, steam delays crust setting, allowing the hydration to create an open crumb before the high heat locks in a rustic golden crust. By committing to the full 18-hour timeline, you will achieve the incredible flavor and texture that quick-mix recipes simply cannot replicate.
7 Steps to a Crisp Open Crumb: The Ultimate Italian Ciabatta Recipe
Executing this step by step authentic Italian ciabatta bread guide requires abandoning the clock and focusing on dough rheology. To properly knead high hydration dough, you must look for specific visual cues like the windowpane test and the dough jiggle. This chronological workflow transitions smoothly from mixing the Italian biga to executing the crucial stretch and fold phases. You will learn to bulk ferment properly, maintaining the critical air structure necessary for authentic homemade ciabatta bread.
1. Mix Preferment for Your Authentic Italian Biga

Save this authentic biga preferment ratio to your favorite Bread Baking board to guarantee incredible flavor!
The Italian biga is a firm preferment that acts as the flavor engine for your loaf. This traditional Italian ciabatta rolls recipe overnight starter relies on a simple mix of flour, water, and yeast. The extended timeframe allows the biga develops flavor gracefully through slow enzymatic activity.
Ingredients
- 200g Tipo 00 flour or unbleached bread flour (high protein content essential)
- 100g lukewarm water (ideally filtered, at 75°F/24°C)
- 1g (about 1/4 tsp) instant dry yeast or active dry yeast
- High-precision digital kitchen scale for measuring in exact grams
Instructions
- Mix preferment by stirring the yeast into the lukewarm water in a medium bowl and let it dissolve for 2 minutes.
- Add the flour to the liquid and mix roughly with a wooden spoon or your hands until a stiff, shaggy dough forms. Do not overmix; no dry spots should remain.
- Cover the bowl tightly with plastic wrap or a damp kitchen towel to prevent a hard skin from forming.
- Ferment overnight by leaving the biga at room temperature (68-72°F) for 12 to 18 hours until it is domed, highly aromatic, and webbed with bubbles beneath the surface.
Pro-Tip: Based on artisan baker certified method techniques, a true Italian biga is stiffer than a poolish. If your kitchen is incredibly warm (above 75°F), ferment it at room temperature for just 2 hours. Then, move it to the refrigerator for the remaining 14 hours to balance the lactic vs acetic acid balance and to definitively correct overfermented biga risks.

2. Autolyse Flour and Knead High Hydration Dough

Pin this essential dough-mixing technique to master high-hydration baking!
The stand mixer effortlessly handles the extremely wet dough characteristics of this recipe. Here, the autolyse improves dough elasticity significantly, while the flour protein determines water absorption. This highly mechanical process culminates in a robust gluten matrix elongation.
Ingredients
- The ripened biga (from Step 1)
- 300g Tipo 00 flour or strong bread flour (at least 12-14% protein)
- 260g lukewarm water (for the autolyse phase)
- 10g fine sea salt
- 1 tsp diastatic malt powder (optional, but aids in a caramelized crust)
- A high-capacity stand mixer fitted with a dough hook
Instructions
- Tear the ripened biga into small chunks and place them in the bowl of your stand mixer. Add the lukewarm water and mix on low to break up the preferment slightly.
- Add the flour and diastatic malt powder (do not add the salt yet). Mix on low speed just until no dry flour remains.
- Autolyse flour by covering the bowl and letting it rest for 30 minutes. This allows the flour to fully hydrate and enzymes to begin breaking down starches, making the dough more extensible.
- Sprinkle the salt over the dough. Knead high hydration dough on medium-high speed for 10 to 15 minutes. The high hydration Italian ciabatta recipe for stand mixer starts as a wet batter but will eventually pull away from the sides, wrapping beautifully around the dough hook.
Pro-Tip: Do not panic and add more flour! High hydration dough (around 80-82%) relies on the W index flour strength and mechanical mixing to develop structure. You know it is ready when it passes the windowpane test: pull a small piece of dough; if it stretches thin enough for light to pass through without tearing, the gluten network is fully developed.

3. Stretch and Fold to Build Gluten Strength

Save this essential stretch-and-fold guide to help you handle sticky, wet doughs effortlessly!
The stretch and fold technique completely replaces traditional hand kneading for high-hydration loaves. Using wet hands or a flexible dough scraper helps you confidently manage sticky wet dough handling. These methodical stretch and folds build dough strength to actively trap gases, setting the foundation for your highly desired honeycomb crumb.
Tools Required
- A wide, shallow glass or plastic proofing dish (rectangular is best for ciabatta)
- Extra virgin olive oil (for greasing the container)
- A bowl of cool water (to keep your hands wet)
- A flexible plastic dough scraper
Process
- Oil your rectangular proofing dish generously with high-quality extra virgin olive oil.
- Transfer the incredibly wet dough from the mixer bowl to your oiled dish using your flexible plastic dough scraper.
- Wet your hands completely in the bowl of cool water. This is the absolute best way to manage wet dough—it sticks instantly to dry skin, but slips right off wet hands.
- Stretch and fold the dough: Grab the top edge of the dough, stretch it upward until you feel resistance, and fold it over the center. Repeat this on all four sides of the dough (top, bottom, left, right).
- Cover the dish and let the dough rest for 30 minutes. You will repeat this 4-sided sequence a total of 3 times, spaced 30 minutes apart.
Pro-Tip: Each time you perform a coil fold or stretch and fold, you physically organize the gluten strands into a structured matrix. You will notice the dough rheology and extensibility change drastically from a sloppy puddle in the first fold to a tight, jiggly, cohesive block by the final fold.

4. Bulk Ferment and Monitor Dough Rheology

Pin this visual guide to know exactly when your ciabatta dough has finished its bulk fermentation!
During the bulk ferment, natural yeast rapidly produces gases while the gluten traps carbon dioxide effectively. Knowing exactly when to stop this phase is critical to fix ciabatta lacking air bubbles. You must closely monitor the dough to avoid deflating risen dough and preserve the large air pockets necessary for a beautiful porous crumb.
Supplies Needed
- The folded dough in its container
- A tight-fitting lid or plastic wrap
- A stable, draft-free spot in your kitchen (ideally 72°F-75°F)
- A clear rectangular proofing container (allows you to monitor bubbles)
Routine
- Cover your rectangular dish tightly after the final stretch and fold is complete.
- Bulk ferment the dough undisturbed with a room temperature fermentation for 1.5 to 2 hours.
- Monitor the dough’s progress carefully. You are not just looking for it to double in size; you are looking for specific structural and chemical changes.
- Inspect the surface and the sides of the clear container. The dough is ready when it is highly domed, jiggles like a bowl of gelatin when you gently shake the dish, and features massive, translucent air bubbles blistering across the surface.
Pro-Tip: If you rush the bulk fermentation, you will never achieve that coveted open crumb. Look for a highly active alveolation index—the dough should feel alive, incredibly airy, and fragile. From this point forward, handle it like a delicate cloud to preserve those gases during degassing.

5. Shape Loaves Without Deflating Air Pockets

Save this gentle shaping technique to ensure you keep all those massive air holes in your crumb!
Using a sharp metal dough scraper, you will carefully divide the dough into a slipper shaped loaf (the literal translation of ciabatta). Heavily dusting the board with semolina prevents peel sticking during the oven transfer and directly helps maintain the rustic golden crust that defines true ciabatta slipper bread.
Supplies Needed
- A heavy dusting of semolina flour (or a mix of rice flour and AP flour)
- A sharp metal bench scraper / dough knife
- A heavy-duty baker’s couche linen (or a very heavily floured heavy cotton towel)
- The fully fermented dough
Instructions
- Dust with semolina across your work surface exceptionally heavily. Do not skimp; this prevents sticking.
- Invert your rectangular proofing dish over the floured surface. Let gravity do the work. Allow the dough to slowly fall out of the container onto the flour. Do not pull or tear it.
- Dust the top of the dough rectangle generously with more semolina flour.
- Shape loaves by taking your sharp metal bench scraper and pressing straight down the middle of the dough rectangle, cleanly dividing it into two elongated, rectangular loaves.
- Transfer each loaf immediately to the heavily floured baker’s couche, scrunching the fabric up between the loaves to create walls that support the sides of the wet dough.
Pro-Tip: Remember that “ciabatta” means “slipper” in Italian. They are meant to be flat, rustic, and slightly irregular! Never pat the dough down, never roll it, and never try to tuck it into a tight ball. Avoid deflating risen dough at all costs to preserve your delicate honeycomb crumb.
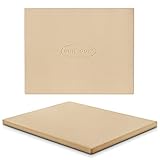
6. Proof Dough and Preheat Pizza Stone with Steam

Don’t skip the steam! Save this oven setup for the crispiest crust possible.
The heavy pizza stone provides immediate bottom heat for vertical lift, while the introduction of steam delays crust setting. This combination of baking stone steam and intense high heat produces oven spring, which is entirely essential for developing a truly exceptional crusty Italian white bread and helps you entirely overcome low oven spring.
What You Need
- A heavy cordierite baking stone or baking steel
- A wooden pizza peel (or a flat, rimless baking sheet)
- A heavy cast-iron skillet or heavy-duty roasting pan (for steam)
- 1 cup of boiling water
- Parchment paper
Steps
- Proof dough at room temperature for 30 to 45 minutes on the couche. It will puff up slightly and develop a thin, dry skin on the surface.
- Preheat pizza stone by placing it on the middle rack of your oven. Place your heavy cast iron skillet on the bottom rack. Preheat the oven to 475°F (245°C) for a full 45-60 minutes before baking.
- Transfer the proofed loaves carefully. Place a sheet of parchment paper over a wooden peel, gently roll the ciabatta loaves off the couche onto the parchment, seam side down.
- Dimple the surface of the loaves very gently with your fingertips just before loading to redistribute large gas bubbles.
- Slide the loaves (parchment and all) directly onto the scorching hot pizza stone.
- Inject steam by immediately pouring 1 cup of boiling water into the hot cast iron skillet on the bottom rack. Swiftly shut the oven door to trap the steam.
Pro-Tip: The definitive secret to massive oven spring technique is that steam delays crust setting. By keeping the exterior of the dough wet and flexible during the first 10 minutes of baking, the bread rapidly expands to its maximum volume before the heat locks the crust into place.
7. Bake Until Golden and Cool on Wire Rack

Be patient! Pin this final crucial step—cutting into hot bread ruins the crumb!
You must absolutely bake until golden to achieve the highly sought-after caramelized crust. Once removed from the oven, extreme patience is required as cooling stabilizes crumb structure. This prevents a gummy interior and guarantees the perfect texture when you finally slice crusty bread.
What You Need
- A heavy-duty wire cooling rack
- Heat-proof oven mitts
- An instant-read digital thermometer
- A sharp serrated bread knife
Instructions
- Bake with steam at 475°F (245°C) for the first 12 minutes.
- Vent the oven by briefly opening the door to release the remaining steam, and carefully remove the cast iron skillet.
- Bake until golden by lowering the temperature to 425°F (220°C) and continuing to bake for another 15 to 20 minutes. The loaves should be a deep, rustic mahogany brown.
- Verify doneness using an instant-read thermometer inserted into the center of the loaf. It should read at least 205°F to 210°F (96°C-98°C).
- Transfer the loaves immediately from the hot stone to a wire rack.
- Cool on wire rack completely, for a minimum of 2 hours, before attempting to slice it.
Pro-Tip: Do not cut into hot bread! While warm ciabatta is tempting, cooling stabilizes crumb structure safely. The starches are still undergoing their starch retrogradation rate process while cooling. Slicing too early mashes the delicate air pockets together and results in a gummy texture. Let it cool, then enjoy the perfect Italian sandwich bread!

Key Takeaways: Your Quick Guide to the Italian Ciabatta Recipe
Reviewing these core principles will ensure your success before you begin mixing. This authentic Italian ciabatta recipe overview distills the critical techniques required to master homemade ciabatta bread without getting bogged down in complex dough science. Use this Italian ciabatta recipe summary as a quick checklist during your baking timeline.
- Start with an Authentic Biga Preferment – The heart of a traditional Italian ciabatta recipe is the stiff biga, fermented for 12-18 hours, which provides the complex flavor and strong gluten network characteristic of artisan loaves.
- Embrace High Hydration Dough – Authentic homemade bread requires around 80% hydration. Use wet hands to manage sticky wet dough handling and avoid adding excess flour, which ruins the texture.
- Build Strength via Stretch and Folds – Rather than heavy machine kneading that can over-oxidize the dough, utilize gentle coil folds to align the gluten matrix elongation and trap carbon dioxide effectively.
- Handle Proofed Dough Like a Cloud – When you shape loaves, remember that ciabatta means “slipper.” You must avoid deflating risen dough; never press, roll, or punch down the delicate structure.
- Bake with Intense Heat and Steam – Using a preheated pizza stone combined with an initial blast of steam is non-negotiable to overcome low oven spring and achieve a crackling, rustic golden crust.
- Respect the Cooling Process – As difficult as it is to wait, cooling stabilizes crumb structure. Slicing into a hot loaf disrupts the starch retrogradation rate, resulting in a gummy interior rather than the desired light open texture.
FAQs About Italian Ciabatta Recipe
Understanding the science behind the ingredients and techniques will elevate your baking game instantly. These answers to common questions about Italian ciabatta bread address the most frequent troubleshooting issues bakers face.
What makes ciabatta different from a baguette?
Ciabatta is an Italian bread characterized by an extremely high hydration dough, a flatter shape, and a very open crumb, whereas a French baguette uses lower hydration and tighter shaping. While both utilize lean doughs (flour, water, yeast, salt), the ciabatta vs baguette difference lies primarily in the water content and handling. Ciabatta relies heavily on a stiff biga preferment, while baguettes often utilize a wetter poolish.
Why is my ciabatta bread flat and dense?
Your ciabatta is likely flat and dense because the dough was degassed during the final shaping, or it lacked sufficient gluten strength to trap the carbon dioxide produced during bulk fermentation. To fix dense ciabatta crumb, ensure you use a high-protein bread flour (Tipo 00 with a high W index) and perform adequate stretch and folds. Furthermore, handle the dough incredibly gently when transferring it to the oven.
Can you make ciabatta without a biga?
You can make an easy no-knead ciabatta without a biga by utilizing a long cold overnight fermentation, but it will lack the authentic depth of flavor and structural integrity of the traditional Italian method. The original 1982 Italian ciabatta recipe specifically mandates a stiff preferment. While direct-mix methods exist for beginners, the biga provides a superior lactic vs acetic acid balance and a noticeably lighter, more porous crumb.
What flour is best for an Italian ciabatta recipe?
The best flour for an authentic Italian ciabatta recipe is Italian Tipo 00 flour with a high protein content, or a very strong unbleached bread flour. Because ciabatta is a high-hydration dough, weak all-purpose flour cannot absorb the water effectively or build a strong enough gluten network, resulting in a sticky puddle. You need flour with a high W index flour strength to support massive oven spring.
What is the difference between biga and poolish for ciabatta?
A biga is a stiff Italian preferment with lower hydration that develops nutty complex flavors, while a poolish is a wet French preferment that yields sweeter extensible doughs. Authentic Italian ciabatta bread relies specifically on the biga. Comparing biga vs poolish, the biga provides more structural strength to the final dough, which is crucial when the final recipe involves adding massive amounts of water.
How do you shape wet ciabatta dough without deflating it?
You shape wet ciabatta dough by heavily dusting your workspace with semolina flour, gently inverting the proofing container, and dividing it swiftly with a bench knife without patting it. The key to maintaining the honeycomb crumb is to touch the dough as little as possible. Transfer it immediately to a couche linen to support the sides during the final proof.
Does authentic ciabatta have milk or olive oil?
An authentic Italian ciabatta recipe does not contain milk, though modern artisan variations occasionally add a very small amount of high-quality extra virgin olive oil to the lean dough. Adding milk softens the crust, which ruins the characteristic crackle of a true rustic recipe. Olive oil can be used to grease proofing tubs, subtly enhancing the flavor and crumb softness.
Why do you bake ciabatta with steam?
Baking ciabatta with steam delays the setting of the exterior crust, allowing the dough to rapidly expand in the oven’s high heat to achieve maximum volume and large internal air pockets. If you bake without steam, the crust hardens immediately, leading to a flat loaf and a tough rubbery crust. Generating steam during the first 12 minutes is the professional panetteria secret to achieving a glossy, caramelized crust.
How to store homemade Italian ciabatta bread?
Store homemade Italian ciabatta bread at room temperature in a paper bag or a cloth bread bag for up to two days to preserve the crisp crust. Never store crusty artisan bread in a sealed plastic bag, which traps moisture and turns the crust soft and rubbery. If you cannot consume the loaf within 48 hours, slice it, wrap it tightly in foil, and freeze it.
Is ciabatta bread good for Italian panini sandwiches?
Ciabatta is widely considered the absolute best bread for Italian panini sandwiches because its sturdy crisp crust holds up perfectly in a press, while its open crumb beautifully absorbs olive oil and meat juices. Its slightly flattened, broad profile makes the ciabatta slipper bread structurally ideal for layering heavy ingredients like prosciutto, fresh mozzarella, and roasted red peppers without becoming soggy.
Final Thoughts on Mastering the Italian Ciabatta Recipe
Mastering an authentic Italian Ciabatta Recipe is a defining milestone for any home baker. While the high hydration levels and multi-day biga fermentation process may initially seem intimidating, these traditional methods are the non-negotiable secrets behind that glorious, rustic crust and translucent crumb. By ditching the quick-fix, one-bowl shortcuts and embracing the science of the traditional biga preferment, you elevate your home kitchen to the exacting standards of a true Veneto panetteria.
As of September 2026, traditional Italian bread baking trends emphasize returning to these historically accurate, flavor-building methods. Remember that baking artisan bread is an exercise in tactile feedback and patience. Pay closer attention to dough rheology—how the dough feels during the stretch and folds, and how it blisters during the bulk ferment—than to the timer on your oven. Every kitchen environment is different, and true master class bread baking is about responding to the dough in front of you.
Handle it gently, trust the high heat of your pizza stone, and let the steam work its magic. Now that you are equipped with the exact baker’s percentages, visual cues, and shaping techniques to conquer this legendary slipper loaf, all that is left to do is mix your biga tonight. Once you slice into that crackling crust and see those massive air pockets, you will never buy store-bought bread again. What classic Italian ingredients are you planning to stuff into your first homemade ciabatta panini? Let me know in the comments below!
Last update on 2026-09-06 at 21:30 / Affiliate links / Images from Amazon Product Advertising API
