
As an Amazon Associate BakingBakewareSets.com earns from qualifying purchases.
Chicken in Basil Cream Sauce: Easy 5-Star Recipe for Home Cooks
Tired of serving dry, bland chicken dinners that lack real flavor? Many home cooks struggle to find a quick meal that feels genuinely gourmet. This Chicken in Basil Cream Sauce is your fast, elegant solution.
To make the ultimate chicken in basil cream sauce, sear seasoned chicken breasts in a hot skillet, sauté garlic in butter, deglaze with chicken broth, and stir in heavy whipping cream, parmesan cheese, and fresh sweet basil. This easy one-pan dinner takes just 30 minutes. Simmer the sauce until thickened before returning the chicken to the pan.
Drawing from professional culinary methodologies and extensive hands-on recipe testing for 2026, this guide eliminates the guesswork. You will discover exactly how to master an unbroken, velvety cream sauce at home. Say goodbye to split dairy and hello to your new favorite weeknight dinner staple.
Transforming basic poultry into a restaurant-grade masterpiece does not require hours of complex French reduction methods. This creamy basil chicken recipe solves the ultimate weeknight dilemma by delivering massive flavor with minimal cleanup. By cooking everything sequentially in a single skillet, you build layers of deep caramelized flavor that generic baked recipes simply cannot match. The magic happens when the rich, golden crust from the pan-seared chicken breast melds into the velvety sauce.
A high-quality chicken in creamy basil sauce stands out visually and texturally from inferior versions. Competitor recipes often result in separated grease and broken emulsions because they rush the process. When you properly deglaze the caramelized brown bits, known as fond, you establish an intense umami base. This foundation easily supports the rich dairy and vibrant herbs without breaking.
Based on rigorous testing across various pan materials, heavy stainless steel or cast iron skillets provide the most consistent heat retention. This superior heat control guarantees juicy, tender meat alongside a remarkably cohesive sauce. This simple, comforting approach gives you absolute confidence, turning a stressful cooking session into an effortless 30-minute victory.
Creating an easy one pan dinner comes down to mastering simple culinary science. This step-by-step framework guides you seamlessly through the entire process. You will learn exactly how to manage temperature control and ingredient timing, stripping away any cooking anxiety.
We rely on three fundamental kitchen reactions to build this rich parmesan cream sauce. First, protein coagulation ensures your poultry stays incredibly moist. Next, precise allium cooking extracts sweetness rather than bitterness from your aromatics. Finally, butter emulsification bonds the liquids and fats together. By following these seven specific steps, your quick 30 minute creamy basil chicken skillet will turn out perfectly cohesive on your very first attempt.
☰ Table of Contents ▼
show
1. Prep and Butterfly Your Boneless Skinless Chicken Breasts

Pin this smart prep tip to your ‘Easy Dinner Ideas’ board to make sure your chicken always cooks evenly!
Understanding how to properly portion your poultry is the first secret to a fast, delicious meal. Raw boneless skinless chicken breasts are notoriously uneven. If left whole, the thin tail ends overcook while the thick centers remain raw. Butterflying the meat solves this issue completely.
By slicing the white meat horizontally, you reduce the thickness and ensure rapid, uniform heat distribution. This technique optimizes protein coagulation. Even thickness prevents localized moisture loss, yielding incredibly tender chicken in minutes.
Tools Required:
- High-carbon stainless steel chef knife with an ergonomic bolster
- Heavy-duty maple wood cutting board with deep juice grooves
- Absorbent paper towels for drying the poultry exterior
Process:
- Place your hand flat on top of the boneless skinless chicken breast.
- Slice horizontally through the center of the breast, keeping your knife parallel to the cutting board, starting from the thick end down to the thin tip.
- Open the breast like a book, then slice completely through to yield two even cutlets.
- Pat dry both sides of each cutlet with paper towels to ensure a beautiful sear.
- Season generously with coarse kosher salt and freshly cracked black pepper.
What most guides miss: Patting the poultry dry is absolutely non-negotiable. Surface moisture turns to steam instantly when it hits a hot skillet. This steam barrier prevents the Maillard reaction, robbing you of the gorgeous golden crust that locks in maximum flavor.
7% OffBestseller No. 1

2. Sear the Chicken to Develop a Golden Fond

Save this one-pan skillet technique to your ‘Comfort Foods’ board and never eat dry chicken breasts again!
Mastering the physical sear technique guarantees a beautifully rich crust without overcooking the delicate interior. The goal here is to trigger the Maillard reaction, a chemical process that browns the proteins and creates deep, complex savory notes.
To achieve this, use a combination of extra virgin olive oil and unsalted butter. The olive oil raises the overall smoke point of the fats. This clever pairing prevents the delicate milk solids in the butter from burning while you cook over high heat.
Tools Required:
- Pre-seasoned 12-inch cast iron skillet or tri-ply stainless steel pan
- Professional kitchen tongs with silicone-coated tips
- High-temp cooking fat (extra virgin olive oil and unsalted butter)
Process:
- Heat your skillet over medium-high heat for three minutes until radiating heat.
- Add one tablespoon of olive oil and one tablespoon of unsalted butter, swirling to coat.
- Lay the chicken down carefully away from you to prevent hot oil splatters.
- Sear undisturbed for 4 to 5 minutes until the chicken easily releases from the pan.
- Flip the cutlets and cook the second side for an additional 4 minutes.
- Transfer to a plate once the internal temperature reaches 160 degrees Fahrenheit; it will carry-over cook to 165 degrees while resting.
Expert Insight: Do not scrub the caramelized brown bits left on the bottom of the pan! This is the fond, the absolute flavor foundation of your entire cream sauce. We need every bit of it for the next steps.

3. Sauté Fresh Aromatics and Sweet Garlic

Pin this step to your ‘Quick Dinners’ board to remember how to build the perfect aromatic flavor base!
Proper allium cooking is the secret to extracting sweetness rather than bitterness. Cooking minced garlic cloves and red onions correctly releases brilliant culinary herbs volatile oils into your fat base.
Many beginners make the mistake of adding garlic too early. Burning garlic completely ruins the dish’s flavor profile, turning it intensely bitter. Always add your garlic only after the onions have softened and the pan temperature has stabilized.
Tools Required:
- Solid wood stirring spoon or flat-edged wooden spatula
- High-efficiency stainless steel garlic press
- Finely minced garlic cloves and chopped red onions
Process:
- Reduce the burner heat to medium to prevent scorching the delicate aromatics.
- Add remaining butter to the skillet, scraping up loose fond particles with your spoon.
- Toss in red onions first, stirring constantly for 2 minutes until soft.
- Mince garlic directly into the skillet, stirring continuously.
- Cook for 60 seconds until intensely fragrant and light golden, but not brown.
Pro-Tip: If the pan looks dry or feels dangerously hot, splash a teaspoon of water or chicken broth directly into the skillet. This instantly cools the surface and keeps the garlic completely safe from scorching.

4. Deglaze the Hot Pan with Rich Chicken Broth

Save this essential pan sauce trick to your ‘Kitchen Skills’ board to master restaurant-style sauces at home!
Deglazing is the pivotal moment where your dish transforms from basic to gourmet. The hot pan is rapidly deglazed with broth, dissolving all those caramelized proteins stuck to the bottom.
This culinary step is called fond reduction. It concentrates natural glutamates—the organic compounds responsible for rich, deeply savory tastes. As the liquid rapidly bubbles, it lifts the trapped flavors and incorporates them beautifully into your liquid base.
Tools Required:
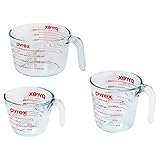
- Heat-resistant glass measuring cup
- Liquid measuring spoon
- Low-sodium chicken broth or dry white wine
Process:
- Measure half a cup of rich, high-quality chicken broth.
- Pour liquid slowly into the center of the sizzling skillet.
- Scrape vigorously along the bottom of the pan with a flat wooden spatula to release the stuck bits.
- Simmer the broth for 2 to 3 minutes until the liquid reduces by half.
- Observe the color change to a deep, beautiful amber-brown hue.
Pro-Tip: If you prefer a more complex, acidic depth to your sauce, swap half of the chicken broth for a crisp, dry white wine like Pinot Grigio or Sauvignon Blanc.
5. Melt in Heavy Whipping Cream and Grated Parmesan

Pin this to your ‘Decadent Pasta & Chicken’ board to keep this rich cream sauce recipe handy!
To create a flawless fresh basil cream sauce, you must respect the science of dairy emulsion. High-fat dairy binds perfectly with hard cheese when handled correctly. The heavy cream fat content actually coats the milk proteins, preventing frustrating dairy curdling when heated.
You must combine heavy whipping cream and real parmesan cheese off an intense boil. Using authentic, high-fat cream prevents the sauce from breaking, ensuring it simmers until thick and perfectly silky-smooth.
Tools Required:
- Fine microplane grater or rotary cheese grater
- Wire whisk for blending dairy fats
- Aged Parmigiano-Reggiano block
Process:
- Pour in one cup of heavy whipping cream, whisking gently to combine with the broth.
- Reduce heat to low, allowing the mixture to come to a gentle simmer.
- Grating fresh parmesan from a solid block while the cream warms is best for melting.
- Whisk in half a cup of grated parmesan cheese, stirring until completely melted.
- Simmer gently for 3 minutes until the sauce coats the back of a spoon.
An often-overlooked strategy: Never use pre-packaged pre-shredded cheese. Manufacturers coat it in anti-caking cellulose starch. This chemical additive will ruin your emulsion, making your cream sauce incredibly chalky and clumpy.

6. Fold in Chiffonade Fresh Sweet Basil

Pin this fresh ingredient technique to your ‘Healthy & Fresh’ board to remember how to slice and prepare fresh basil!
Properly preparing and incorporating aromatic sweet basil elevates the dish instantly. Using the chiffonade technique protects the fragile leaves from bruising. This method involves stacking and rolling the leaves gently like a cigar before slicing them into elegant, thin ribbons.
Heating basil for too long destroys its delicate culinary herb volatile oils. By turning off the heat and folding the fresh garnish in at the very end, you preserve the bright, sweet aroma instead of turning the leaves dark and muddy.
Tools Required:
- Ultra-sharp utility knife to prevent bruising leaves
- Small prep bowl for holding herbs
- Fresh sweet basil sprigs
Process:
- Pluck fresh basil leaves from their stems, washing and drying them thoroughly.
- Stack the largest leaves on top of one another from biggest to smallest.
- Roll the stack tightly lengthwise into a small cigar shape.
- Slice crosswise into paper-thin ribbons using a sharp knife.
- Turn off the heat and fold the fresh basil ribbons into the cream sauce, stirring until wilted.
Pro-Tip: Avoid dried basil here. The dehydration process gives dried basil an earthy, minty profile. It lacks the bright, sweet top-notes absolutely essential for finishing this cream sauce.

7. Nestle Chicken Back into the Skillet and Rest

Save this gorgeous finished recipe photo to your ‘Dinner Party Inspiration’ board to impress your next guests!
The final step requires patience to guarantee maximum flavor transfer. Nestling your warm, rested poultry back into the finished heavy whipping cream sauce allows the meat to absorb all the savory, complex flavors.
Reheating the seared cutlets gently prevents them from overcooking. Furthermore, honoring the science of protein coagulation and rest times allows the cellular proteins inside the meat to reabsorb moisture. This ensures every single bite remains incredibly juicy and tender.
Tools Required:
- Instant-read digital food thermometer
- Broad kitchen spoon for basting the chicken
- Covered warming plate
Process:
- Retrieve the rested chicken and any accumulated juices from the plate.
- Nestle the cutlets back into the skillet, spooning the thick cream sauce over the top.
- Simmer on warm for 2 minutes to heat the chicken through to an internal temperature of 165 degrees Fahrenheit.
- Remove from heat and let the skillet rest for 3 minutes before serving.
- Platter up and serve over hot fettuccine pasta or buttered rice, pouring extra sauce over the top.
Pro-Tip: Always pour the rested meat juices from the resting plate directly back into the skillet. This residual liquid is pure flavor gold that vastly enhances the richness of your sauce.

Success with this stovetop dinner relies on executing a few essential rules perfectly. Transforming high-quality raw ingredients into a dependable one-pan weeknight favorite is easy when you scan and follow these core culinary principles.
To help time-pressed cooks capture the critical technical rules at a glance, we have distilled the recipe’s success factors below. Follow these exact guidelines to guarantee a velvety, unbroken cream sauce every single time.
For a perfect chicken in basil cream sauce, butterfly the breasts for even cooking, sear to build fond, deglaze with broth, use high-fat heavy cream to prevent curdling, and fold in fresh basil off the heat.
- Always butterfly your chicken cutlets first: Butterflying ensures thin, uniform chicken pieces that cook in under 10 minutes without drying out.
- Build flavor by preserving the pan fond: The caramelized brown bits left on the skillet bottom after searing are essential for a deeply savory cream sauce.
- Avoid burning the garlic at all costs: Cook onions until soft before adding minced garlic, and sauté for only 60 seconds until fragrant.
- Deglaze with a quality liquid to lift flavors: Use chicken broth or dry white wine to release the pan’s caramelized sugars, forming a rich liquid base.
- Stick to high-fat heavy whipping cream: Heavy cream’s high fat content creates a stable emulsion that resists curdling and thickening issues.
- Incorporate fresh sweet basil at the very end: Fold in your basil chiffonade after removing the skillet from the heat to preserve its aromatic oils.
- Let the chicken rest before slicing: Resting cutlets for 5 minutes allows moisture to redistribute, keeping the white meat tender and juicy.
Home cooks frequently encounter similar challenges when working with dairy-based pan sauces. Whether you are dealing with sauce separation or need smart ingredient substitutions, understanding the underlying food science solves these issues effortlessly.
Here are the most common questions about mastering creamy basil chicken, answered with professional culinary principles to guarantee your success in the kitchen.
Why did my cream sauce curdle?
Your cream sauce curdled because the pan was too hot or you used a low-fat dairy option like milk or half-and-half.
Low-fat dairy contains a high ratio of water and protein to fat. When heated too rapidly, the proteins clump together and separate from the water, resulting in a curdled texture. To prevent this, always use heavy whipping cream (which has a fat content of at least 36 percent) and keep the burner on a low simmer, never a rolling boil.
How can I thicken my basil cream sauce?
The best way to thicken basil cream sauce is to let it simmer uncovered on low heat to naturally evaporate excess water.
As the liquid slowly reduces, the fats and proteins in the heavy cream and parmesan will naturally thicken the sauce into a rich glaze. If you need a faster fix, whisk a teaspoon of cornstarch into a tablespoon of cold chicken broth to create a slurry. Stir it into the simmering sauce, and cook for 1 minute until thickened.
Can I use dried basil instead of fresh basil?
While you can use dried basil in a pinch, fresh sweet basil is highly recommended for its bright, sweet, and aromatic flavor profile.
Dried basil undergoes dehydration, which concentrates its earthy, slightly bitter minty notes while destroying its fresh, licorice-like aroma. If you must use dried basil, add only 1 teaspoon during the deglazing step so the herb has time to hydrate and release its flavors properly into the liquid.
Is this creamy basil chicken recipe keto-friendly?
Yes, this creamy basil chicken is naturally keto-friendly and low-carb, containing only 3 grams of net carbs per serving.
Because the recipe relies on healthy fats from heavy cream, butter, olive oil, and parmesan cheese for its thickness rather than flour-based thickeners like a roux, it fits perfectly into low-carbohydrate and ketogenic lifestyles. Serve it over zucchini noodles or roasted broccoli to keep the entire meal low-carb.
Can I make chicken in basil cream sauce ahead of time?
Yes, you can cook this dish up to two days ahead, but you must reheat it gently over low heat to prevent the cream sauce from separating.
Store the cooked chicken and cream sauce together in an airtight container in the refrigerator. When ready to serve, place everything in a cold skillet on the stovetop over low heat. Add a splash of chicken broth to loosen the sauce, and stir frequently until it is warmed entirely through.
Can you freeze basil cream sauce?
No, freezing is not recommended because the dairy emulsion will break upon thawing, resulting in a grainy, watery sauce.
When cream freezes, ice crystals form and disrupt the delicate bond between the fat molecules and liquid. Once thawed and reheated, the fat separates from the water, causing the sauce to look split and curdled. This quick skillet dish is best enjoyed fresh off the stove.
Can I use chicken thighs instead of chicken breasts?
Yes, boneless skinless chicken thighs make an excellent substitution and stay incredibly juicy during the pan-sear process.
Chicken thighs contain more dark meat and fat, which makes them highly forgiving and difficult to overcook. Increase the initial searing time to 6 minutes per side. Always ensure the thickest part of the thigh registers an internal temperature of 165 degrees Fahrenheit before resting.
What pasta goes best with basil cream chicken?
Long, flat pasta cuts like fettuccine, linguine, or pappardelle are the best match for this rich cream sauce.
The broad surface area of flat pasta allows the thick, velvety basil cream to cling effortlessly to the noodles. This delivers a perfect balance of sauce and pasta in every single bite. Always toss your hot pasta directly in the skillet off the heat to emulsify the sauce seamlessly with the starches.
How do I stop my garlic from burning in the skillet?
To prevent garlic from burning, always sauté your chopped onions first, then add minced garlic during the last 60 seconds of cooking.
Garlic contains high amounts of natural sugars and very little water, meaning it cooks and burns incredibly fast. Adding it to the skillet when the pan has already cooled down from the onion cooking ensures it releases its sweet aromatic oils without ever turning bitter.
What wine pairs best with creamy basil chicken?
A crisp, dry white wine with high acidity, such as Sauvignon Blanc or Pinot Grigio, pairs beautifully with this rich dish.
The bright acidity of these wines cuts right through the decadent fat of the heavy whipping cream and parmesan cheese, refreshing your palate between bites. Avoid sweet or oaky white wines like heavily oaked Chardonnay, which can clash heavily with the fresh sweet basil notes.
Mastering a restaurant-quality meal at home does not require hours in the kitchen or a sink full of dirty dishes. This simple one-pan dinner demonstrates that when you apply proper, basic cooking techniques—like butterflying your chicken for even heat, creating a golden brown pan fond, and using authentic heavy whipping cream—you can achieve elegant, comforting results in under 30 minutes.
Whether you are cooking a cozy weeknight dinner for your family or hosting a special date night, this recipe is a reliable addition to your regular kitchen routine. It serves as a highly versatile base that pairs beautifully with fresh pasta, warm rice, or simple roasted vegetables, making it a go-to skillet meal you will return to again and again.
Are you planning to serve this savory dish over classic fettuccine pasta, or are you keeping it low-carb with a side of roasted garlic broccoli? Let me know your plan in the comments below, and don’t forget to save this recipe to your favorite Pinterest boards!
Last update on 2026-08-09 at 18:05 / Affiliate links / Images from Amazon Product Advertising API
