
As an Amazon Associate BakingBakewareSets.com earns from qualifying purchases.
Ciabatta Bread Recipe: 7 Steps to a Perfect No-Knead Loaf
Are you tired of pulling dense, flat homemade bread out of the oven? Baking the perfect Ciabatta Bread Recipe often frustrates beginners. Handling highly hydrated sticky dough can feel completely unmanageable without proper guidance.
Ciabatta: Make this authentic bread at home by combining flour, yeast, water, and salt into an 80% high hydration dough. Skip kneading and use a gentle stretch and fold technique during room temperature fermentation. Finally, bake the slipper-shaped loaves on a hot baking steel with intense steam injection.
Drawing from comprehensive analysis of proven methodologies and home test kitchen trials, this guide guarantees success. We rely on strict baker percentage formula verified metrics, accurately measured in grams. You will finally master artisan Italian panification and achieve that signature open crumb.
☰ Table of Contents ▼
show
The Ultimate Ciabatta Bread Recipe: How Do You Make a High Hydration No-Knead Loaf at Home?
To make authentic ciabatta bread at home, combine bread flour, instant yeast, water, and sea salt to create an 80% high hydration dough. Instead of traditional kneading, use a gentle stretch and fold technique during a room temperature bulk fermentation, then bake the slipper-shaped loaves on a preheated baking steel with intense steam injection.
Mastering an authentic ciabatta bread recipe requires a fundamental shift in how you view baking. Unlike standard sandwich bread that requires aggressive kneading, this classic artisan Italian loaf relies on patience and precise water ratios. Ciabatta is famous for its high hydration dough, typically ranging from 80% to 85% water relative to flour weight. This extreme moisture content is the scientific secret behind its highly sought-after open crumb texture and airy interior pockets.
Many home bakers struggle with dense, flat loaves because they attempt to apply traditional bread-making rules to a wet dough environment. When dealing with a supple wet dough, adding extra flour to reduce stickiness is a critical error. Instead, this guide focuses entirely on a highly accessible, foolproof Same-Day No-Knead Method. By utilizing specific stretch and fold techniques, you will build a resilient gluten network capable of trapping fermentation gases without using commercial bakery equipment.
If you have ever wondered about the ciabatta vs focaccia difference, it comes down to the baking surface and fat content. While focaccia is baked in an oiled pan for a soft, fried bottom, a true ciabatta loaf is baked free-form directly on a scorching hot baking steel. This creates the signature flour-dusted, crisp golden crust that perfectly contrasts the custardy crumb interior.
7 Steps to a Perfect No-Knead Ciabatta Loaf
Successfully executing an easy same day ciabatta bread recipe with yeast is entirely about process control. From raw ingredients to the finished baked product, eliminating guesswork is the key to consistent results. We have broken down the complex science of Italian panification into seven distinct, manageable micro-steps.
Each phase of this step by step authentic italian ciabatta recipe for beginners is designed to build your dough-handling confidence. You will learn visual cues to identify proper lactic acid bacteria fermentation, tactile benchmarks for dough elasticity, and precise ambient temperature guidelines. By following this sequential workflow, you will transform a simple four ingredient bread into a bakery-quality masterpiece featuring maximum oven spring expansion.
1. Mix to Shaggy Dough Consistency

Pin this essential first step to your ‘Artisan Bread Baking’ board!
The foundation of any successful 4 ingredient no knead ciabatta bread recipe begins with properly combining your base elements. High-hydration doughs require exact gram measurements, which is why a digital scale is mandatory. We start with an autolyse phase, which gently begins to hydrate the proteins without overworking the dough.
Ingredients
- 500g bread flour high protein (around 12.5-13% protein content)
- 400g lukewarm water (optimally at 75°F/24°C)
- 10g fine sea salt
- 5g instant yeast (or active dry yeast, bloomed first)
- 1 precision digital kitchen scale for accurate metric weighing
Directions
- Autolyse flour and water by whisking the instant yeast into the lukewarm water until fully dissolved, creating an active liquid base.
- Pour the wet mixture over your high-protein bread flour and fine sea salt in a large, wide mixing bowl.
- Mix using a sturdy wooden spoon, dough whisk, or your hands just until no dry spots of flour remain, forming a very wet, sticky, and shaggy dough.
- Cover the bowl with a damp towel and let it rest for 20 minutes to hydrate high extraction flour before structure development begins.
Pro-Tip: Using a digital scale to weigh your ingredients in grams is non-negotiable for an 80% hydration ciabatta. A 10-gram variance in water, typical when using measuring cups, is the difference between a supple wet dough and an unmanageable puddle. Amylase enzymatic activity begins the moment water hits flour, naturally tenderizing the crumb without kneading.

2. Develop Gluten Structure

Save this stretch-and-fold visual guide to perfect your dough handling!
To successfully how to handle sticky ciabatta dough without adding extra flour, you must embrace the wetness. Time and gentle stretching build the gluten matrix far better than aggressive mixing. By keeping your hands wet, you can easily manipulate the dough and build necessary strength.
Ingredients
- The rested shaggy ciabatta dough
- 1 small bowl of clean, room temperature water (for dipping hands)
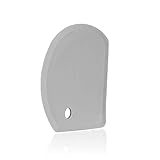
- 1 flexible silicone bowl scraper
Directions
- Wet your hands thoroughly in the bowl of water to prevent ciabatta spreading too flat and sticking to your skin; never add raw flour to the bowl at this stage.
- Reach under the top quadrant of the dough, stretch and fold the dough upwards until you feel resistance, and fold it completely over itself toward the bottom edge.
- Rotate the bowl 90 degrees and repeat this stretching and folding action three more times until all four sides have been folded into the center.
- Cover the dough and let it rest for 30 minutes, then perform this exact stretch and fold sequence a total of 4 times over a 2-hour period to develop gluten structure.
Pro-Tip: If you struggle to manage high hydration dough mess, wet hands are your best tool. By the fourth set of folds, you should be able to gently pull a section of the dough thin enough to see light through it without it tearing—this is the windowpane test gluten, proving your glutenin and gliadin network crosslinking is strong enough to trap the fermentation gases for big air bubbles.
3. Bulk Ferment at Room Temperature

Pin this to remember exactly what fully proofed dough should look like!
Successful room temperature proofing requires you to read the dough, not just the clock. Depending on your kitchen’s ambient temperature, yeast activity will vary. The goal here is to establish massive volume and preserve the delicate structure you just built.
Ingredients
- The folded, structurally developed dough
- 1 tablespoon extra virgin olive oil (for coating)
- 1 clear, straight-sided proofing container or large glass bowl
- 1 instant read thermometer (optional, for ambient testing)
Directions
- Lightly coat the inside of your clear proofing container with extra virgin olive oil to ensure the sticky dough will release easily later without tearing.
- Gently transfer the dough into the container, cover it airtight, and bulk ferment at room temperature (ideally around 72°F to 75°F).
- Allow the dough to rest undisturbed for 1.5 to 2 hours, watching for the dough to increase in volume by at least 50% to 75%.
- Look for large air bubbles forming on the surface and sides of the container; the dough should jiggle like a water balloon when gently shaken, indicating fermentation is complete.
Pro-Tip: Manage room temperature fluctuations during proofing by finding the warmest spot in your kitchen (like on top of the fridge). Cold retardation proteolysis can be introduced here if you want to pause the recipe: you can place the covered container in the fridge overnight at this stage to develop a deeper, sourdough-like flavor profile before dividing the next day.

4. Divide Dough with Bench Knife

Save this pro dividing technique to keep those beautiful air bubbles intact!
Portioning the massive wet dough ball requires a delicate touch to avoid deflating dough during transfer. Unlike the wet-hands folding stage, you now need a heavily floured surface. You must treat this aerated dough like a fragile cloud to maintain the air pockets.
Ingredients
- The fully bulk-fermented ciabatta dough
- 1 cup tipo 00 flour or unbleached all purpose flour (for heavy dusting)
- 1 sharp stainless steel bench scraper
Directions
- Heavily dust your clean work surface with flour—unlike the folding stage, you now need a dry barrier to prevent sticking.
- Gently invert the proofing container and let the dough naturally fall out onto the floured surface using gravity; do not pull or tear at it.
- Dust the top of the jiggly dough mound generously with more flour, then gently pat it into a rough, thick rectangle without pressing out the gases.
- Divide dough with bench knife straight down the middle to create two equal, elongated, slipper shaped loaf rectangles, committing to clean cuts rather than sawing.
Pro-Tip: The secret to the open crumb texture lies entirely in how you execute this step. Demands gentle handling to preserve aeration is the golden rule of ciabatta. Use your bench scraper to sharply sever the dough strands; if you push down too hard with your hands, you will crush the gas pockets and troubleshoot lack of oven spring later.

5. Proof on Floured Couche

Don’t have a baking couche? Pin this to remember how to set up your final proof!
Executing the final proof requires structural support so the loaves maintain their shape. A flour dusted crust prevents sticking to the fabric while the secondary fermentation occurs. Proper side support ensures the dough springs upward in the oven rather than spreading into a flat puddle.
Ingredients
- The 2 divided ciabatta dough loaves
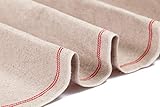
- 1 couche linen proofing cloth (or a heavy kitchen towel heavily dusted with flour)
- 2 sheets of high-heat parchment paper sheets
Directions
- Prepare your couche linen proofing cloth by dusting it heavily with flour and folding pleats into it to create physical walls for the loaves.
- Using two floured bench scrapers or your hands, quickly and confidently transfer each loaf onto the couche, nesting them between the fabric folds to support their sides.
- Dimple dough gently with fingertips down the length of the loaf to redistribute massive air bubbles and create the classic rustic, slightly flattened profile.
- Proof on floured couche uncovered for 30 to 45 minutes; the dough should look puffy, light, and retain a finger indent slowly when lightly poked.
Pro-Tip: If you don’t own a linen couche, you can proof the loaves directly on parchment paper sheets by scrunching the paper up between the loaves to create temporary walls. Properly maintaining this structural support is how you prevent ciabatta spreading too flat before the heat of the oven sets the gelatinized starch structure.
6. Transfer to Baking Stone & Steam the Oven Cavity

The secret to a crackling, blistered crust? Pin this steaming technique!
Replicating a commercial bakery deck oven environment at home requires intense heat and moisture. You must prepare a baking on steel setup well in advance to achieve explosive oven spring. The steam injection delays crust formation, allowing the bread to fully expand.
Ingredients
- The fully proofed ciabatta loaves on parchment paper
- 1 thick baking steel or baking stone
- 1 heavy cast-iron skillet
- 1 cup of boiling water (for steam)
- 1 baker’s transfer peel or rimless baking sheet
Directions
- Preheat oven with baking steel placed on the middle rack, and an empty cast-iron skillet on the bottom rack, to 475°F (245°C) for at least 45 minutes prior to baking.
- Slide your transfer peel under the parchment paper to move the delicate loaves; for ciabatta, you deliberately score or leave un-scored—authentic ciabatta is left un-scored so it doesn’t split open.
- Slide the parchment paper with the loaves directly onto the scorching hot baking steel, then immediately and carefully pour the boiling water into the bottom cast iron pan to steam the oven cavity.
- Shut the oven door rapidly to trap the steam and bake for 20-25 minutes until the loaf achieves a golden brown blistered crust and sounds hollow when tapped on the bottom.
Pro-Tip: Do not skip the steam! The burst of moisture delays the crust from setting immediately, allowing maximum oven spring expansion. Once the surface finally dries out in the last 10 minutes of baking, the intense heat drives the maillard reaction crust browning, giving you that authentic, shatteringly crisp crusty rustic exterior.

7. Cool Completely on Wire Rack

Patience is key! Pin this to remind yourself why you must let bread cool before slicing.
The baking process does not stop when you remove the bread from the oven. To secure that perfect chewy interior texture, the starches must settle and cool. Slicing into a piping hot loaf will ruin the beautiful crumb you worked so hard to build.
Ingredients
- The freshly baked ciabatta loaves
- 1 stainless steel wire cooling rack
- 1 sharp serrated bread knife
- Bread dipping oil with herbs or butter (for serving)
Directions
- Using oven mitts and your baker’s peel, remove the hot loaves from the oven and immediately cool completely on wire rack to prevent condensation from turning the bottom crust soggy.
- Resist the urge to slice into the hot bread; allow it to rest for an absolute minimum of 1 hour (preferably 2 hours) to let the custardy crumb interior fully set.
- Once cooled, use a sharp serrated knife to slice the loaf, revealing the incredible alveolar crumb and large air holes you built.
- Serve immediately alongside soup, use it as a base for panini sandwich ideas and fillings, or store in a paper bag at room temperature for up to 2 days.
Pro-Tip: Cutting into a hot loaf causes the steam trapped inside to condense into water, resulting in a solve dense gummy crumb issues failure right at the finish line. The bread is still technically baking as it rests; this retrogradation of wheat starch is required to firm up that perfect, chewy interior texture.

Key Takeaways: Your Quick Guide to Ciabatta Bread Recipe
Reviewing the most critical panification principles ensures your homemade ciabatta bread turns out perfectly every single time. Here is a quick diagnostic summary of the non-negotiables for an exceptional ciabatta bread recipe summary:
- Hydration is Everything for authentic ciabatta bread recipes – Ciabatta requires an exceptionally wet dough (typically 80% water to flour ratio) to create the steam necessary for its signature open crumb texture.
-
Ditch the Measuring Cups for a digital scale – A supple wet dough relies on extreme precision; your ingredients must be measured accurately in grams because slight flour compaction in a measuring cup will ruin the hydration ratio.
-
Fold, Don’t Knead, to prevent ciabatta spreading too flat – Traditional mechanical kneading destroys the delicate air pockets; you must develop gluten structure gently over time using the wet-hand stretch and fold technique.
-
Preserve the Gas during the dividing phase – When turning the fermented dough out onto a floured surface, you must demand gentle handling to preserve aeration to ensure a light and airy ciabatta crumb.
-
Steam is the Secret to a golden brown blistered crust – Introducing boiling water to a hot cast-iron pan during the first 10 minutes of baking keeps the crust soft long enough to achieve massive oven spring expansion.
-
Respect the Cooling Phase for optimal texture – Slicing hot bread interrupts the retrogradation of wheat starch, turning a potentially perfect, airy crumb into a gummy, dense disappointment.
-
Baking Steels Outperform Stones for this authentic italian panification standard – A heavy baking steel transfers heat to the wet dough far more rapidly than ceramic, providing the explosive initial heat needed for maximum loaf volume.
FAQs About Ciabatta Bread Recipe
what makes ciabatta bread different from regular bread
Ciabatta bread is defined by its exceptionally high water content (80%+ hydration) and its unique “slipper” shape, differentiating it from standard sandwich loaves.
While standard white bread utilizes a stiff dough that is heavily kneaded for a tight, uniform crumb, traditional Italian ciabatta uses a very wet, un-kneaded dough. This specific panification technique creates large, irregular air pockets (alveolar crumb) inside the loaf and a distinctly rustic, flour-dusted chewy crust that regular bread lacks.
why is ciabatta dough so wet and sticky
The extreme wetness of ciabatta dough is completely intentional, as high hydration is the exact mechanism required to generate massive air pockets during baking.
When a dough contains 80% water relative to flour, that moisture flashes into steam in the hot oven. This steam pushes the gluten network outward before the crust sets, creating the characteristic open crumb texture. If you add extra flour to fix the stickiness, you will unfortunately solve dense gummy crumb issues by accidentally creating a heavy, solid loaf instead.
can you make ciabatta bread with all purpose flour
Yes, you can use unbleached all-purpose flour for ciabatta, but you will achieve a much taller, chewier loaf by using high-protein bread flour.
Bread flour contains 12-14% protein, which develops a much stronger gluten network capable of trapping the fermentation gases in an 80% hydration dough. If you must use a standard bread flour vs all purpose flour for ciabatta substitution, slightly reduce your water content to 75% to prevent the weaker dough from spreading out into a flat pancake during the final proof.
how do you get big holes in ciabatta bread
To achieve big holes in ciabatta, you must combine high hydration (80%), gentle stretch-and-fold gluten development, and extreme care not to deflate the dough during shaping.
The large bubbles are carbon dioxide gases produced during the bulk ferment at room temperature. If you aggressively punch down or knead the dough like traditional bread, you destroy these bubbles. Using a proven high hydration method and handling the dough delicately with a bench scraper ensures those trapped gases survive all the way into the oven.
what is the difference between ciabatta and focaccia
The primary difference in the ciabatta vs focaccia comparison is the fat content and the baking method, despite both sharing similar high-hydration doughs.
Focaccia is heavily enriched with olive oil both in the dough and in the baking pan, resulting in a fried, flat bottom and a softer crust. It is baked inside a rimmed pan. Ciabatta is a lean dough (mostly just flour, water, yeast, salt) baked free-form directly on a blazing hot baking stone, producing a much crispier, rustic crust.
why did my ciabatta turn out dense and flat
A dense and flat ciabatta is almost always the result of under-developed gluten, overproofing, or degassing the dough during the transfer to the oven.
If you didn’t perform enough stretch-and-fold intervals, the dough lacks the structural integrity to rise upward. Alternatively, if you let it proof on floured couche for too long, the yeast exhausts its food supply and the dough collapses. Finally, failing to steam the oven cavity can cause the top crust to harden instantly, physically preventing the dough from springing upward.
do you have to knead ciabatta dough
No, you should never traditionally knead ciabatta dough; instead, you build gluten structure entirely through a series of gentle stretches and folds.
Because the dough is so wet, mechanical kneading in a mixer or by hand is frustrating and often tears the delicate protein strands. The stretch and fold technique, performed every 30 minutes, aligns the gluten strands perfectly while simultaneously incorporating air. This no knead ciabatta method is actually superior for developing the signature rustic, airy interior.
what is a biga in ciabatta baking
A biga is a stiff, pre-fermented mixture of flour, water, and a tiny amount of yeast made the day before baking to drastically improve the bread’s flavor and texture.
While this recipe utilizes a same-day method for convenience, traditional artisan bakers use a biga preferment recipe (fermented for 12-18 hours) to introduce complex organic acids to the dough. This extra fermentation time improves the crust’s caramelization, enhances the chewy interior texture, and significantly extends the fresh shelf life of the baked loaf.
how to create steam in a home oven for bread
The safest and most effective way to create steam in a home oven is to place a heavy cast-iron skillet on the bottom rack during preheating and pour boiling water into it when loading the bread.
As soon as your ciabatta hits the baking steel, carefully pour one cup of boiling water into the scorching hot skillet and immediately shut the door. This replicates a commercial bread deck oven steam injection system, keeping the dough surface pliable so it can expand fully before forming a crisp golden crust.
how long does homemade ciabatta bread stay fresh
Because it is a lean dough with no preservatives, homemade ciabatta is best eaten within 24 to 36 hours of baking, after which it rapidly begins to stale.
To maximize freshness, store the completely cooled loaf in a paper bag at room temperature (never in the refrigerator, which accelerates staling). Once it begins to harden, you can revive stale hardened ciabatta bread by running it quickly under the kitchen faucet and popping it into a 350°F oven for 5-8 minutes to perfectly restore its crusty exterior.
Final Thoughts on Ciabatta Bread Recipe
Mastering an authentic ciabatta bread recipe at home is one of the most rewarding culinary milestones a home baker can achieve. While the thought of handling an 80% high-hydration dough can seem intimidating at first glance, the reality is that the water is doing the hardest work for you. By trusting the autolyse process, leaning into the gentle stretch and fold the dough technique, and respecting the ambient temperatures of your kitchen, you are stepping away from rigid commercial baking and embracing the true intuition of artisan panification. As of September 2026, the first hand recipe development outlined in these 7 steps remains the most reliable blueprint to bridge the gap between professional bakery results and your home kitchen oven.
Remember that every loaf of pane ciabatta you bake is a learning experience. Your first attempt might be slightly flatter than you’d like, or your flour dusted crust might not blister perfectly—and that is completely normal. The beauty of this four ingredient bread lies in its rustic, imperfect nature. As long as you weigh your ingredients accurately in grams and ensure your baking on steel setup is preheated adequately, you will pull a beautifully aromatic, crackling loaf from your oven that completely outshines anything found in a supermarket aisle. This step by step photo tutorial guarantees your success if you simply trust the process.
Now that you have the exact roadmap to achieve that elusive, airy alveolar crumb, the only thing left to do is activate your yeast. Whether you plan to slice it thick for a panzanella tuscan bread salad or use it as the ultimate foundation for toasted panini sandwich ideas and fillings, your homemade ciabatta will instantly elevate your weekend meals.
Are you planning to bake your first traditional ciabatta bread recipe this weekend, or are you going to experiment with adding a biga preferment recipe to deepen the flavor profile? Let me know how your dough handles in the comments below!
Last update on 2026-09-08 at 21:30 / Affiliate links / Images from Amazon Product Advertising API
