
As an Amazon Associate BakingBakewareSets.com earns from qualifying purchases.
Best Sourdough Ciabatta Recipe: 7 Tips For Honeycomb Crumb
Have you ever struggled with wet, sticky bread dough? Handling an authentic sourdough ciabatta recipe can definitely feel intimidating. Most home bakers end up with flat, dense loaves instead of beautifully aerated artisan bread.
The best sourdough ciabatta recipe utilizes an 80 percent hydration dough and an active sourdough starter to achieve a crisp golden crust and an open honeycomb crumb. By executing coil folds and fermenting at room temperature, bakers develop strong gluten to support large, airy alveoli air pockets.
Drawing from extensive testing and precise baker’s percentages, we can simplify this complex process. Ciabatta is a traditional rustic Italian slipper bread requiring high hydration. Updated for 2026, you will discover exactly how to master the technique and bake perfect artisan loaves.
☰ Table of Contents ▼
show
Master the Best Sourdough Ciabatta Recipe for a Perfect Open Honeycomb Crumb
Mastering high hydration dough handling starts with understanding the delicate balance between wild yeast and water. Creating a true artisan ciabatta—characterized by its signature rustic slipper shape and wet sticky dough—demands a significant shift in how you approach bread baking. Unlike traditional firm boules that rely on intense mechanical kneading, this highly hydrated dough requires extreme gentleness to build a strong gluten network. We are aiming for a light aerated crumb filled with massive alveoli air pockets that make the bread so iconic.
To achieve this texture, you must rely on a vibrant, wild yeast culture that produces a mild lactic acidity during the bulk fermentation phase. Baking this style of bread is the ultimate weekend culinary project, offering incredible textural rewards when you finally slice into that stunning interior. By utilizing precise metric measurements, monitoring the fermentation bubbles closely, and understanding ambient dough temperature guides, you can consistently replicate professional bakery-quality results right in your home kitchen.
7 Tips For Honeycomb Crumb: Your Sourdough Ciabatta Recipe Step-by-Step
Performing stretch and folds and executing a flawless same day sourdough ciabatta bread recipe requires following a strict, temperature-dependent chronological timeline. From the initial autolyse phase to handling high hydration dough easily during the final shaping, every single step matters immensely. We will break down exactly how to develop dough strength without destroying the delicate fermentation bubbles that create the crumb.
You will learn the absolute importance of monitoring your bulk fermentation time and why baking with steam is completely non-negotiable for achieving that classic blistered exterior. This guide highlights the critical milestones of balancing dough extensibility versus elasticity, ensuring your ciabatta does not end up resembling a dense, flat focaccia. Gather your digital kitchen scale, prepare your active sourdough starter, and let us walk through the exact professional timeline required to create the perfect artisan loaf.
1. Mixing the Levain and Autolysing Flour and Water

Pin this essential autolyse step to your ‘Artisan Bread Baking’ board!
Mixing the levain and autolysing flour and water kickstarts gluten development gently by fully hydrating the starches before introducing the yeast. This process is absolutely essential for a high hydration sourdough ciabatta recipe with bread flour. A true autolyse (mixing only flour and water without the starter) allows the flour to absorb water efficiently, dramatically improving extensibility.
When you combine your sourdough starter + bread flour after this resting period, the dough is already primed to build a strong autolyse + gluten structure.
Ingredients
- 400g bread flour (look for 12.5% to 14% protein content for optimal structure)
- 320g lukewarm water (for exactly 80 percent hydration)
- 80g active sourdough starter (fed 4-6 hours prior and peaking)
- 10g fine sea salt
- 15g extra virgin olive oil (enhances extensibility)
- High-precision digital kitchen scale measuring in single grams
Instructions
- Combine only the bread flour and water in a large mixing bowl until a rough, shaggy dough forms with no dry spots remaining.
- Rest the dough uncovered for 45 minutes to execute the autolyse, allowing the flour to fully hydrate and naturally begin gluten matrix development.
- Add the peaking active starter, salt, and olive oil after the autolyse phase is complete.
- Pinch and squeeze the levain and salt into the dough until fully integrated and the mixture feels cohesive but very wet.
Pro-Tip: Proper water absorption coefficient varies by flour brand. If your dough feels excessively soupy rather than just sticky, hold back 20g of water next time. Mastering the dough extensibility vs elasticity balance starts right here in the mixing bowl.

2. Executing Coil Folds for High Hydration Dough

Save this coil fold technique to master wet dough handling!
Executing coil folds builds necessary tension and strength in soupy, wet dough without adding excess flour that would ruin the open crumb. This coil fold technique is the premier method for fixing sticky dough handling issues because it utilizes gravity rather than friction.
When comparing the stretch and fold vs coil fold method, coil folds are far superior for high hydration + coil folds applications because they keep the dough uniformly tensioned while trapping air efficiently.
Ingredients
- The mixed high hydration dough
- A bowl of cool water (for wetting hands to prevent sticking)
- Clear, straight-sided glass or plastic fermentation tub (allows you to monitor bubbles)
- A timer to track fold intervals
Instructions
- Transfer the mixed dough into your lightly oiled, straight-sided fermentation tub.
- Wait 30 minutes for the gluten to relax.
- Wet your hands completely in the bowl of water to prevent the wet sticky dough from adhering to your skin.
- Slide both hands under the middle of the dough, lift it straight up until the ends release from the tub, and fold the dough back down so the ends tuck underneath the center.
- Rotate the container 90 degrees and repeat the lift-and-tuck motion.
- Execute 3 to 4 total sets of these coil folds spaced exactly 30 minutes apart.
Pro-Tip: You are building the gluten network matrix development here. By the final set of folds, the dough should resist lifting and hold its shape noticeably better. If the dough still tears easily, it requires more strength—do not skip these folds!

3. Fermenting at Room Temperature and Monitoring Dough Rise

Pin this to know exactly when your dough is perfectly proofed!
Fermenting at room temperature relies on reading visual dough cues like volume expansion and surface bubbles rather than merely watching the clock. Your bulk fermentation time dictates the ultimate success of the crumb structure.
Monitoring the relationship between bulk fermentation + dough volume ensures you avoid the pitfalls of a dense, gummy interior. By watching the fermentation bubbles + dough surface, you can accurately determine when to stop the proof, perfectly managing overfermented dough risks before they happen.
Ingredients
- The resting folded dough
- Clear plastic shower cap or tight-fitting lid
- Digital ambient room thermometer (crucial for timing)
- A warm, draft-free spot in the kitchen
Instructions
- Cover your fermentation tub tightly with a lid or shower cap immediately after completing the final set of coil folds.
- Leave the dough completely undisturbed to continue fermenting.
- Monitor the ambient temperature of your kitchen; at 72°F (22°C), bulk fermentation typically takes 4 to 6 hours from the time the starter was added.
- Check for the three critical visual milestones: a 50-60% increase in total volume, a jiggling domed surface, and large visible fermentation bubbles on the top and sides of the glass tub.
Pro-Tip: The key to avoiding a dense gummy crumb is understanding fermentation kinetics and ph. Warmer temperatures exponentially accelerate fermentation. If your kitchen is 80°F, your bulk proof could be done in 3.5 hours; do not blindly follow the clock.

4. Dumping Dough and Portioning with Bench Knife

Save these essential dough dividing tips to keep your air bubbles intact!
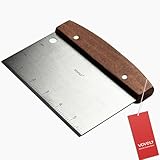
Dumping dough and portioning with bench knife allow you to divide highly aerated dough without degassing the delicate interior structure. Using a sharp bench scraper + wet dough prevents sticking and preserves the trapped carbon dioxide gases.
This extreme gentleness is the secret to preventing ciabatta from deflating when you are cutting the mass into smaller sourdough ciabatta sandwich rolls. Unlike traditional sandwich bread, ciabatta requires absolutely zero punching down.
Ingredients
- Fully bulk-fermented ciabatta dough
- Generous amount of bread flour or all-purpose flour for dusting
- Professional stainless steel bench scraper
- Flour dusting wand or small fine-mesh sieve
Instructions
- Dust your clean countertop very generously with flour using a dusting wand; do not skimp, or the dough will tear.
- Invert the fermentation tub carefully over the floured surface, allowing gravity to slowly pull the dough out in one cohesive block. Do not scrape or pull it.
- Sprinkle the top of the exposed, sticky dough liberally with more flour.
- Press your bench scraper straight down into the dough to divide it in half down the middle, separating the halves gently.
- Portion each half into 3 or 4 smaller rectangles if making sandwich rolls, or leave as two large pieces for traditional slipper loaves.
Pro-Tip: The secret to alveolar cell expansion (those massive holes in the crumb) is preserving the air trapped during bulk fermentation. Treat the dough like a delicate balloon—never roll, knead, or punch it down during the dividing phase.
5. Shaping Slipper Loaves on Floured Parchment Paper

Pin this easy shaping trick for the perfect rustic slipper bread!
Shaping slipper loaves on floured parchment paper requires only gentle stretching to achieve the classic elongated, flat profile. Dusting the paper heavily with semolina flour + dusting board stops the wet dough from adhering during the final proof.
The word ciabatta actually translates to “slipper,” which dictates the final rustic slipper shape we are aiming for. By transferring the dough carefully and utilizing a baker’s couche for support, you maintain that iconic artisan profile.
Ingredients
- Portioned ciabatta dough pieces
- Natural unbleached parchment paper
- Semolina rimacinata (or cornmeal) to prevent sticking
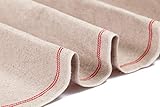
- A heavy linen proofing couche or thick, clean kitchen towels
- Baking peel or flat rimless baking sheet
Instructions
- Prepare a sheet of parchment paper by dusting it heavily with semolina flour.
- Slide your bench scraper under each portion of dough and swiftly transfer it to the prepared parchment paper.
- Stretch the dough pieces very gently from the ends to elongate them into a traditional rustic shape.
- Dimple the surface of the dough incredibly lightly with your fingertips to even out large, uneven bubbles, being careful not to degas the center.
- Support the sides of the parchment by bunching a proofing couche or rolled towels between the loaves, giving them walls to rise against for 30-45 minutes while the oven preheats.
Pro-Tip: Proper proteolysis during bulk retard can be achieved by placing the shaped dough into the fridge for an overnight cold proof. This dramatically deepens the lactic acid flavor profile and makes scoring (if desired, though rarely done for ciabatta) much easier.
6. Steaming the Oven and Baking at High Temperature

Save these oven steaming secrets to get the crispiest bread crust!
Baking with steam at an extremely high temperature delays crust formation, allowing the bread to achieve maximum thermal expansion. This crucial hydrothermal injection creates that coveted crisp golden crust and massive oven spring + high heat.
When considering the baking stone vs dutch oven ciabatta debate, a flat, thick baking steel is vastly superior. It accommodates the elongated shape and transfers heat exponentially faster, ensuring a dramatic rise before the crust finally sets and caramelizes.
Ingredients
- Fully proofed ciabatta loaves on parchment
- Thick baking steel or high-quality baking stone
- Heavy cast iron skillet or roasting pan (for steam generation)
- 1 cup of boiling water
- Heavy-duty oven mitts
Instructions
- Place your baking steel on the middle rack and your cast iron pan on the bottom rack. Preheat the oven to 475°F (245°C) for a full 45 minutes to guarantee the steel is ripping hot.
- Slide the parchment paper carrying the dough directly onto the hot baking steel using a pizza peel or rimless baking sheet.
- Pour the boiling water carefully into the preheated cast iron pan on the bottom rack and immediately shut the oven door to trap the steam.
- Bake with steam for exactly 15 minutes to allow for maximum oven spring thermal expansion.
- Remove the steam pan (venting the oven) and continue to bake for another 15-20 minutes until you achieve a deeply golden crust.
Pro-Tip: Do not rely on a standard dutch oven for ciabatta. The elongated shape requires a flat surface. Using a thick baking steel transfers heat exponentially faster than a ceramic stone, ensuring a dramatic rise before the crust sets.

7. Cooling on Wire Rack and Slicing Across the Crumb

Pin this to show off what a perfect sourdough honeycomb crumb looks like!
Cooling on wire rack allows the internal starches to fully gelatinize and set before you begin slicing across the crumb. Cutting prematurely will instantly destroy your beautiful open honeycomb crumb and leave a gummy, unappetizing texture.
While it is incredibly tempting to slice into hot bread, patience is required to achieve the perfect chewy interior texture. The bread continues to cook internally as it cools down on the rack.
Ingredients
- The freshly baked, hot ciabatta loaves
- Raised metal cooling rack
- Professional offset serrated bread knife
Instructions
- Transfer the finished ciabatta loaves immediately from the oven onto a raised metal wire rack.
- Listen closely for the “bread song”—the subtle crackling sound the crust makes as it contracts in the cooler room air.
- Wait a strict minimum of 2 hours.
- Slice cleanly through the loaf using a sharp offset serrated knife, pressing down gently while using a firm sawing motion to avoid crushing your beautiful airy open structure.
Pro-Tip: Cutting into hot bread guarantees a gummy, irreparably dense crumb. The internal starches must fully set through a process called starch retrogradation rate. Patience here is the final ingredient to achieving that perfect open texture.

Key Takeaways: Your Quick Guide to Sourdough Ciabatta Recipe
Reviewing this sourdough ciabatta recipe summary helps reinforce the core methodologies required for repeatable success. We have covered a vast amount of baking science, from properly managing an 80 percent hydration dough to executing the perfect steam injection. These main takeaways serve as your rapid-reference checklist before you begin mixing your levain. Understanding these principles ensures you avoid common pitfalls, like accidentally degassing your delicately proofed dough or slicing the loaves before starch retrogradation is fully complete. Keep this best sourdough ciabatta recipe overview handy in your kitchen to guarantee a flawless, bakery-quality bake every single time you feed your starter.
- Hydrate dough to 80 percent using a digital kitchen scale
- Build gluten strength using gentle coil folds, not kneading
- Use a straight-sided container to measure a 50% volume rise
- Divide dough gently to preserve delicate alveoli air pockets
- Bake on a preheated baking steel for maximum heat transfer
- Inject heavy steam during the first 15 minutes of baking
- Allow loaves to cool completely to set the crumb structure
People Also Ask About Sourdough Ciabatta Recipe
Navigating questions about sourdough ciabatta is a normal part of mastering high-hydration artisanal baking. Even highly experienced bakers run into unique challenges when handling such a wet, delicate dough structure. In these sourdough ciabatta FAQs, we address the most common points of friction, from optimizing your bulk fermentation timing to understanding exactly why your loaves might have baked up dense or flat. By referencing these industry-standard hydration rates and professional troubleshooting techniques based on extensive baking trials, you can easily correct your course. Whether you are curious about scoring, storing, or substituting ingredients, these direct answers will help refine your technique for your very next bake.
What is sourdough ciabatta?
Sourdough ciabatta is a traditional rustic Italian slipper bread leavened naturally with a wild yeast sourdough starter rather than commercial baker’s yeast.
It is characterized by an extremely high water content (usually 80% hydration or more) that yields a deeply caramelized, thin crisp crust and a highly aerated, open honeycomb crumb. Unlike denser boules, its airy structure makes it the premier choice for artisanal sandwiches and paninis.
How to shape wet sourdough ciabatta dough?
To shape wet sourdough ciabatta dough, avoid rolling or folding; instead, divide the bulk-fermented dough gently and stretch it into simple rectangles.
Because the dough is highly hydrated and sticky, generously dust your work surface and bench scraper with semolina flour. Transfer the portioned blocks directly to parchment paper, using only your fingertips to gently dimple and elongate the dough into a rustic slipper shape, preserving all trapped fermentation gases.
Why is my sourdough ciabatta dense?
Your sourdough ciabatta is likely dense because the dough was either underfermented, degassed during shaping, or sliced while still hot.
Proper alveoli air pockets rely on a robust bulk fermentation phase until the dough increases by 50% in volume. If you punch the dough down—or if you fail to develop sufficient gluten structure through coil folds to trap the escaping gases—the resulting bread will feature a tight, gummy, and dense interior.
How long to bulk ferment sourdough ciabatta?
At an ambient room temperature of 72°F (22°C), sourdough ciabatta typically requires 4 to 6 hours of bulk fermentation to properly aerate.
However, this timeline is highly variable based on your starter’s vitality and the exact temperature of your kitchen. Professional bakers look for visual cues rather than a clock: the dough should look domed, jiggle when shaken, and display prominent fermentation bubbles across the surface.
What hydration is best for sourdough ciabatta?
The best hydration for authentic sourdough ciabatta falls between 80% and 85%, depending on the protein content of your bread flour.
This high liquid ratio is non-negotiable for achieving the signature large air pockets. If you are a beginner struggling with handling wet sticky dough, you can drop the hydration to 78% while you practice your coil folding technique, but dropping it lower will result in a completely different, denser bread style.
How do you get big holes in sourdough ciabatta?
To get big holes in your sourdough ciabatta, you must combine an 80%+ hydration dough with extremely gentle handling during the shaping phase.
Those large holes (alveoli) are created by trapped carbon dioxide generated by the active sourdough starter. Developing strong gluten via stretch and folds traps the gas, and avoiding punching or rolling the dough ensures those delicate air pockets survive the transition into the hot oven.
Is ciabatta bread healthier than regular sourdough?
Nutritionally, sourdough ciabatta and regular sourdough boules are very similar, both offering the digestive benefits of wild lactic acid fermentation.
The primary difference lies in the addition of extra virgin olive oil in ciabatta, which adds heart-healthy fats and softens the crumb. Both utilize wild yeast cultures that break down phytic acid, making the nutrients in the bread flour more bioavailable than in fast-rising commercial yeast breads.
How to bake sourdough ciabatta with steam?
To bake sourdough ciabatta with steam, place a cast-iron skillet on the bottom oven rack during preheating, and pour boiling water into it just as you load the dough.
This intense hydrothermal steam injection delays the crust from setting immediately. By keeping the exterior dough flexible for the first 15 minutes of the bake, the loaf can achieve maximum oven spring and thermal expansion before caramelizing into a blistered crust.
Why add olive oil to sourdough ciabatta dough?
Adding a small amount of extra virgin olive oil to sourdough ciabatta dough enhances the extensibility of the gluten network and creates a softer, more tender crumb.
While traditional lean sourdough only uses flour, water, and salt, the fat in the oil coats the flour proteins. This prevents the crumb from becoming overly chewy or tough, ensuring the bread maintains the perfect texture for a sandwich roll while still achieving a crisp exterior.
How many coil folds does ciabatta dough need?
A standard high-hydration ciabatta dough requires 3 to 4 sets of coil folds, spaced approximately 30 minutes apart during the first half of bulk fermentation.
Because you cannot knead 80% hydration dough on a counter, these folds are the sole method for building the necessary gluten structure. You will know you have completed enough folds when the dough stops sprawling flat in the tub and begins to hold its shape when lifted.
Final Thoughts on Sourdough Ciabatta Recipe
Mastering the best sourdough ciabatta recipe is a rewarding rite of passage for any dedicated home baker. Transforming a soupy, unstructured mass of flour and water into beautifully blistered, airy slipper loaves feels like culinary magic—but it ultimately comes down to reliable, repeatable science. By strictly respecting the bulk fermentation time, maintaining a precise metric hydration ratio, and treating the delicate dough with extreme gentleness, achieving that coveted open honeycomb crumb is entirely within your reach.
Do not feel discouraged if your first attempt yields a slightly flatter loaf than expected; mastering high hydration dough handling is a tactile skill developed over multiple weekend bakes. Keep your active sourdough starter healthy and vigorous, invest in a quality baking steel for that explosive oven spring, and trust the coil fold process to build your gluten network efficiently. Once you pull those golden, crackling loaves from the oven, you will never view store-bought sandwich bread the same way again. Are you planning to bake these as full rustic loaves, or will you be portioning them out into sourdough ciabatta sandwich rolls for the ultimate weekend panini? Let me know how your bake turns out!
Last update on 2026-09-07 at 21:30 / Affiliate links / Images from Amazon Product Advertising API
